How do I deploy the Nanitor Agent across a domain using Active Directory (GPO)?
If you manage a fleet of domain-joined Windows machines, you can deploy the Nanitor Agent to all of them automatically using an Active Directory Group Policy Object (GPO) startup script, rather than installing on each machine by hand.
This article uses the per-tenant PowerShell installer in a GPO startup script as the primary method, with a no-reboot scheduled-task variant and a direct MSI install as alternatives. The install command is generated for you from within your organization in Nanitor.
The Problem
Installing the agent manually on every machine does not scale. For an Active Directory environment, the goal is to:
- Retrieve the install command for your organization (it carries the signup URL that enrolls the agent into the correct Nanitor instance)
- Wrap that command in a startup script
- Push the script to the target machines through a GPO so the agent installs automatically at boot
The GPO mechanics themselves are standard Windows administration. Nanitor provides the install command; you provide the Group Policy that runs it.
Prerequisites
- Domain Administrator rights, or rights to create and link a GPO on the target Organizational Unit (OU)
- The target machines are domain-joined and running a supported version of Windows
- A network share readable by the "Domain Computers" group (if you store the script on a share rather than inline)
- Outbound HTTPS from the target machines to:
nanitor.io(to download the installer script), and- your Nanitor server (to enroll and report in)
- If your network egresses through a proxy, the target machines must be able to reach those endpoints through it. See Configuring Proxy on an Agent; the MSI also accepts a
PROXY_URLproperty (shown later). - Your organization's install command from Nanitor (see the next section)
Retrieving the install command for your organization
The install command is unique to each organization because it contains that organization's signup URL. To find it:
- In Nanitor, open your organization.
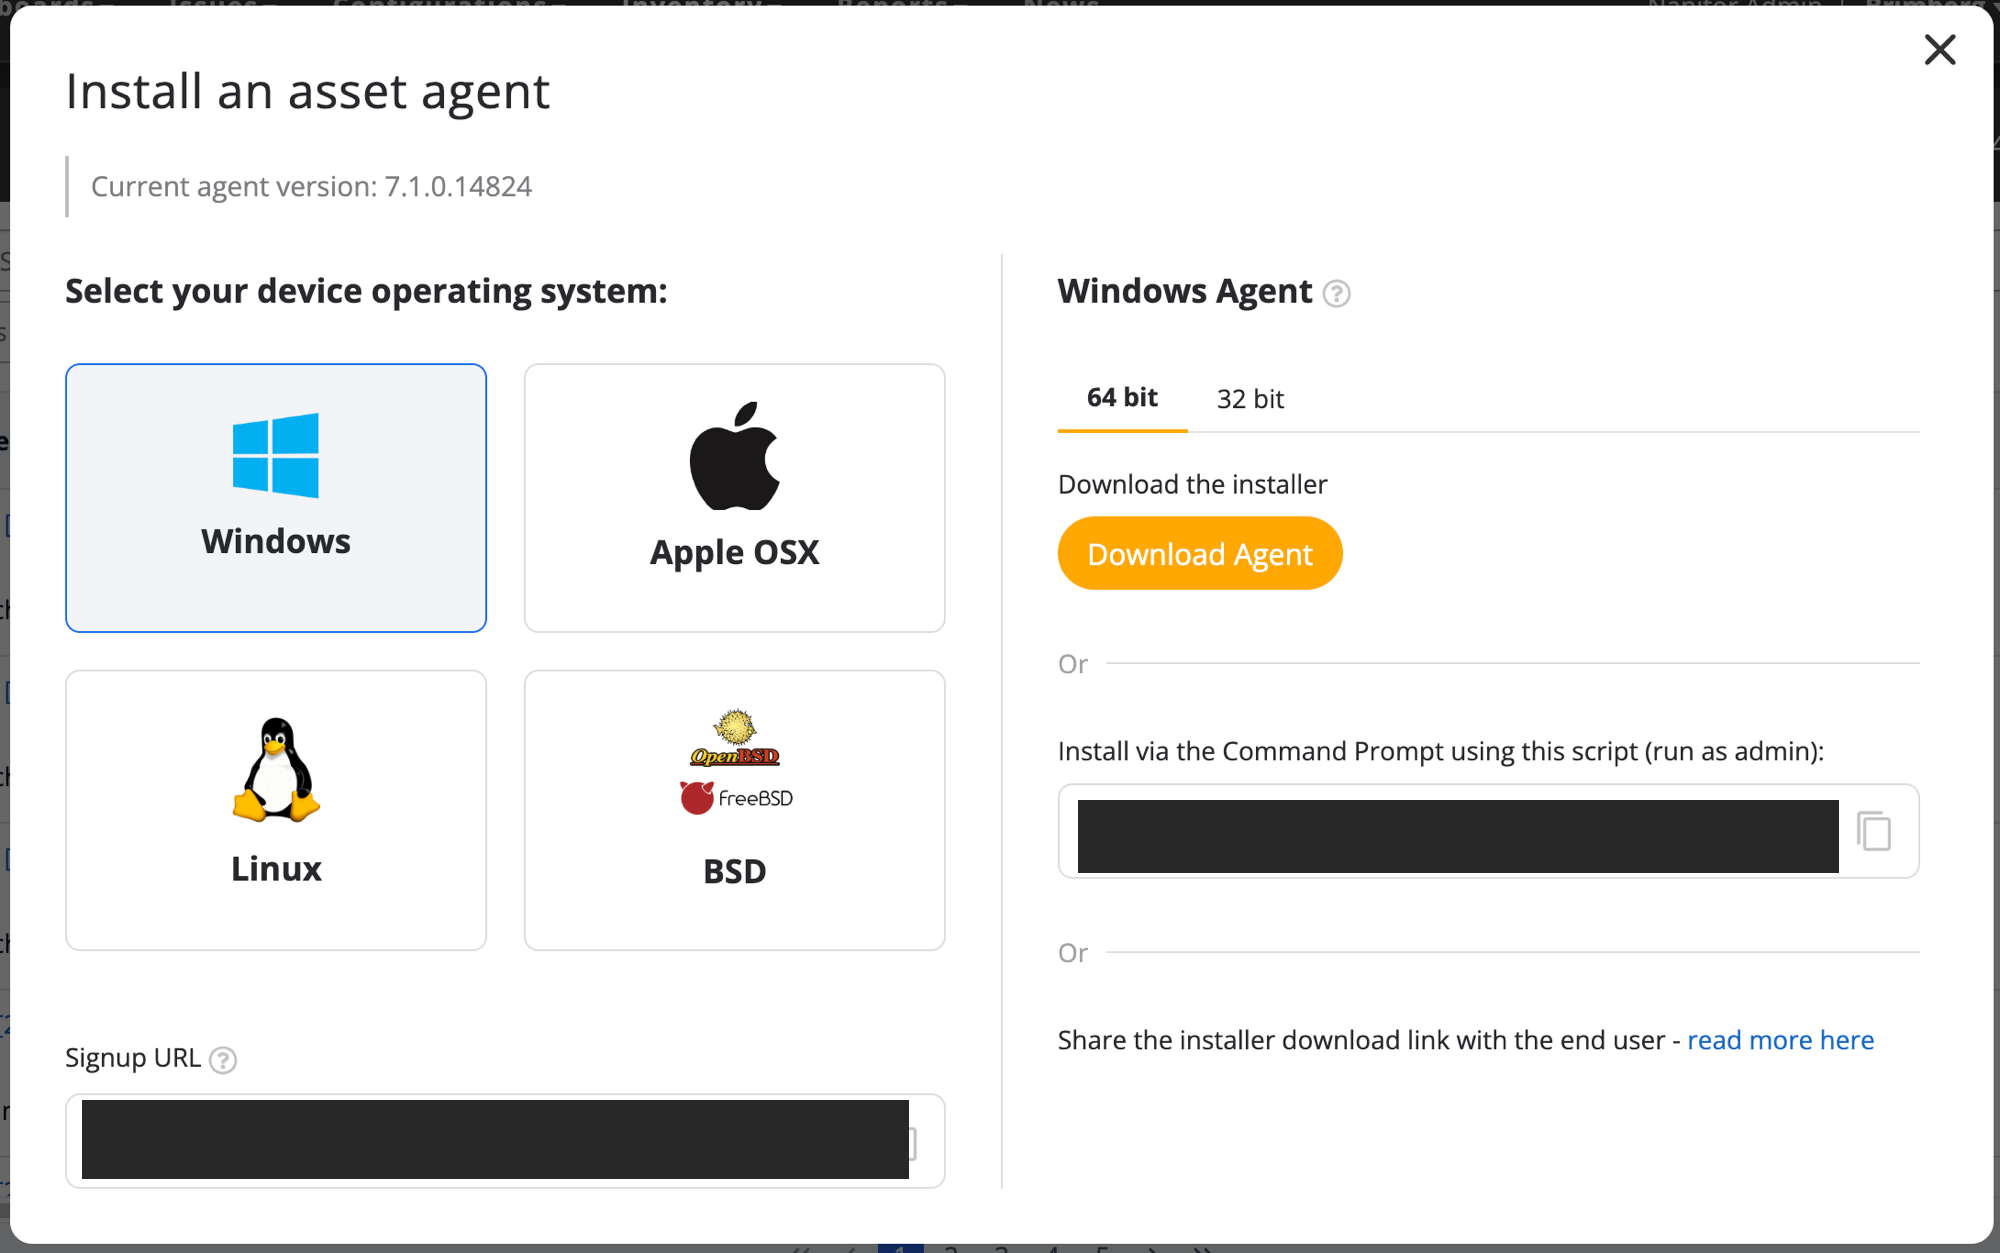
- Go to either Inventory / Assets and click Add new asset, or go to Organization Management → Agent installers. Both open the same screen.
- Select the operating system (Windows).
- Copy the command shown under Install via the Command Prompt using this script (run as admin).
The Windows PowerShell command has this structure:
Set-ExecutionPolicy Bypass -Scope Process -Force; `
[System.Net.ServicePointManager]::SecurityProtocol = [System.Net.ServicePointManager]::SecurityProtocol -bor 3072; `
$signupUrl="https://<your-tenant>.nanitor.net/api/agent_get_signup_key/<org-uuid>/<signup-key>"; `
iex (New-Object System.Net.WebClient).DownloadString('https://nanitor.io/files/installers/install-windows.ps1')
What each part does:
Set-ExecutionPolicy Bypass -Scope Process -Forceallows the script to run for this process only, without changing the machine's execution policy.- The
SecurityProtocol ... -bor 3072line forces TLS 1.2 for the download. $signupUrlis your organization's enrollment URL. This is what binds the agent to the correct tenant and organization.- The final line downloads
install-windows.ps1from Nanitor and runs it.
Note
The signup URL's host is your own Nanitor server's address, not always nanitor.net. For cloud-hosted instances it is your tenant subdomain (for example https://<your-tenant>.nanitor.net/...); for self-hosted instances it is your server's configured address (for example https://nanitor.example.com/...). Always copy the command from your own organization rather than typing the URL by hand — Nanitor fills in the correct host, organization UUID, and key for you.
Warning
The signup URL contains a live enrollment key for your organization. Treat it as a secret. Do not share it outside your organization or commit it to a public repository. Always generate the command from the customer's own tenant; do not reuse a command from a different organization.
Deploying via GPO startup script
Step 1: Save the install command as a script
Create a file named, for example, Install-NanitorAgent.ps1 containing the command from the previous section. Add a guard at the top so the agent is not reinstalled on every boot:
# Log everything to a file so failures can be diagnosed across the fleet
Start-Transcript -Path "C:\Windows\Temp\nanitor-agent-install.log" -Append

# Skip if the Nanitor Agent service is already installed
if (Get-Service -Name "Nanitor Agent" -ErrorAction SilentlyContinue) {
    Stop-Transcript
    exit 0
}

Set-ExecutionPolicy Bypass -Scope Process -Force
[System.Net.ServicePointManager]::SecurityProtocol = [System.Net.ServicePointManager]::SecurityProtocol -bor 3072
$signupUrl="https://<your-tenant>.nanitor.net/api/agent_get_signup_key/<org-uuid>/<signup-key>"
iex (New-Object System.Net.WebClient).DownloadString('https://nanitor.io/files/installers/install-windows.ps1')

Stop-Transcript
Note
The Windows service is registered as Nanitor Agent — note the space in the name. If you prefer a path-based check, you can instead test for the installed binary: if (Test-Path "C:\Program Files\Nanitor\Nanitor Agent\nanitor-agent-bin.exe") { exit 0 }.
Step 2: Stage the script
Place the script on a network share that the "Domain Computers" group can read, for example \\dc01\NanitorDeploy\Install-NanitorAgent.ps1. Grant Read at both the share and NTFS levels. Startup scripts run in the machine (SYSTEM) context, so the computer accounts, not the user accounts, need read access.
Alternatively, you can paste the script directly into the GPO Startup Scripts editor instead of using a share.
Step 3: Create and link the GPO
- On a Domain Controller, open a command prompt and run
gpmc.mscto open the Group Policy Management Console. - Right-click the OU that contains the target computers and select Create a GPO in this domain, and Link it here.
- Name it clearly, for example Nanitor Agent Deployment.
Step 4: Add the startup script
- Right-click the new GPO and select Edit.
- Navigate to Computer Configuration → Policies → Windows Settings → Scripts (Startup/Shutdown).
- Open Startup, then select the PowerShell Scripts tab.
- Click Add and point to the script (use the UNC path, for example
\\dc01\NanitorDeploy\Install-NanitorAgent.ps1, not a local drive letter).
Warning
Startup scripts can run before the network stack is fully ready, and this script needs the network to download the installer and reach the share. If you see machines that never enrol, enable Computer Configuration → Policies → Administrative Templates → System → Logon → Always wait for the network at computer startup and logon in the same (or a higher-priority) GPO. The transcript at C:\Windows\Temp\nanitor-agent-install.log will show download or connectivity errors. If the network not being ready at boot is a recurring problem in your environment, use the scheduled-task method below instead, which runs after the machine is up.
Step 5: Scope and pilot
- Use security filtering or a WMI filter, or link to a small pilot OU first, so the rollout reaches only a test group initially.
- On a pilot machine, run
gpupdate /forceand reboot. Startup scripts run at boot, so a restart is what triggers the install. - Confirm the machine appears in the correct organization in Nanitor.
Step 6: Roll out
Once the pilot machines enroll correctly, widen the GPO scope (link it to the full OU or remove the pilot filter). Machines install the agent on their next reboot.
Alternative: deploy without waiting for a reboot (scheduled task)
A startup script only runs at boot, so machines that rarely restart can be slow to enrol (running gpupdate /force does not trigger startup scripts). If you need the agent to install soon without waiting for a reboot, deploy the same script through a Group Policy Preferences immediate scheduled task, which runs at the next policy refresh (roughly every 90 minutes) while the machine is up and the network is available.
- Stage the
Install-NanitorAgent.ps1script on a share as in Step 2 above. - Edit your GPO and go to Computer Configuration → Preferences → Control Panel Settings → Scheduled Tasks.
- Right-click and choose New → Immediate Task (At least Windows 7).
- On the General tab, set the task to run as
NT AUTHORITY\SYSTEM, and select Run whether user is logged on or not and Run with highest privileges. - On the Actions tab, add a Start a program action:
- Program:
powershell.exe - Arguments:
-ExecutionPolicy Bypass -NoProfile -File "\\dc01\NanitorDeploy\Install-NanitorAgent.ps1"
- Program:
- Optionally, on the Common tab use Item-level targeting to skip machines that already have the agent (the script's own guard also handles this).
Because the script context is SYSTEM and the machine is already running, the network is available and the same install/enrol/log behaviour applies.
Alternative: deploy the MSI directly
You can deploy the MSI instead of the PowerShell installer. How you pass the required properties depends on the tool.
Through a deployment tool (SCCM, Intune, PDQ, scheduled task)
These tools run an arbitrary command line, so use the documented unattended command:
msiexec.exe /i "nanitor-agent.msi" ACCEPTEULA="yes" SIGNUP_URL="<your-signup-url>" /qn
The two parameters that matter are ACCEPTEULA="yes" and SIGNUP_URL (the same per-tenant enrollment URL described above). Add PROXY_URL="proxy.example.com:3128" if the machines reach the internet through a proxy.
Through native GPO Software Installation
Warning
Group Policy Software Installation (Computer Configuration → Policies → Software Settings) deploys a bare MSI and provides no way to type a command line, so it cannot pass SIGNUP_URL or ACCEPTEULA on its own. An agent deployed this way installs but never enrols.
To use GPO Software Installation you must author an MSI transform (.mst) that sets those properties and attach it when you add the package. This adds tooling and still installs only at reboot, so most administrators are better served by the startup-script or scheduled-task methods above. If you do need it, see How do I deploy the Nanitor Agent via GPO Software Installation (MST transform)? for the full recipe.
Verification
To confirm a deployment succeeded:
- On a target machine, check that the Nanitor Agent service is present and running (
Get-Service -Name "Nanitor Agent"). -
Confirm the agent signed up by running, from an administrative prompt:
& "C:\Program Files\Nanitor\Nanitor Agent\nanitor-agent-bin.exe" info -
In Nanitor, confirm the device has checked in under the correct organization.
If a machine does not appear, review the install transcript at C:\Windows\Temp\nanitor-agent-install.log, check outbound HTTPS to nanitor.io and to your Nanitor server (including through any proxy), and see the agent installation troubleshooting articles below.