Using the Nanitor collector
About the Nanitor collector
The Nanitor collector is a process to collect configuration information from network devices, Cloud infrastructure platforms, and databases. The Nanitor collector acts as a pulling service that will gather device hardware and configuration information from devices where a Nanitor agent can't be installed and that are supported by Nanitor (refer to the supported list of devices).
What is needed?
Adding a network device, a database, or a Cloud service into the Nanitor monitor can be done through the web interface from Nanitor. Before you proceed you should have the following information available for each device that you want to connect to Nanitor:
- Ensure the Nanitor collector service is connected properly into Nanitor (connection status is set to true)
- A username and password with administrator privileges to log into the device/connect to the database/Cloud service. It is unnecessary though to create a username/password for every single device. Usually, organizations use the same username/password set (called credentials in Nanitor) for each type of device. To be able to log into a Cloud (Google, AWS, Azure) service you will typically need to set up and configure a service account. Refer to the documentation for each platform (on help.nanitor.com) to gather better information on how to set these up and what other settings might need to be configured.
- The access method of the device. E.g. telnet or ssh for a network device or other like a set of usernames and passwords or possibly other information. The access/connection method is listed in the list of supported devices. Nanitor will populate a different window depending on the access method which makes the setup process easier.
- The IP address where the device/service can be reached. Make sure that the Nanitor server is able to communicate to this IP address.
- The port the device is using to connect. The port is optional and Nanitor will assume the default port used by the device/service if not specified specifically.
The Nanitor collector UI
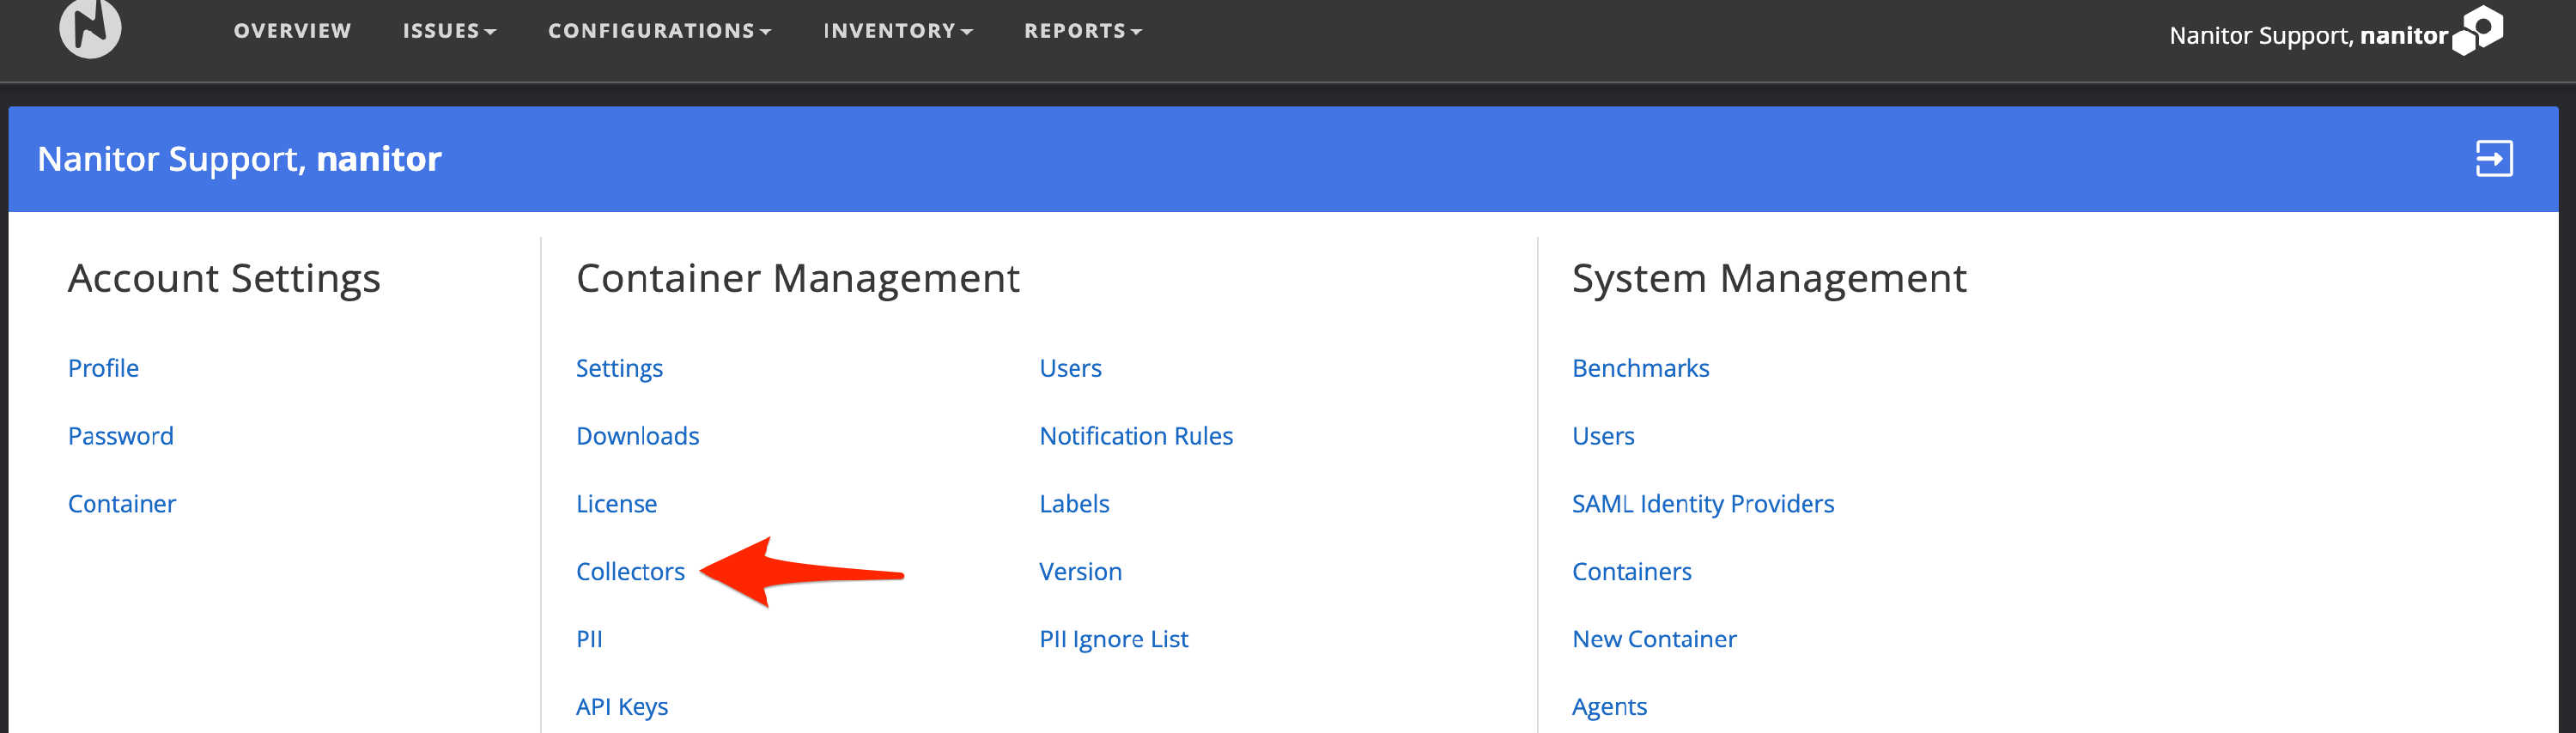
From the Nanitor administration menu under the organization, management selects Collectors to enter the area where you can add devices to your Nanitor instance
 This will get you to the web interface of the Nanitor collector.
 In the list of collectors, you should see at least one instance of a Nanitor collector and make sure the connection status states "true".
You will also notice the two other tabs available:
- Credentials. This is where you add the sets of usernames/passwords (credentials) used to log into the devices to collect information from.
- Assets. This is where you add actual devices to the Nanitor monitoring platform. You will always need a valid credential to be able to add a device.
Credentials
Head to the Credentials tab. This will give you a list of existing credentials.
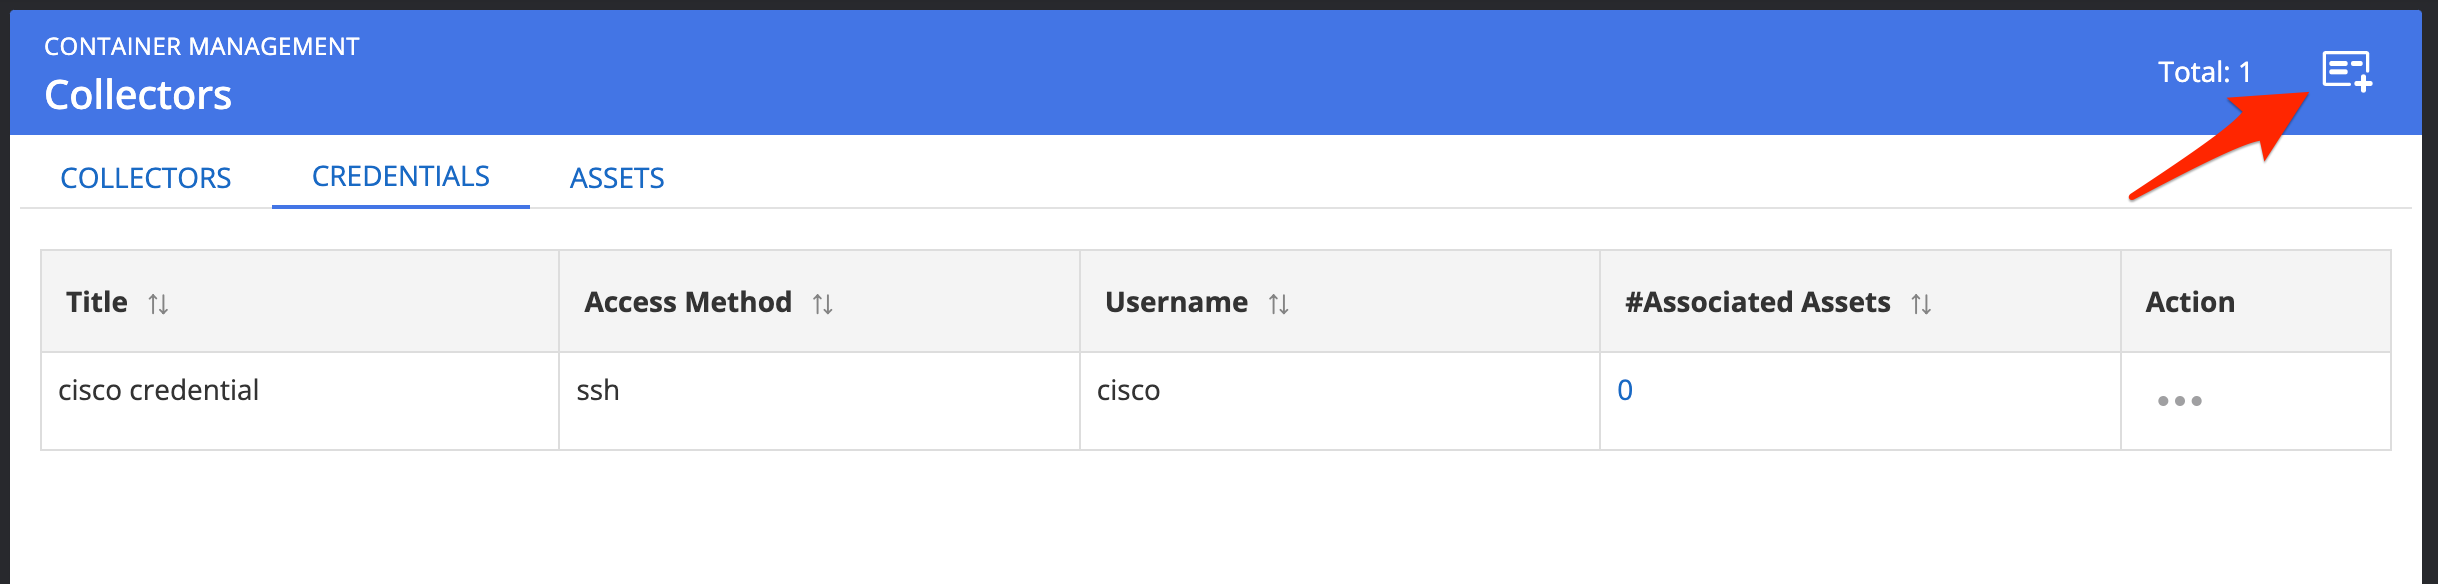
From the button on the top right, you can now create a new credential.
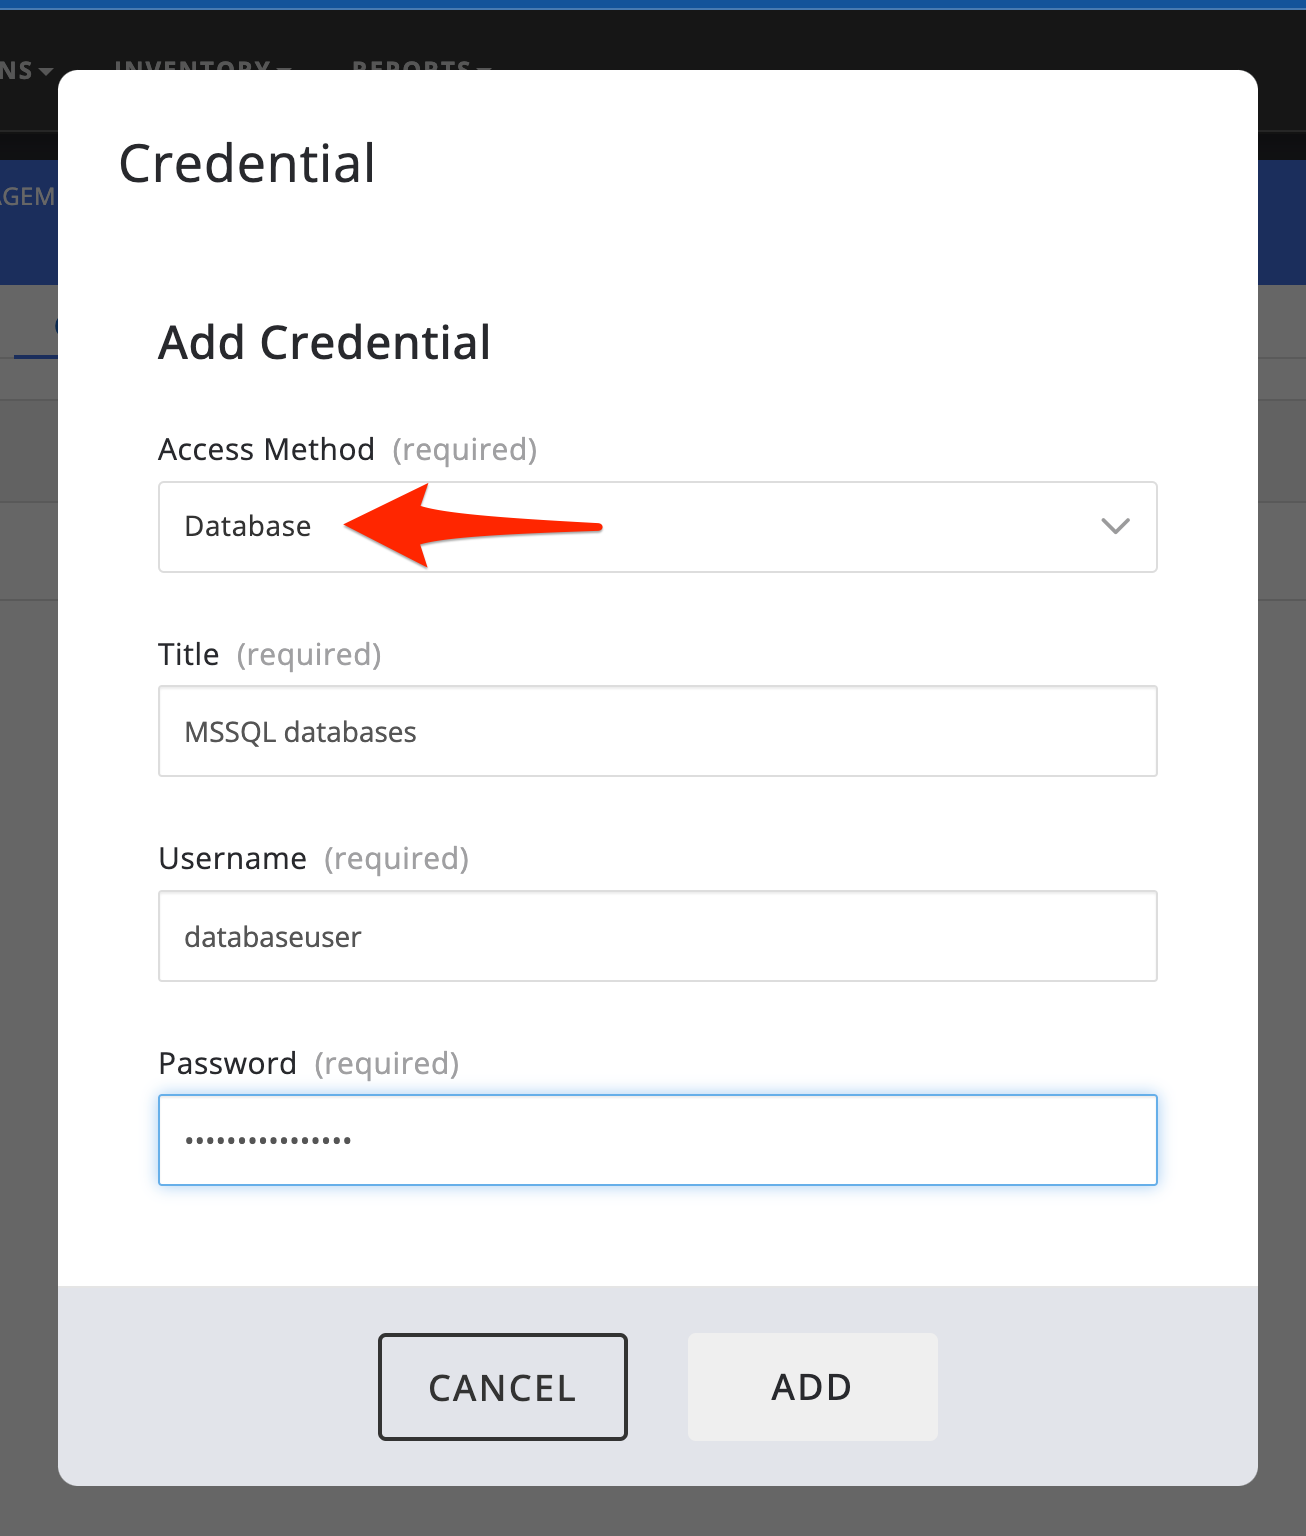
Depending on the selected access method Nanitor will provide a different set of needed input parameters. The selected access method needs to match to the device you want to collect information from when you add the asset/device itself.
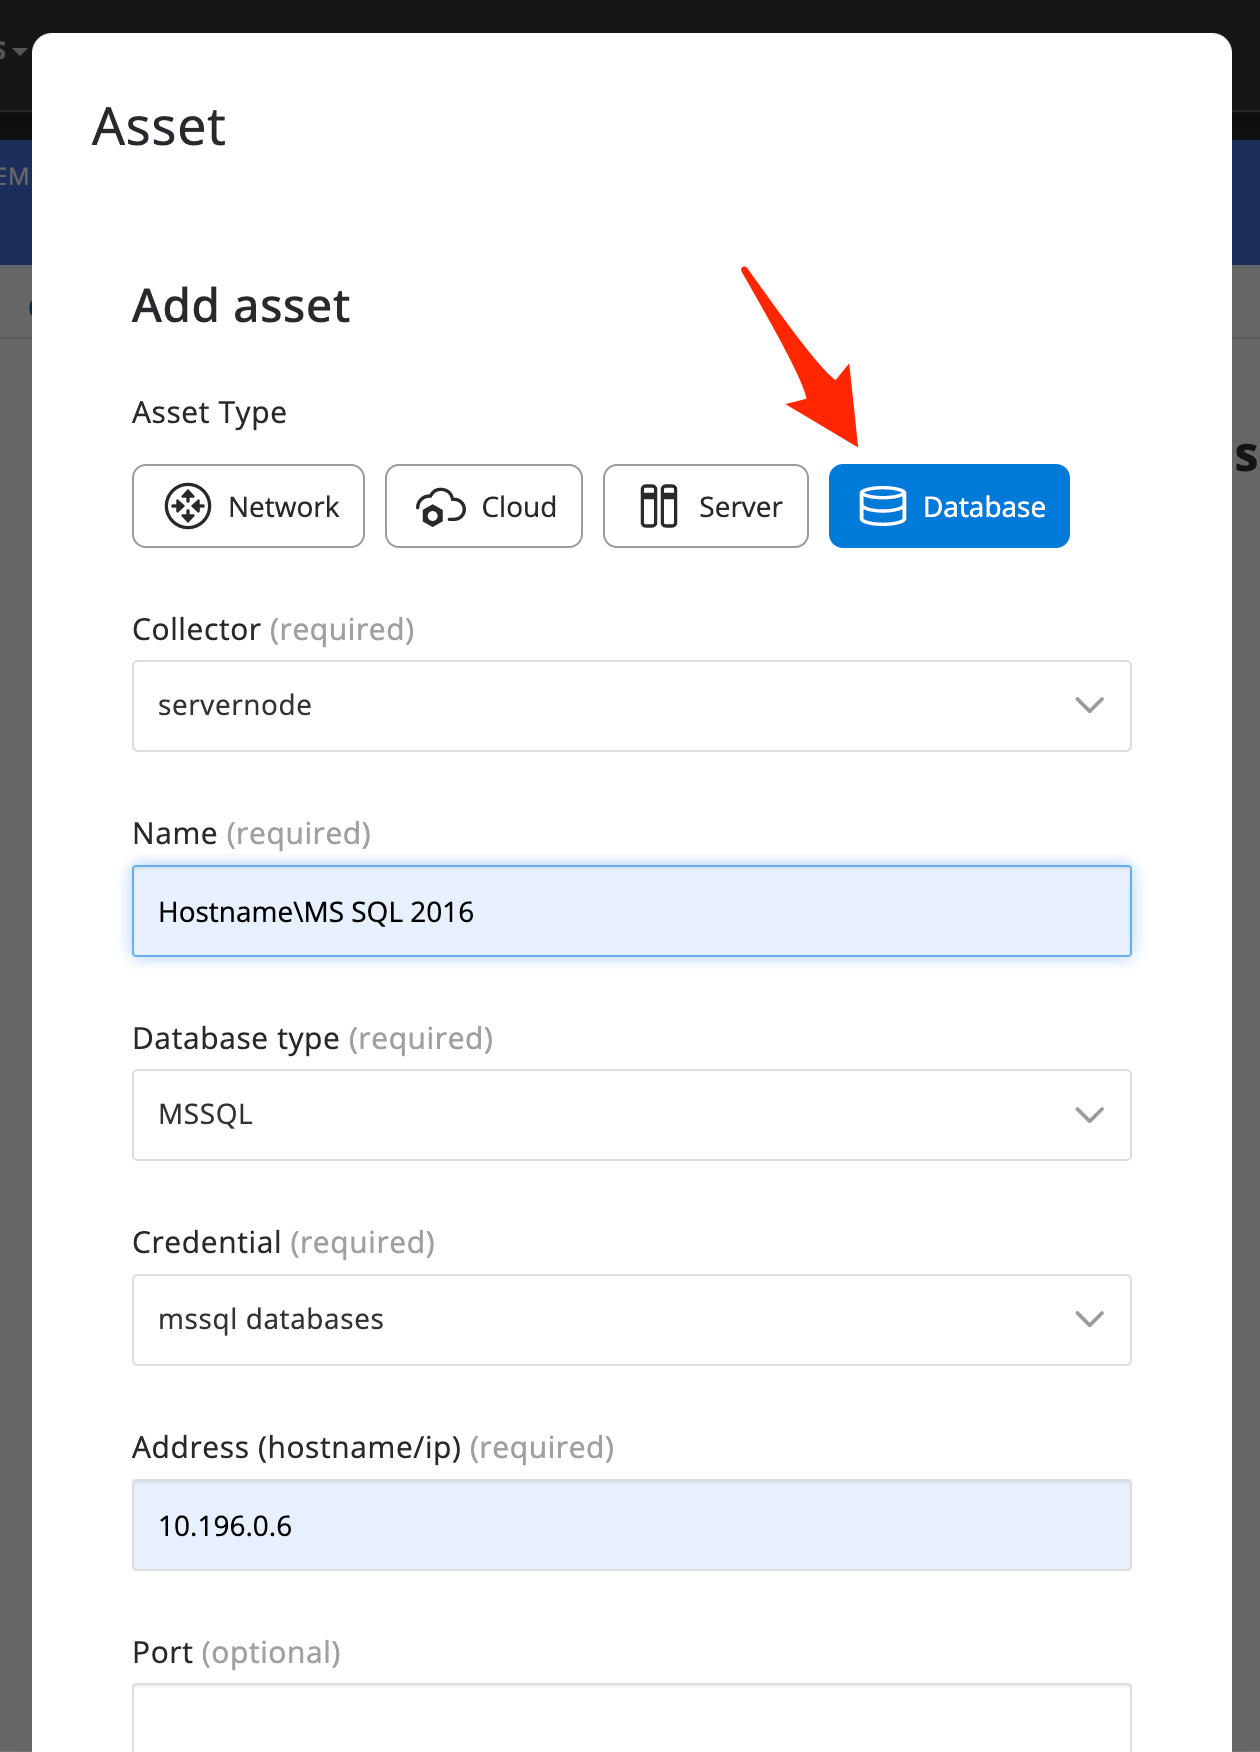
Adding a device
Before you can add a device make sure you have created the username/password set (credential) for the device you want to collect information from inside Nanitor.
Editing a Device
To make changes to a device you added navigate back to the collector screen. Start by clicking on the admin menu

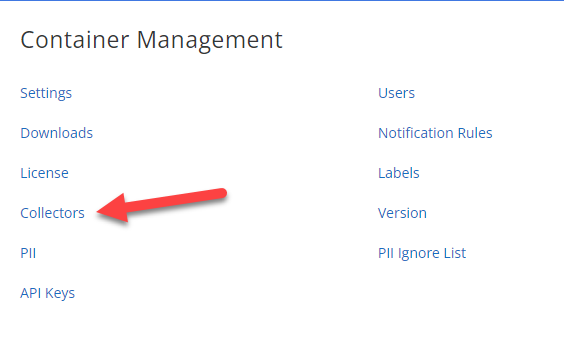
Click on collectors under organization management
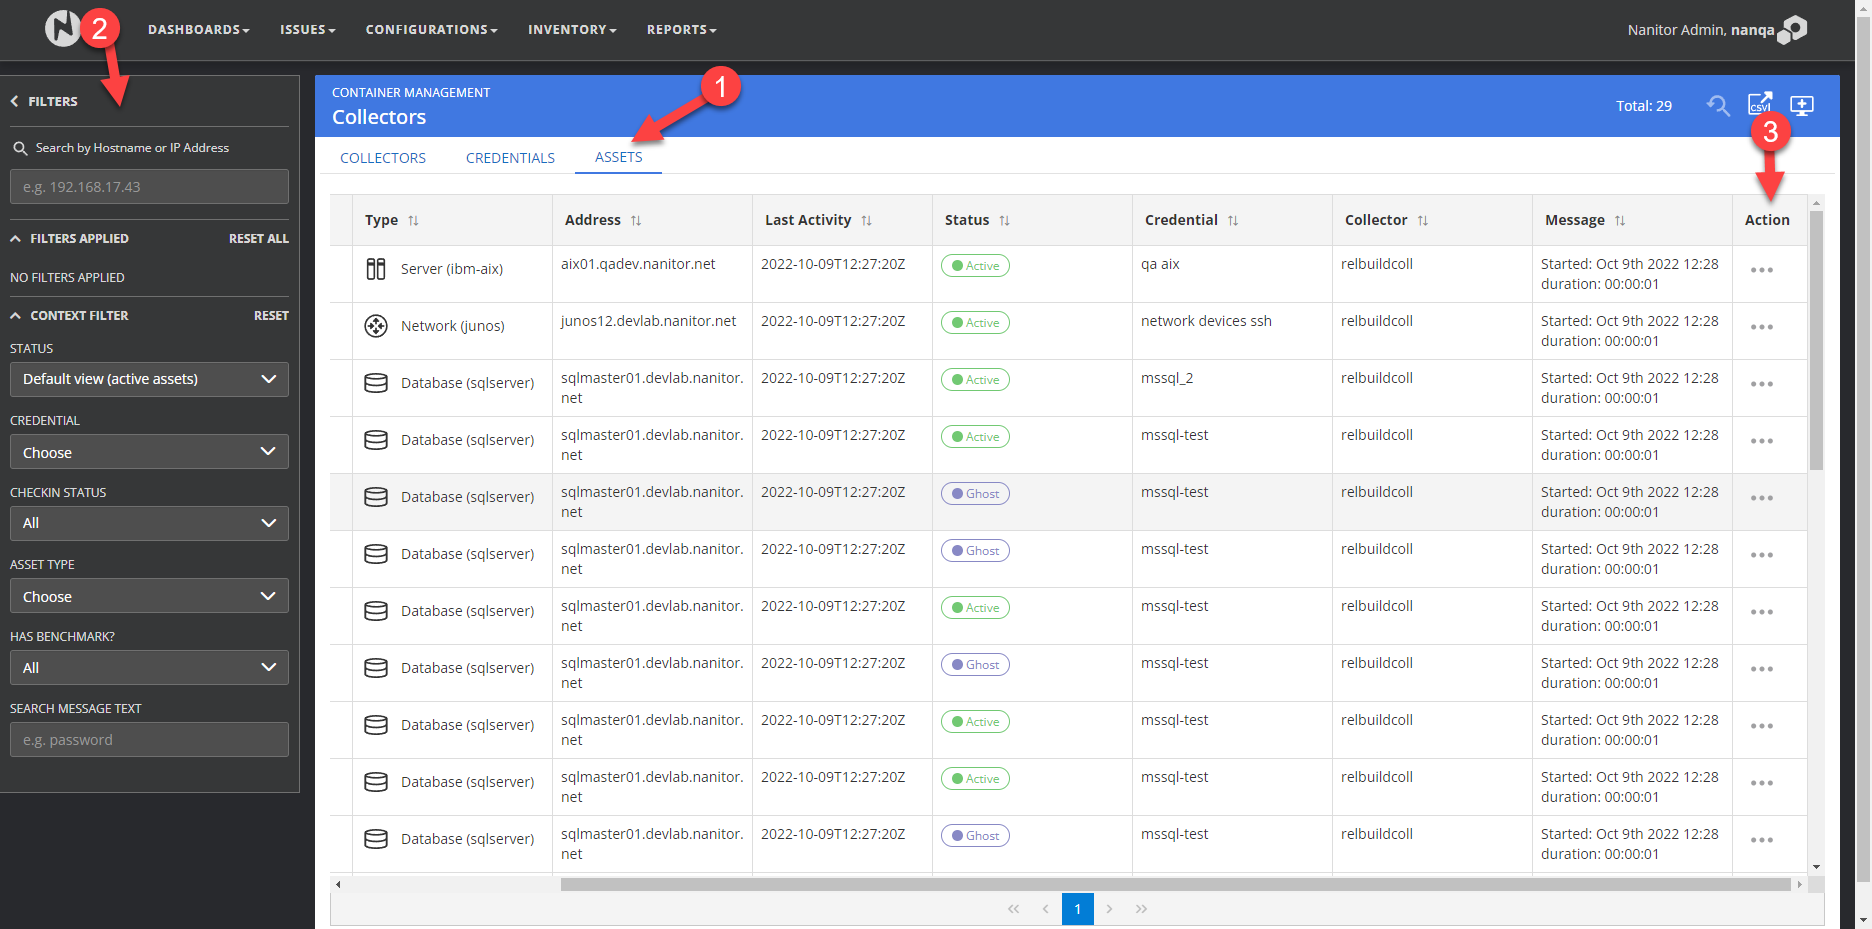
Once on the collector's screen
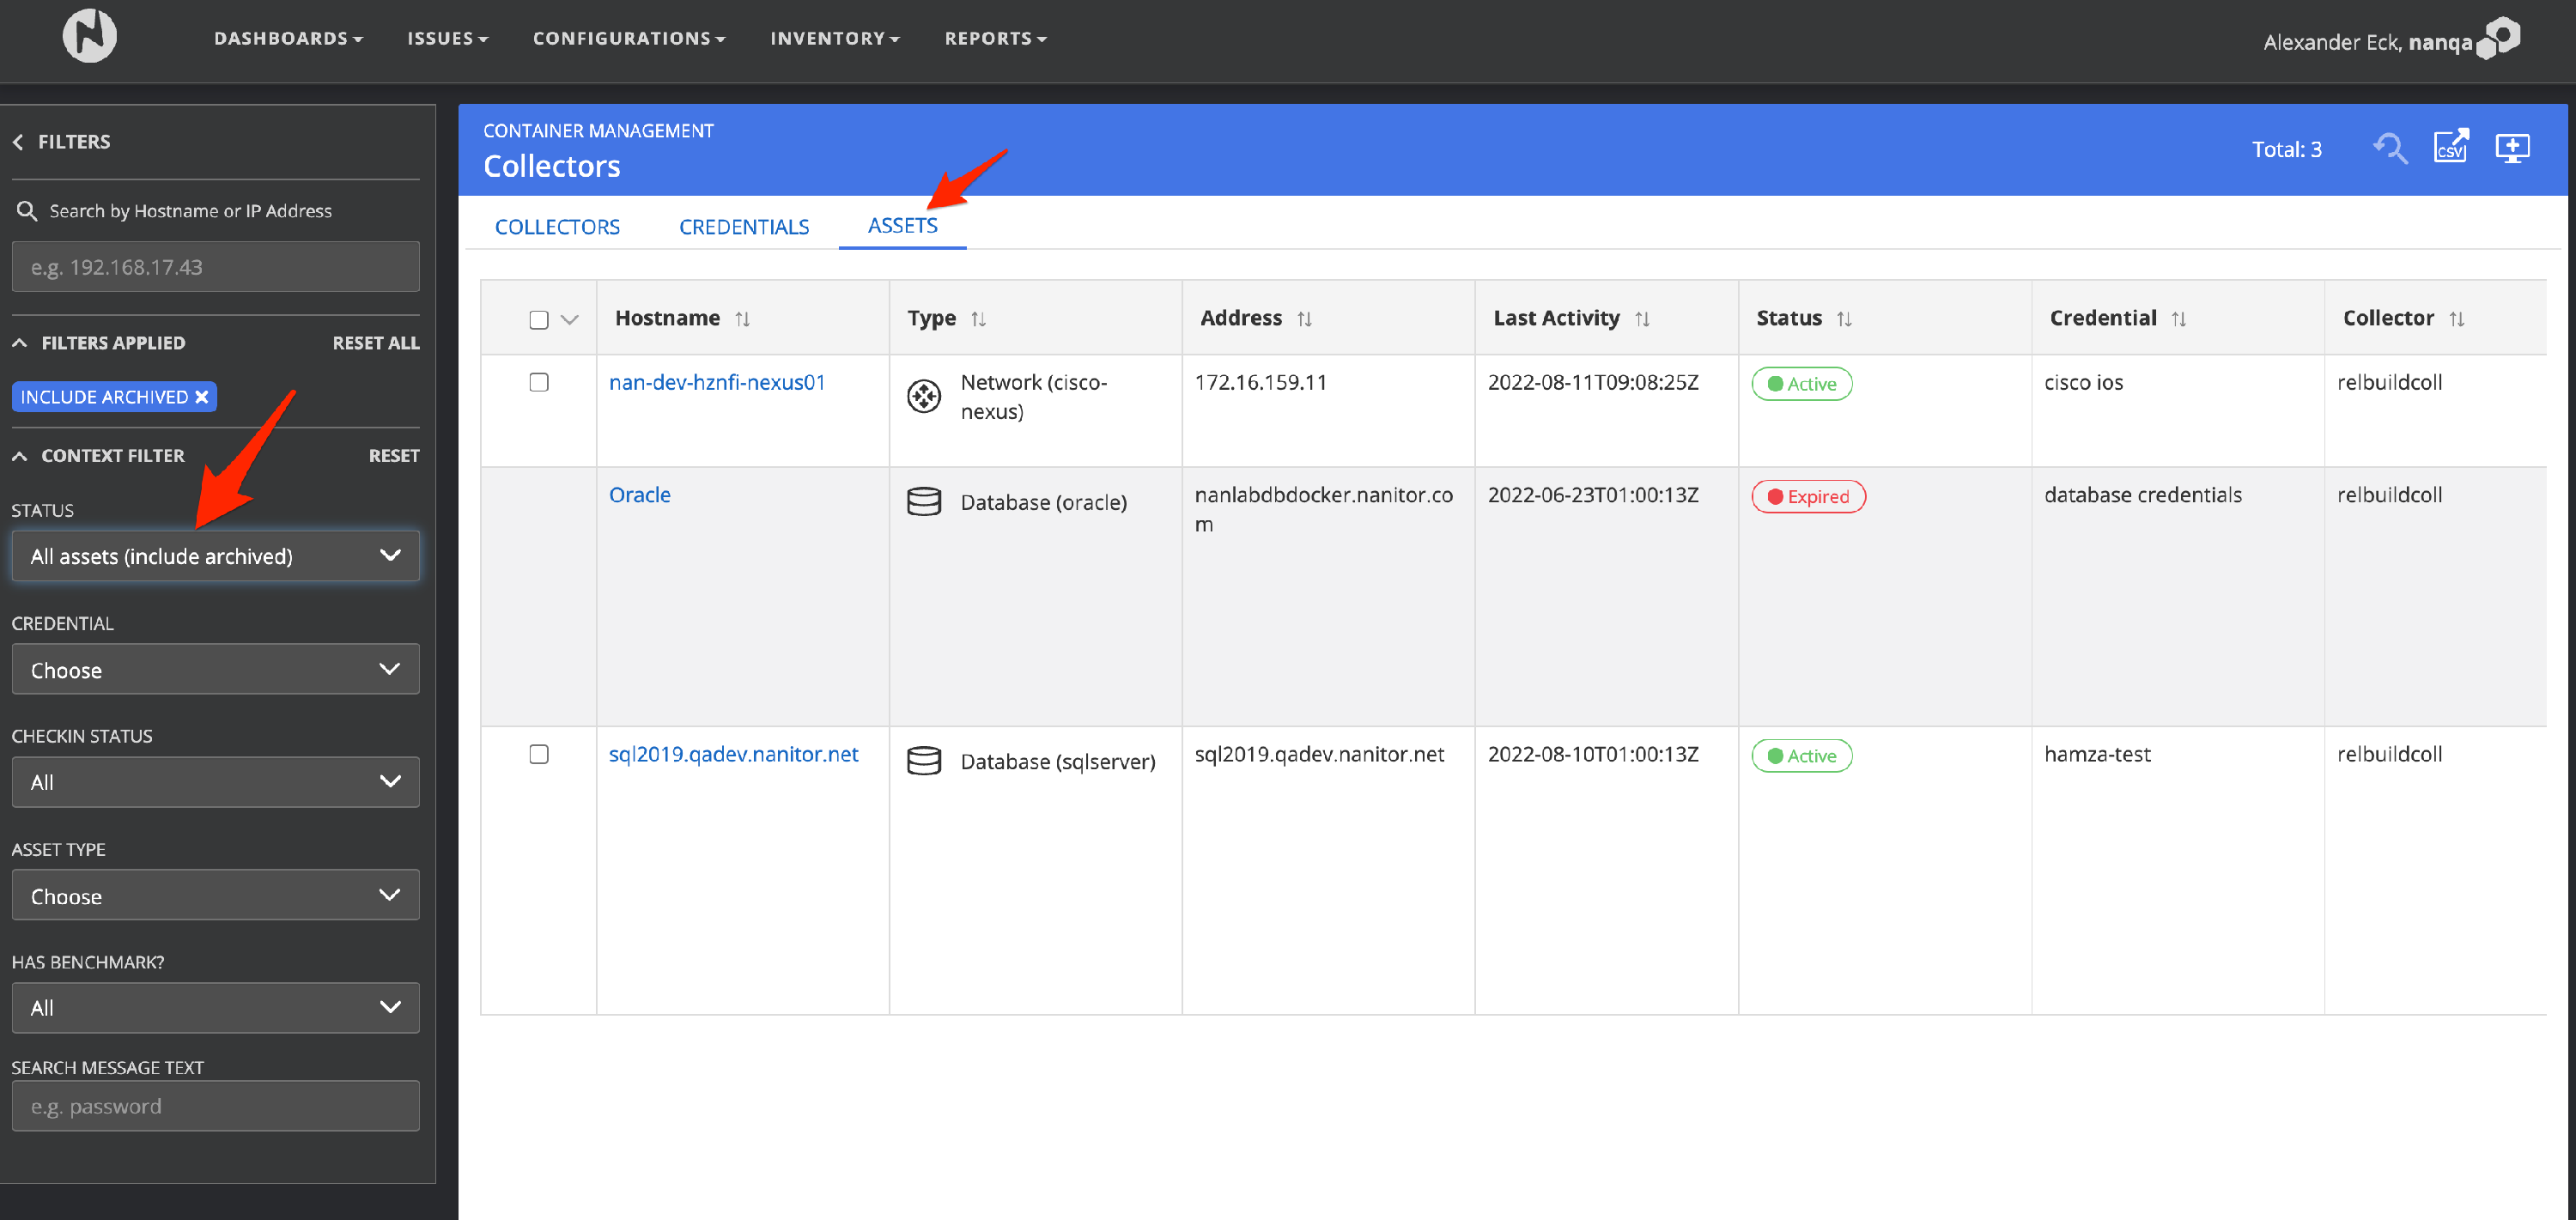
- Click the assets tab
- Filter for the asset in question as necessary, don't forget by default expired assets are filtered out so change that as needed
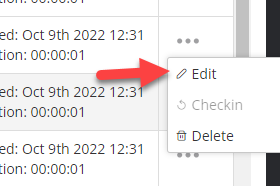
- Go to the Action column on the far right, click on the three dots, and select Edit
Deleting a Device
To make changes to a device you added navigate back to the collector screen. Start by clicking on the admin menu
Click on collectors under organization management
Once on the collector's screen
- Click the assets tab
- Filter for the asset in question as necessary, don't forget by default expired assets are filtered out so change that as needed
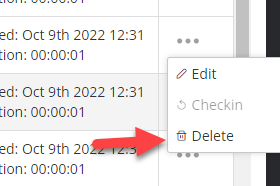
- Go to the Action column on the far right, click on the three dots, and select delete
Troubleshooting
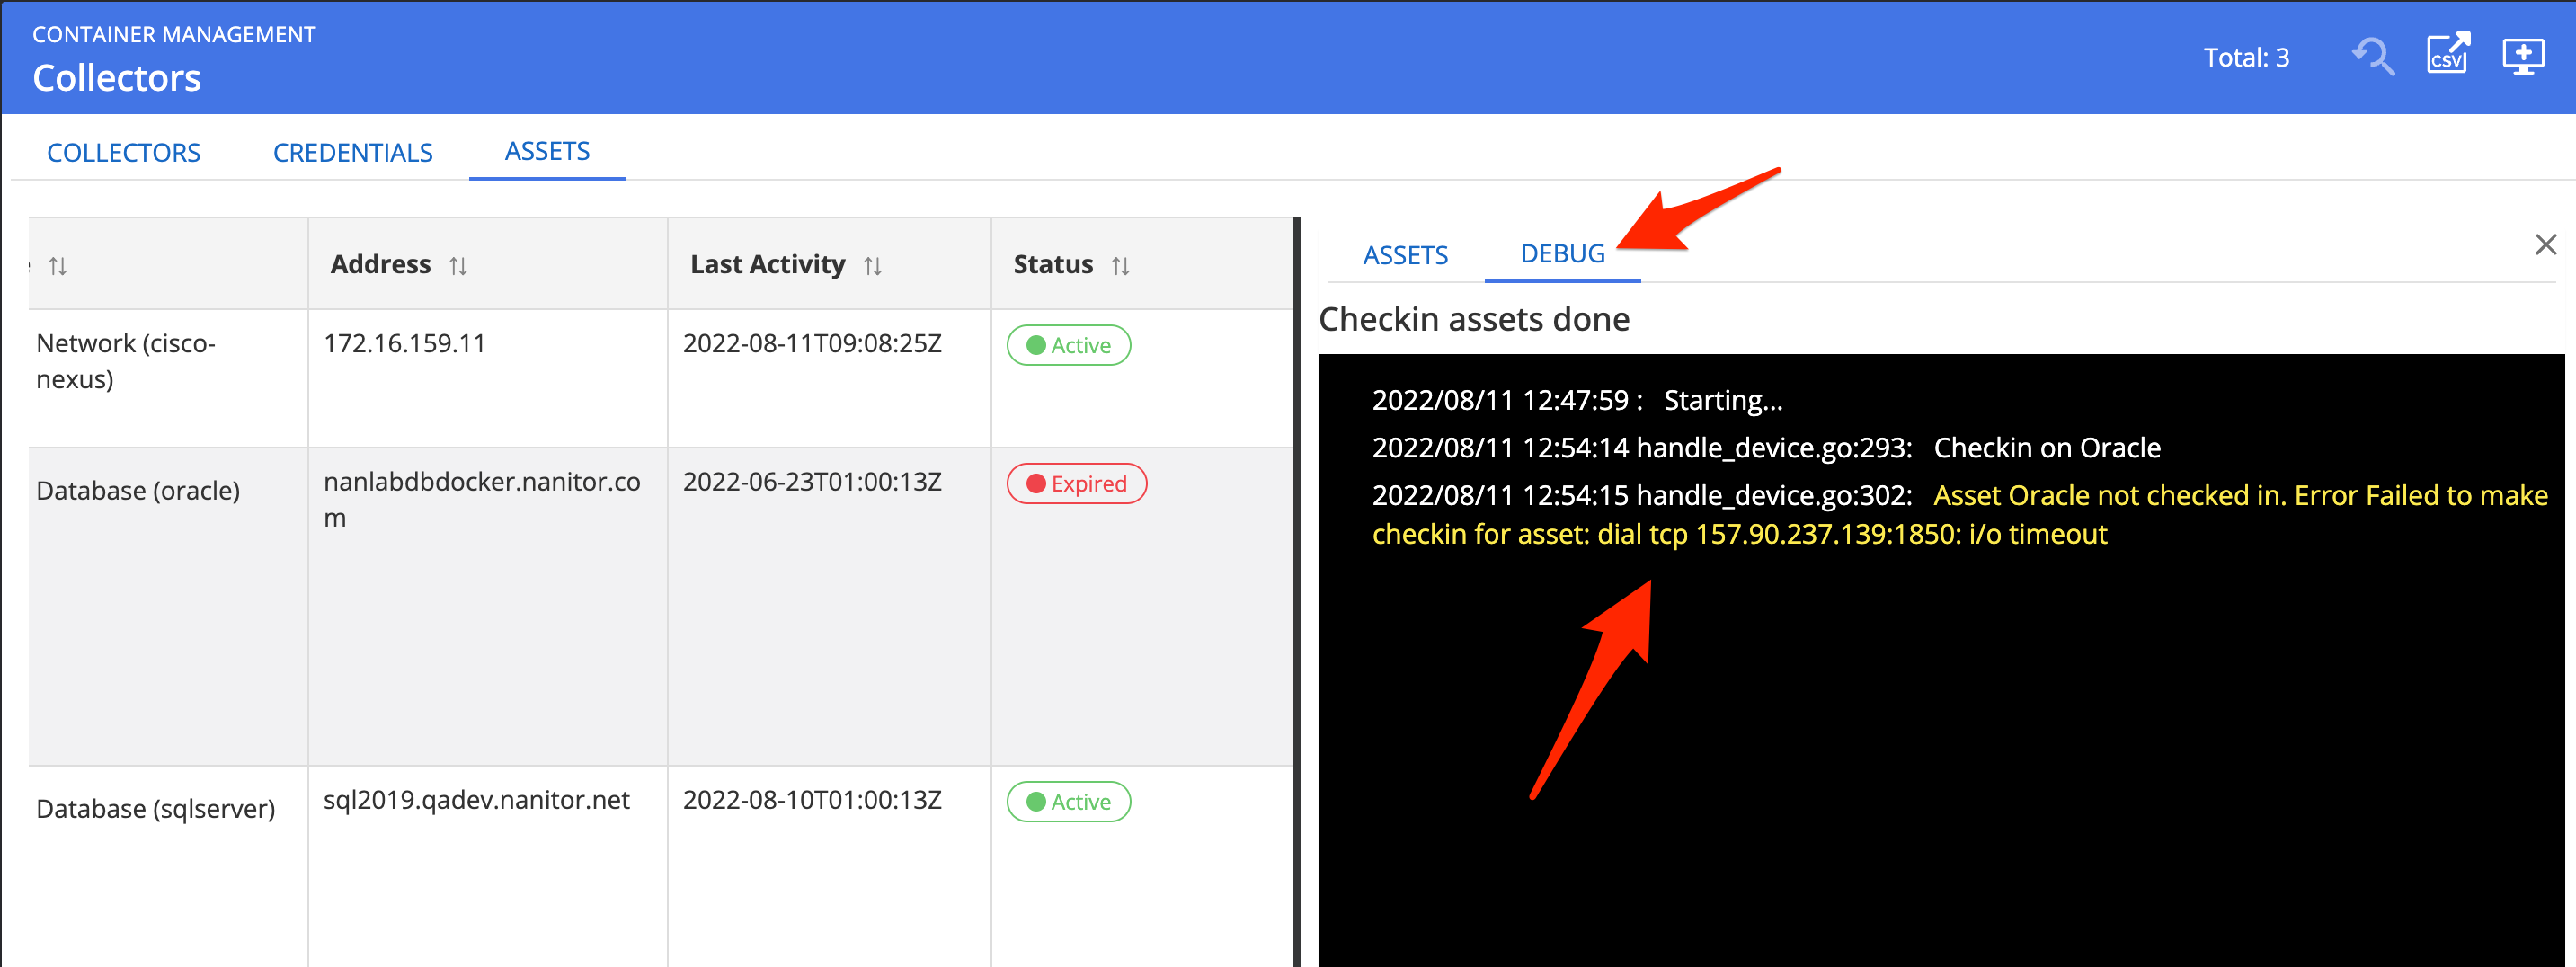
When a collected device is not checking in anymore, does not get a benchmark assigned, or has even expired you can use Nanitor to troubleshoot the root cause from inside Nanitor. From the Nanitor collector interface select the Asset tab. You can use the asset filter on the left to show e.g. archived assets.
From there you can scroll to the right of a problematic device and request a manual check-in. From the Action menu select Checkin.
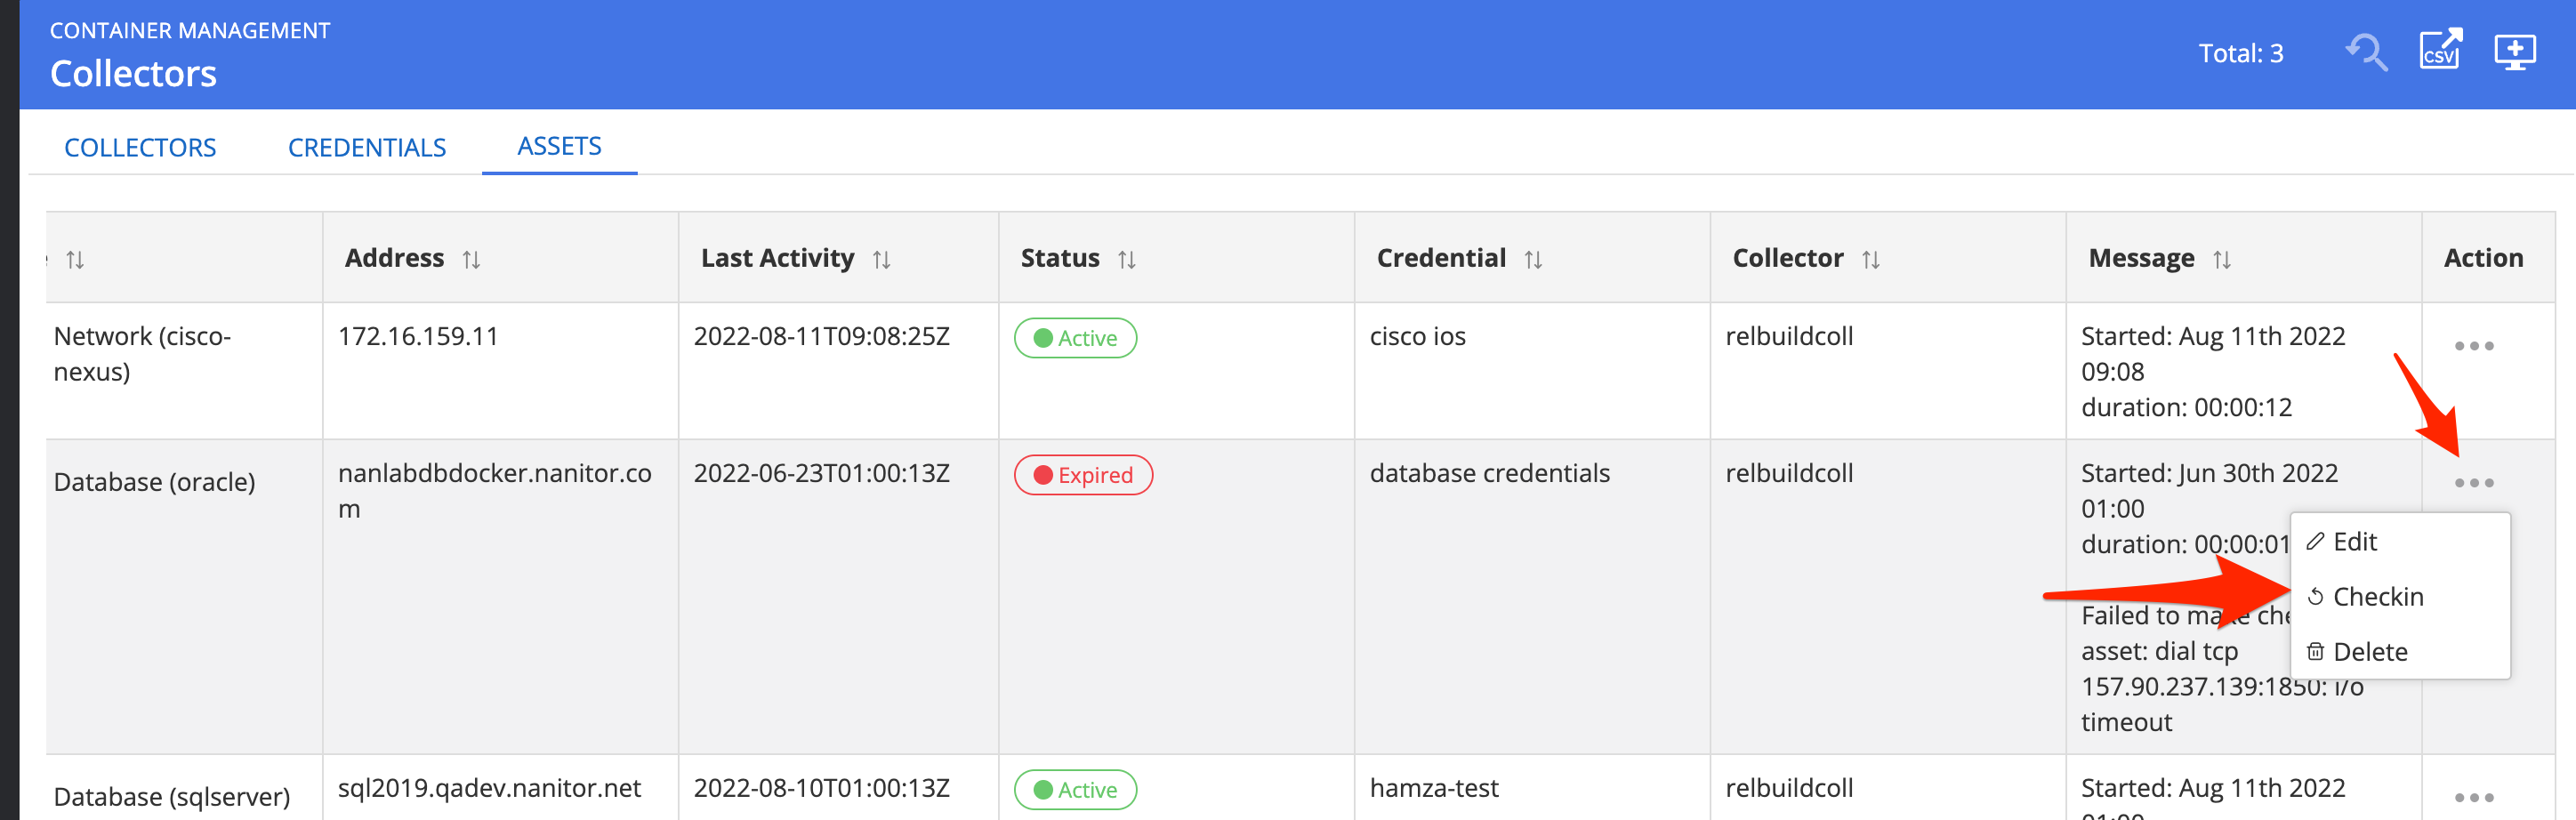
This will open a debug window to the right where you can follow the commands Nanitor is executing. This will also reveal any error or debugging message that should help you to understand the problem of why is an asset is not connecting to Nanitor.