Nanitor Projects
What are Nanitor Projects?
Nanitor Projects help you to organize the work that needs to be done to increase the security posture. Nanitor collects information from connected devices, servers, databases, and Cloud infrastructures. Detected misconfigurations, vulnerabilities, missing patches, and software updates are raised as issues in Nanitor where the same issue can exist on multiple assets. The issues are prioritized and make it easy for Nanitor customers to focus on the most important security concerns.
Nanitor Projects help to organize work to reduce collected issues in Nanitor. You can group issues together that belong together or have similar remediation and should be worked on in the same context or within the same person or team. Nanitor Projects can be timeboxed and help to define deadlines and or milestones. The progress is automatically calculated by Nanitor.
Creating a Nanitor project
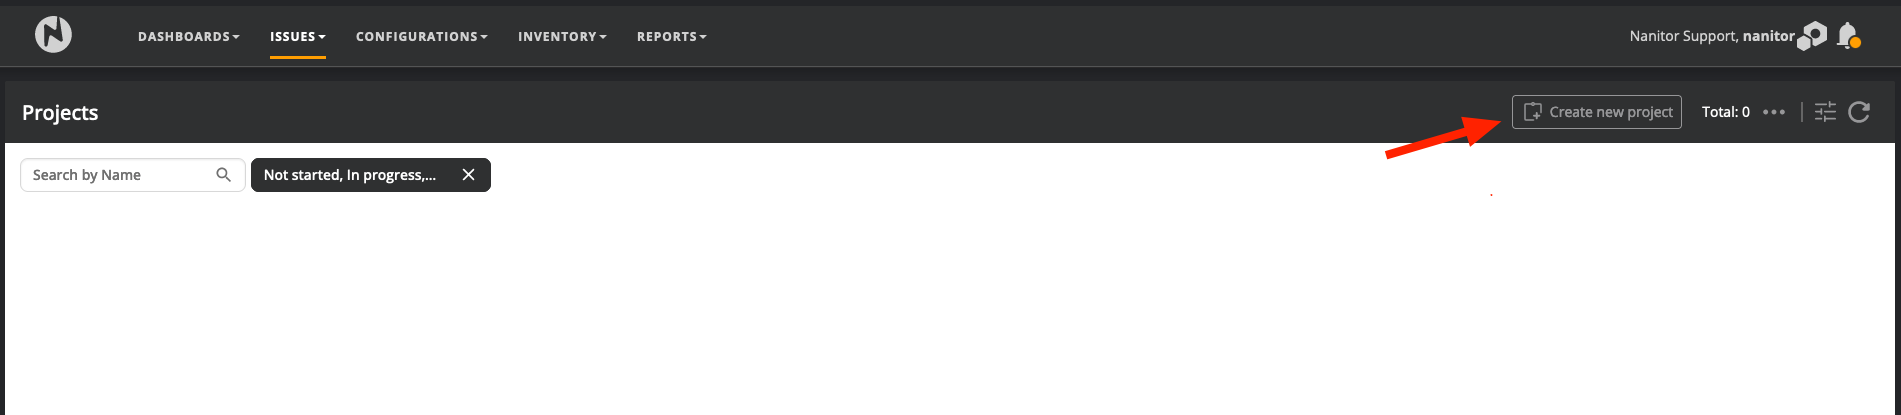
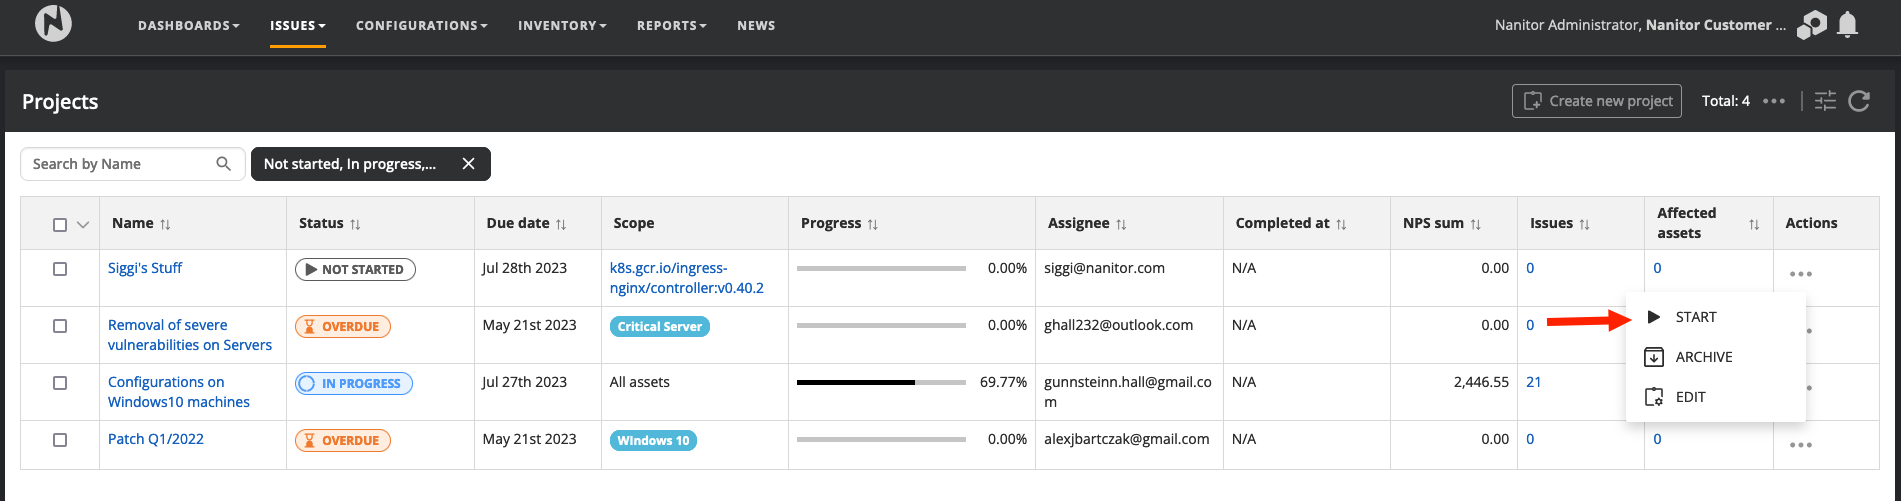
From the Issues menu select Projects. This will show a list of existing projects within Nanitor. Click on the Create new project button on the top right when this window appears...
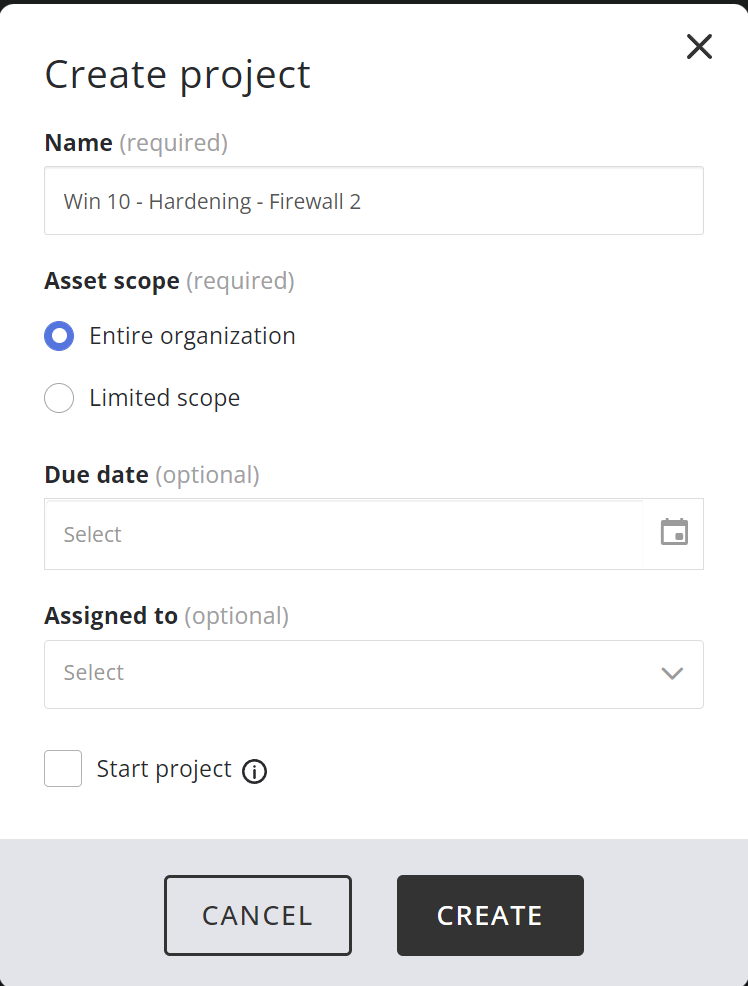
Enter a good description for your project that follows a name convention. The description should tell about the scope (e.g. Windows Servers, Linux, Laptops, or similar), and the kind of remediation task (hardening, vulnerability removal, patching, or similar) and should state the expected time period (e.g. Q4 2022) as well as possible. That helps to identify running projects later when assigning issues to your project.
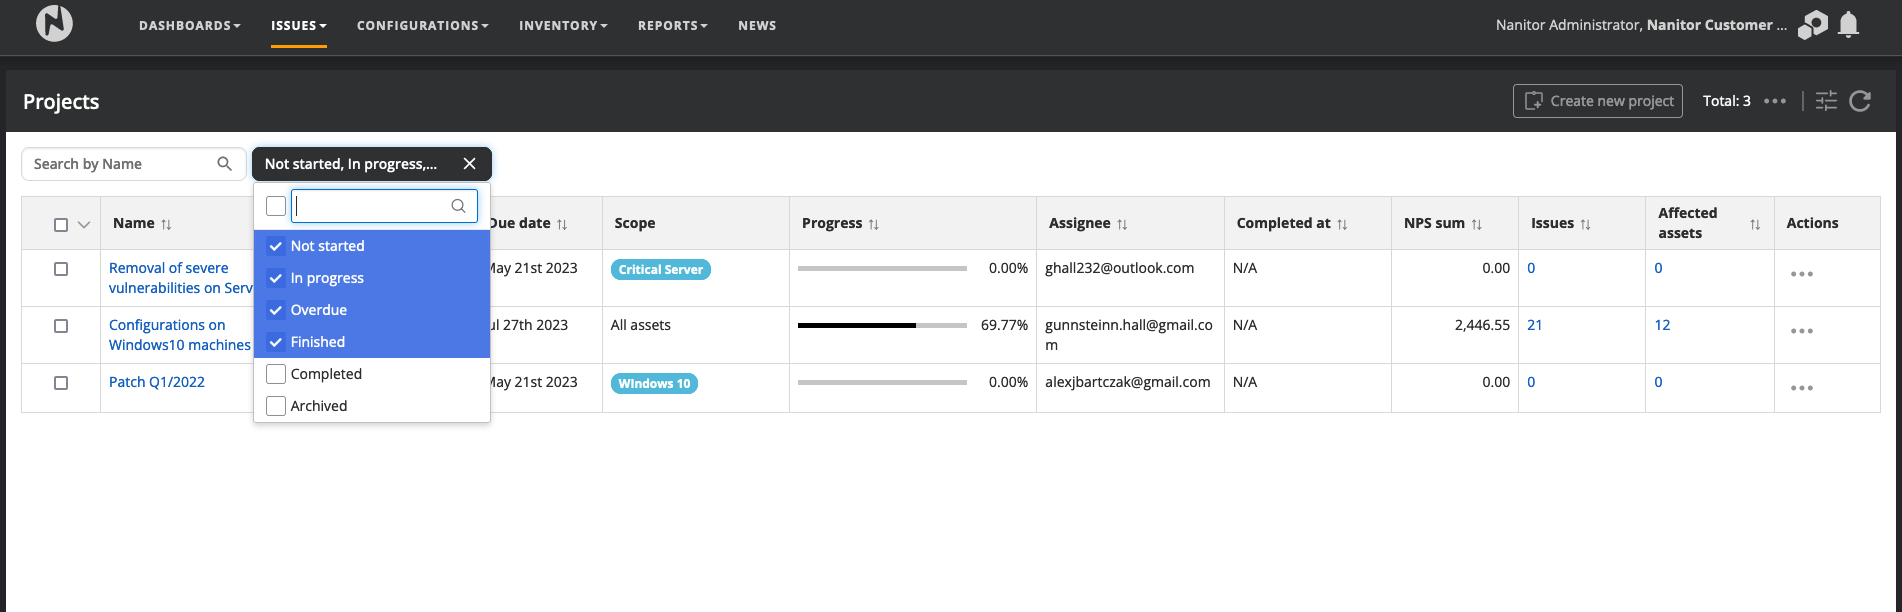
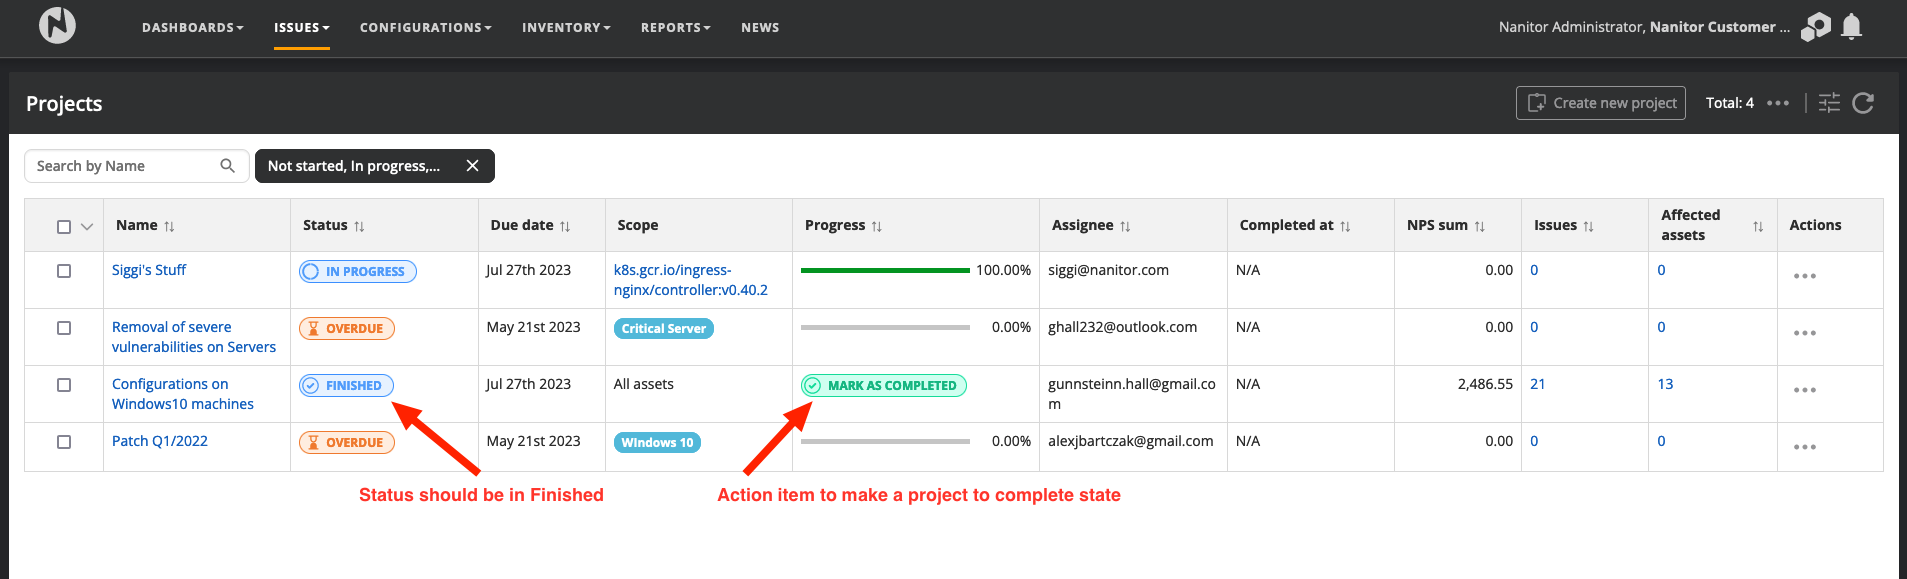
A Nanitor project can have the following statuses:
- Not started: When no issue has been assigned to the project
- In Progress: When at least one issue has been assigned to the project.
- Completed: When all issues assigned to a project have been resolved. All the finished issues can be marked as complete.
- Overdue: When a project is not completed and its due date has passed.
- Finished: When a project is 100% done and it is still open to take issues in it.
- Archived: When a project is no longer in use or it has been decided to no longer work on them.
A project status can't be changed manually (a project can always be set to the archived status). Instead, it is set based on the logic above.
The start and end date of a project can be adjusted later on from the actions menu that can be accessed by clicking on the three dots and then the EDIT. The project can also be deleted from the same action menu.
Clicking on the number of assigned issues within a project will show the list of all assigned issues.
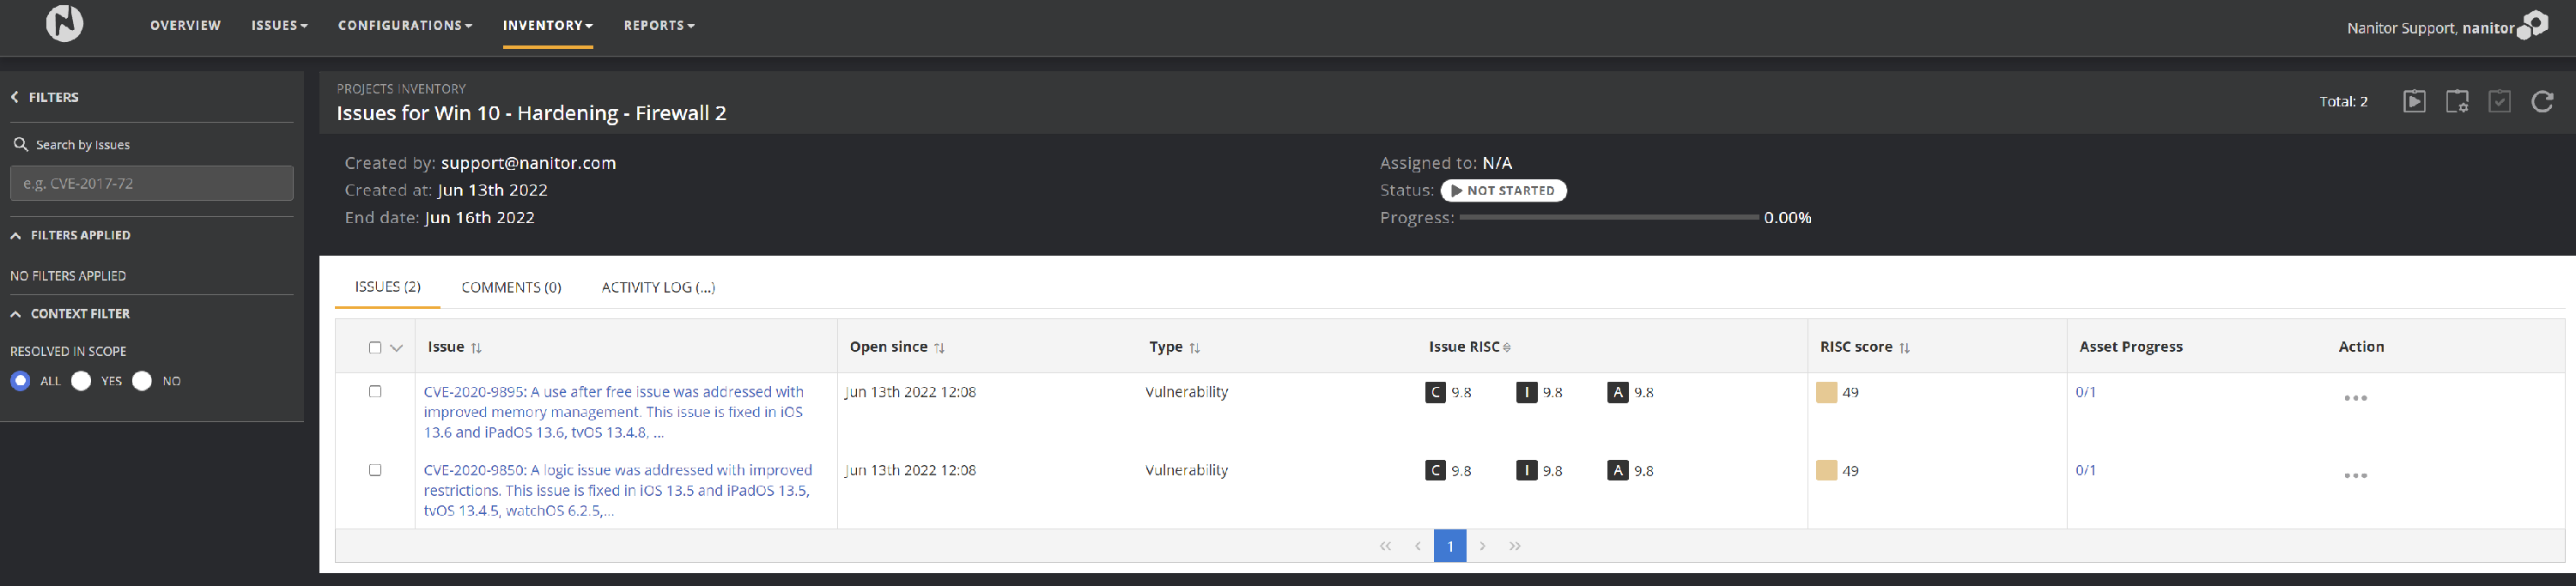
Already resolved issues are marked with a ~~strikethrough~~ text in the issue description. An issue can be marked as resolved when a remediation has actually been applied and Nanitor detected the issue as resolved or when the issue has been excluded from Nanitor. Excluded issues have a little x at the bottom right of the priority score icon and also with the heading issue excluded on top of the issue.

Assigning issues to a Nanitor project
From the issue list within Nanitor, an issue can be assigned to an existing project, moved to another project, or removed from a project. An issue can only be assigned to one project at a time. Within the list of Nanitor issues, you can see which issues are already assigned to a project.
Only administrators can assign issues to a project.
If you don´t see the column scroll to the right.
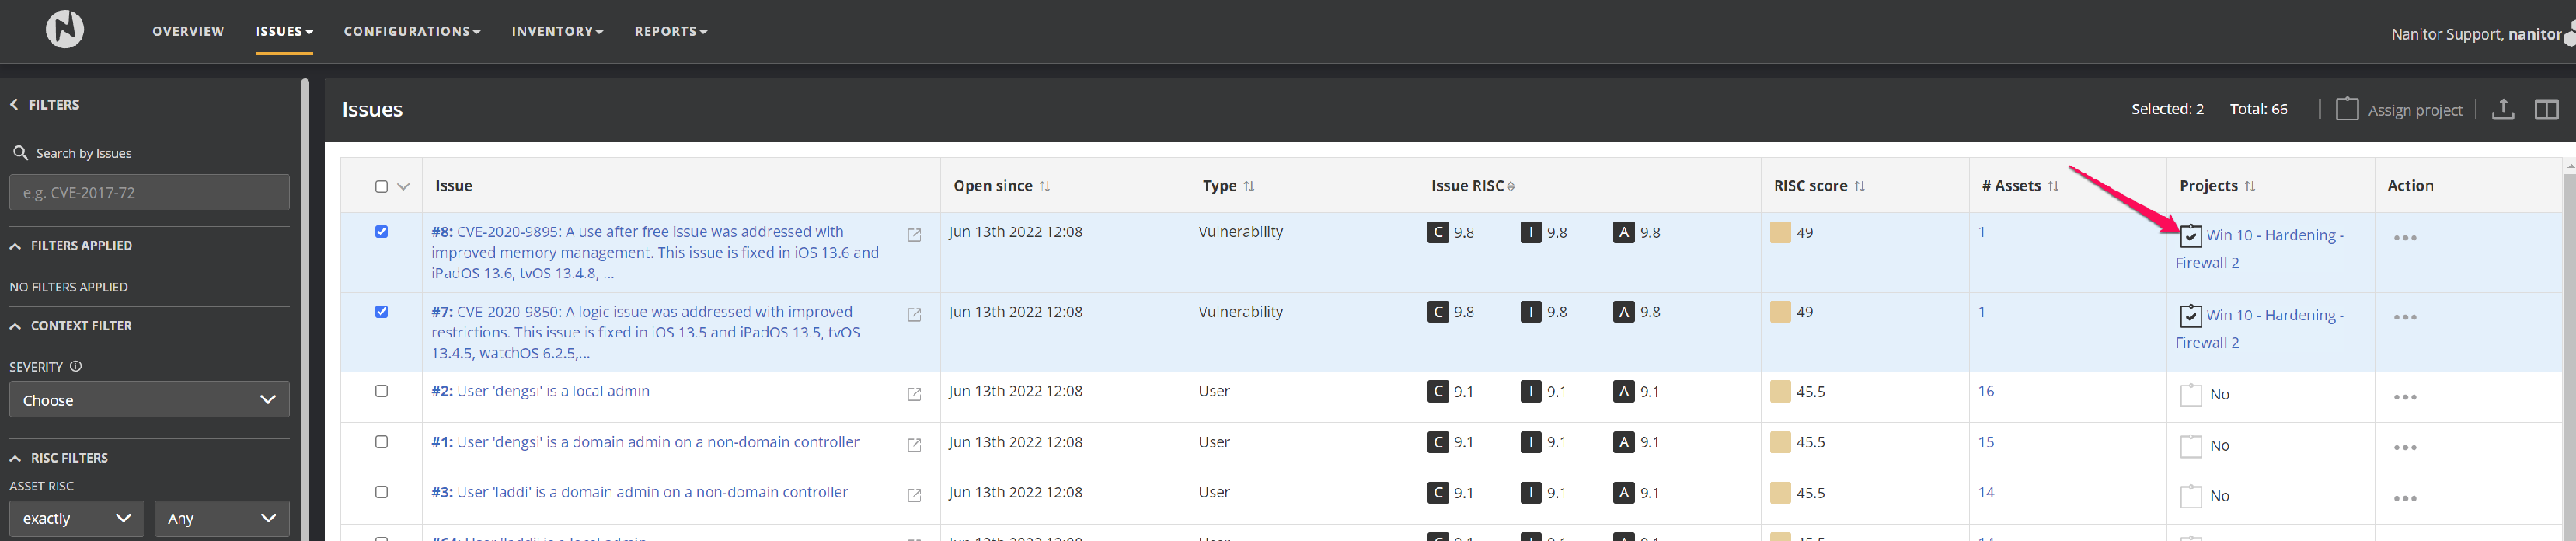
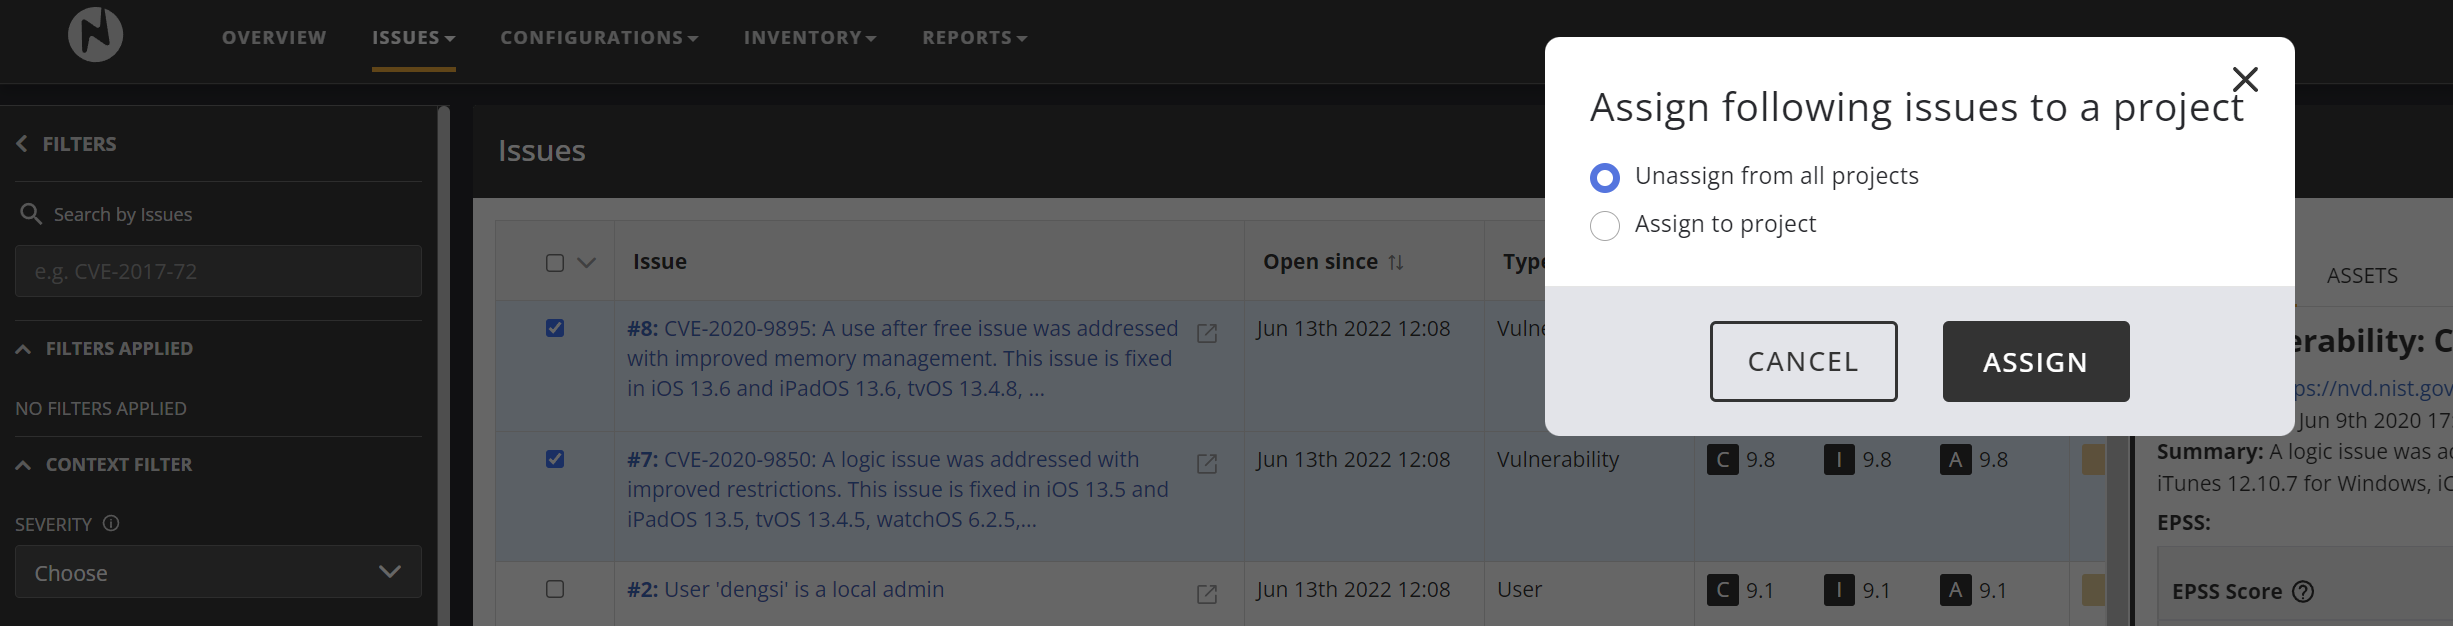
Use the filter on the left to look for issues that you need to be worked on. Select the issues that you want to assign to an existing project. Finally, click on the assign issue button on the top right.

Select the issues that you want to assign to an existing Nanitor project or you can also create a new project by clicking on the last "Create new project".
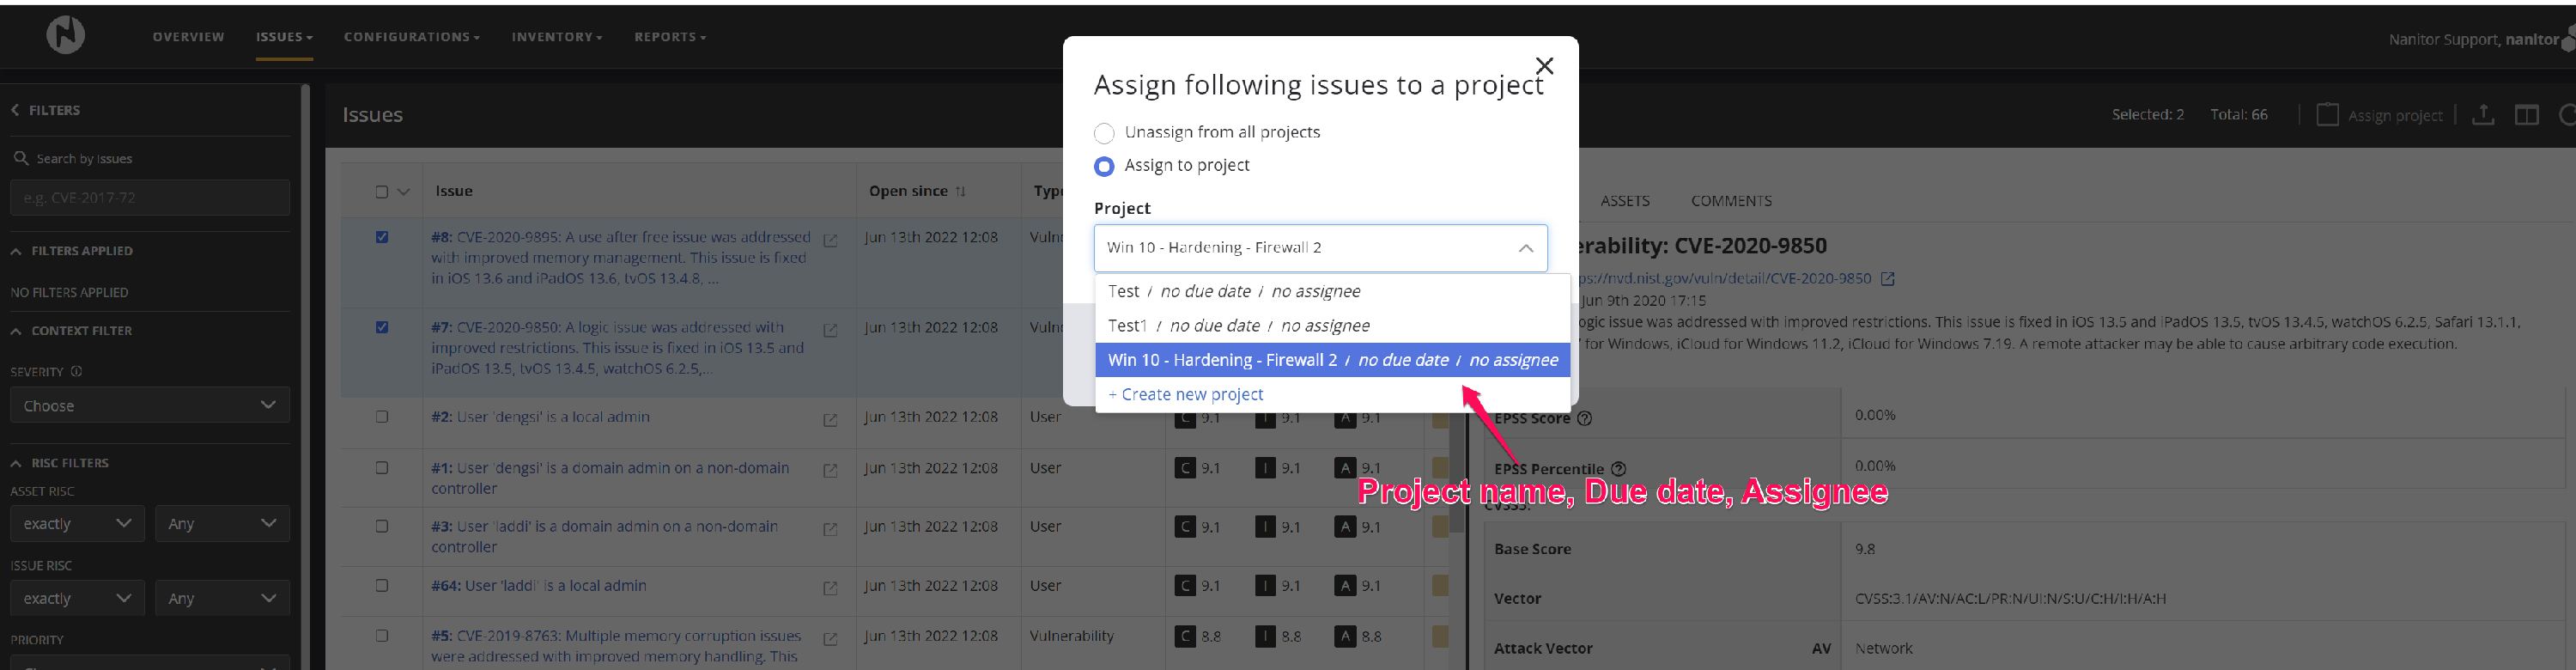
Select the project and click ASSIGN.
Also we can unassign the selected issues from all the projects.
View Project information on issues
Before when the issues were assigned to a project we were only able to see just info as if it is assigned to a project or not. Now the feature is added in such a way that it displays which project the issue is assigned to and one can even directly click to see the project data.

Completing projects
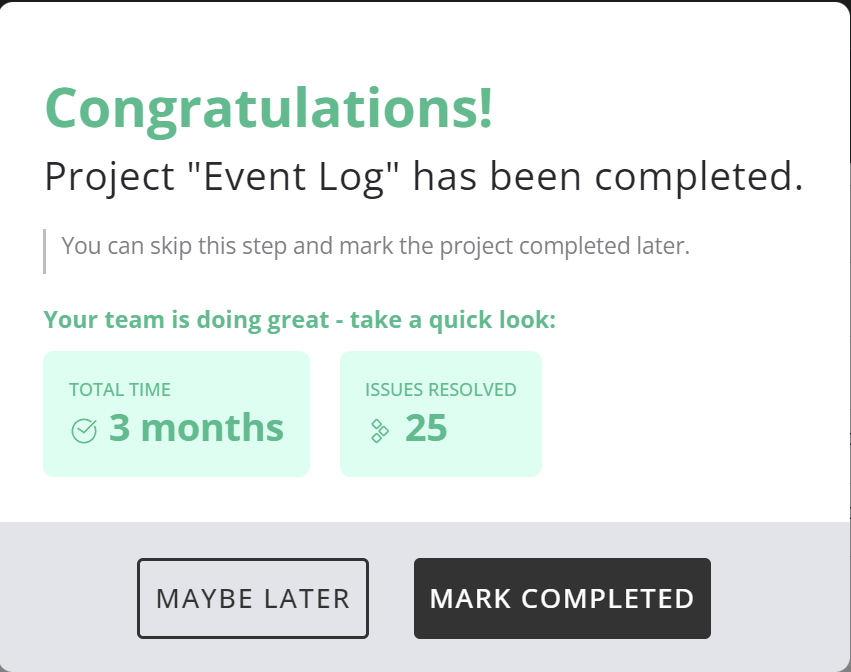
Projects that are finished (progress = 100%) can be marked as completed. Once a project is completed no more issues can be added to that project. Finished projects will get an action item in the project list (Mark the project as completed). Projects can also be set in the completed state from the action menu of finished projects. Projects that are not 100% completed will not have this option available.
So, after clicking on "Mark as completed", we would go to this window and then click mark completed.
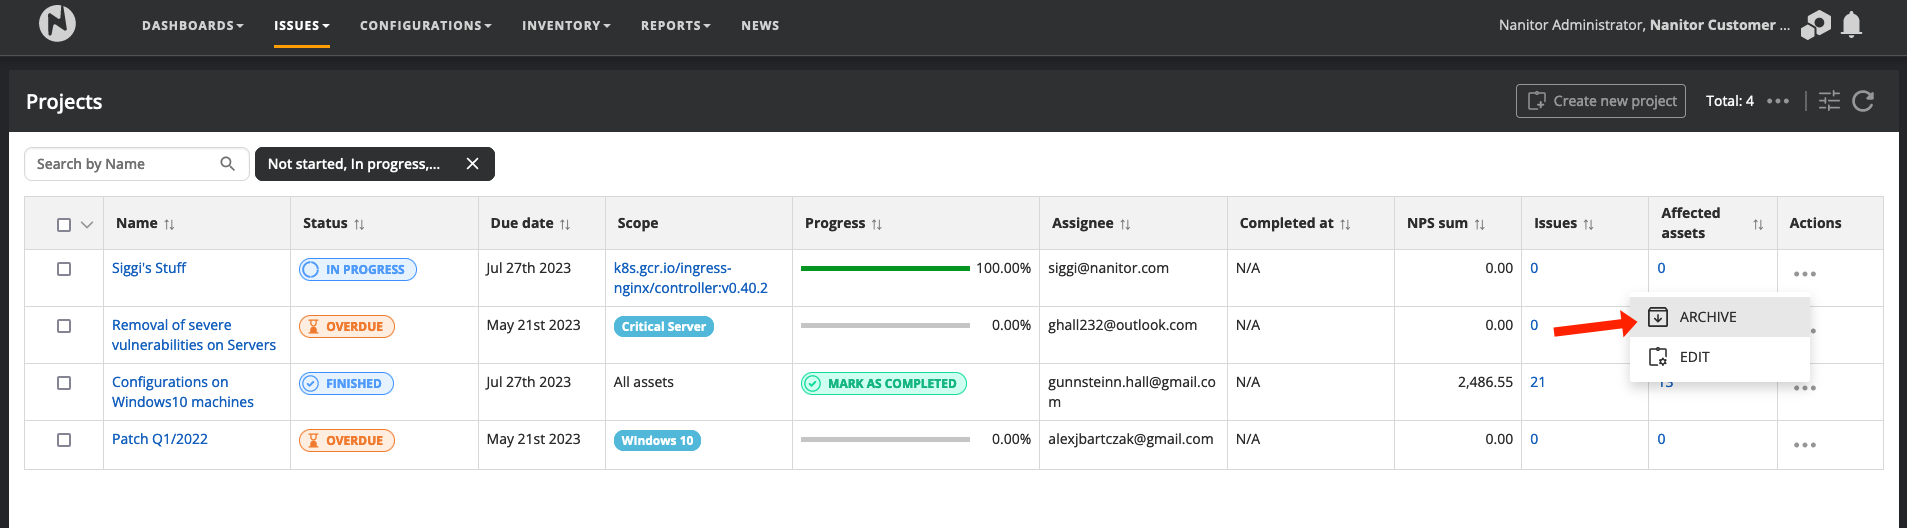
Archiving projects
When projects are not supposed to be carried on you are able to set them in an archived state. Archived projects mark remediation projects as not to be continued. Projects can be archived from the action menu of a project.