Uploading assets to the Nanitor system with a csv file
If your company oversees assets that you are aware of but are fully invisible to the Nanitor system (that is, they do not have a running agent, are not collected by a collector, and are not seen on the network by other devices if the Network Discovery feature is enabled), then you can still manually let Nanitor know about them by uploading a .csv file with information about these assets.
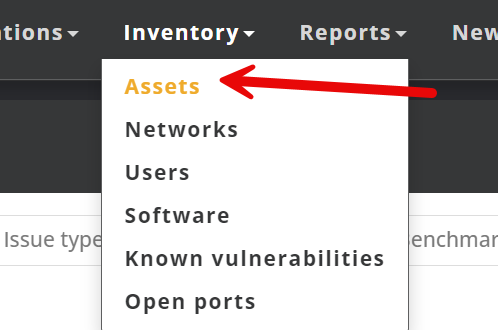
- From within the Nanitor interface, click the "Assets" link in the menu under "Inventory".
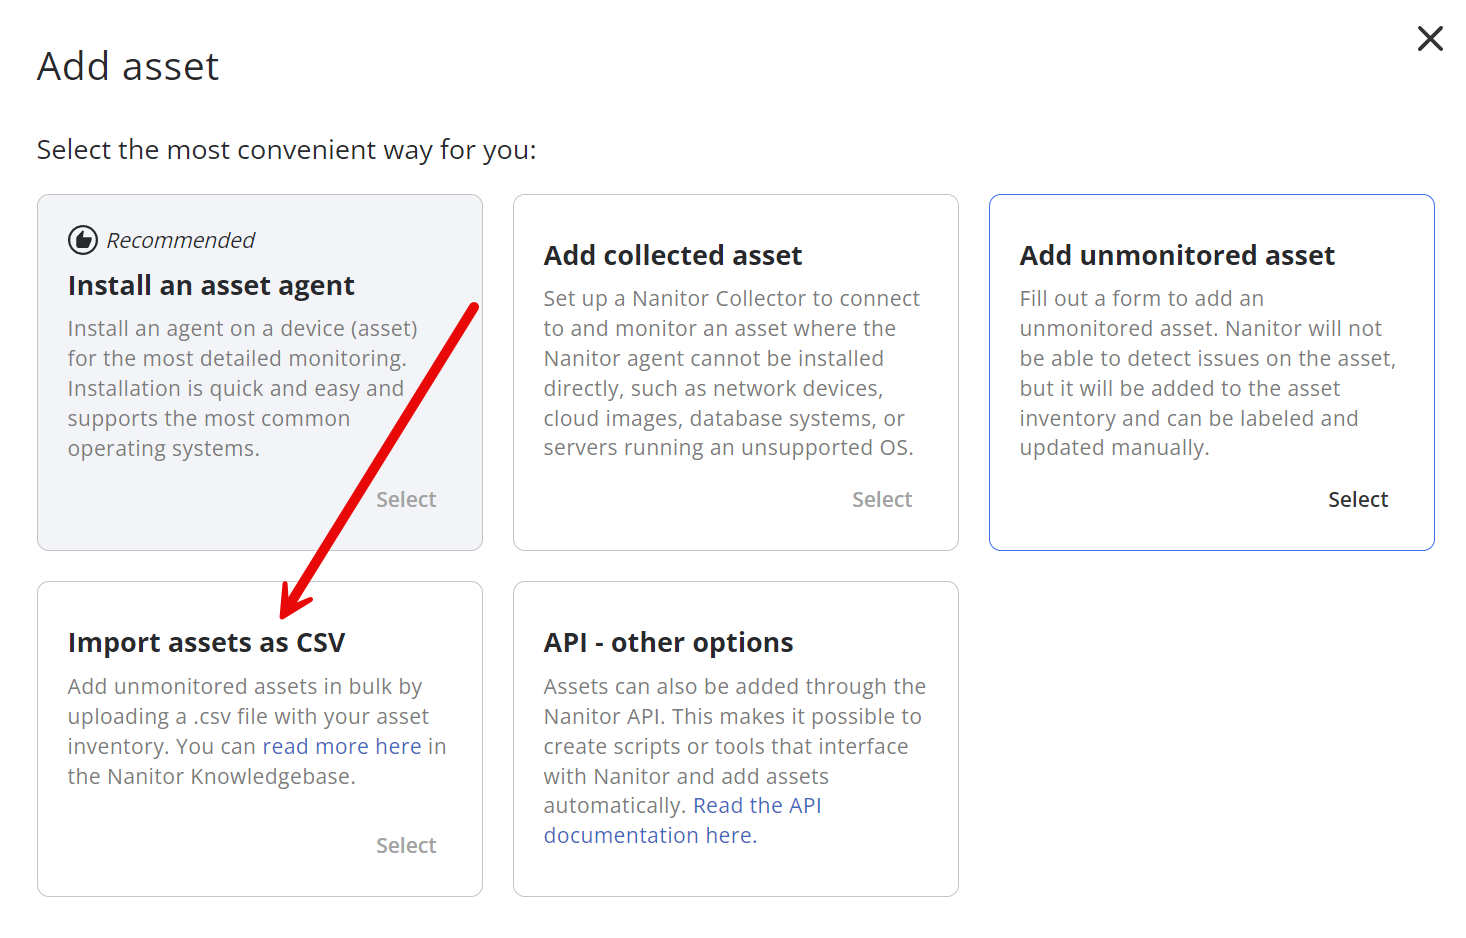
- Near the top right corner of the asset list table, click the Add new asset button

Then click on Import assets as CSV and select the right CSV file.
The columns in this CSV file should be:
- Hostname (required): The hostname of the device, to be shown in the Nanitor interface.
- IP (required): An IP address for this device, required to uniquely identify it.
- Type (optional): A device type: either "Desktop", "Server", "Network", "Mobile", "Database" or "Cloud". If none (or a different string) is specified, it will be "Unknown".
- Labels (optional): Any device labels that should be assigned to the device, separated by commas.
- Benchmark (optional): The name of a hypothetical benchmark profile that the device should be classed under for convenience (see below).
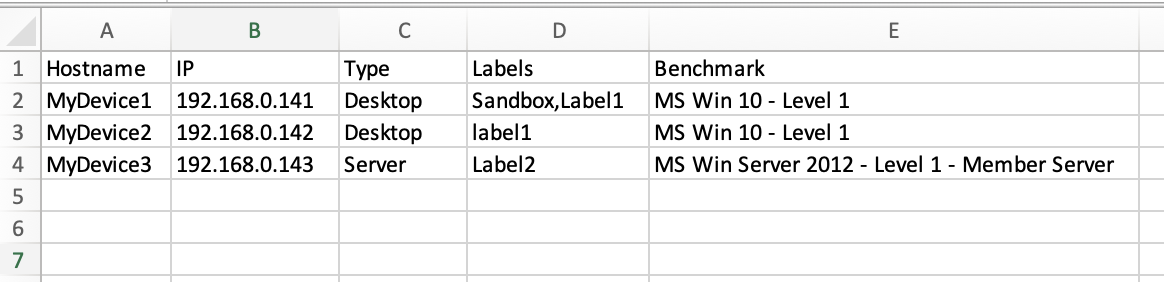
The optional columns may be empty or left out entirely. The first line of the CSV file should contain the column headers in use, as listed above. An example CSV file could for instance look like this:
Hostname;IP;Type;Labels;Benchmark
MyDevice1;192.168.0.141;Desktop;Sandbox,Label1;MS Win 10 - Level 1
MyDevice2;192.168.0.142;Desktop;label1;MS Win 10 - Level 1
MyDevice3;192.168.0.143;Server;Label2;MS Win Server 2012 - Level 1 - Member Server
You can create a CSV file by exporting from a program such as Microsoft Office Excel. If you prepare an Excel spreadsheet that looks like this:
Then it can be exported into a CSV file like the above by pressing Ctrl+Shift+S (Cmd+Shift+S on a Mac) and selecting "Comma-separated Values (.csv)" in the "File Format" field.
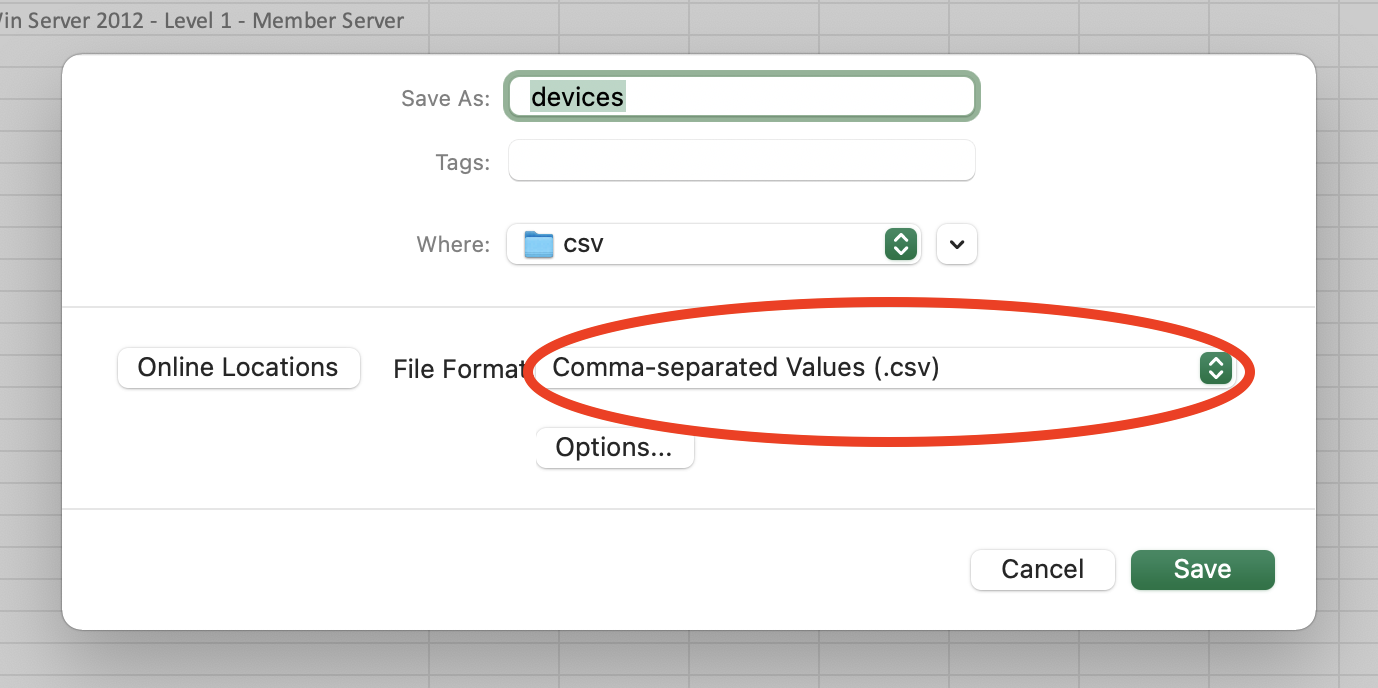
(Nanitor will understand CSV files with either comma or semicolon delimeters.)
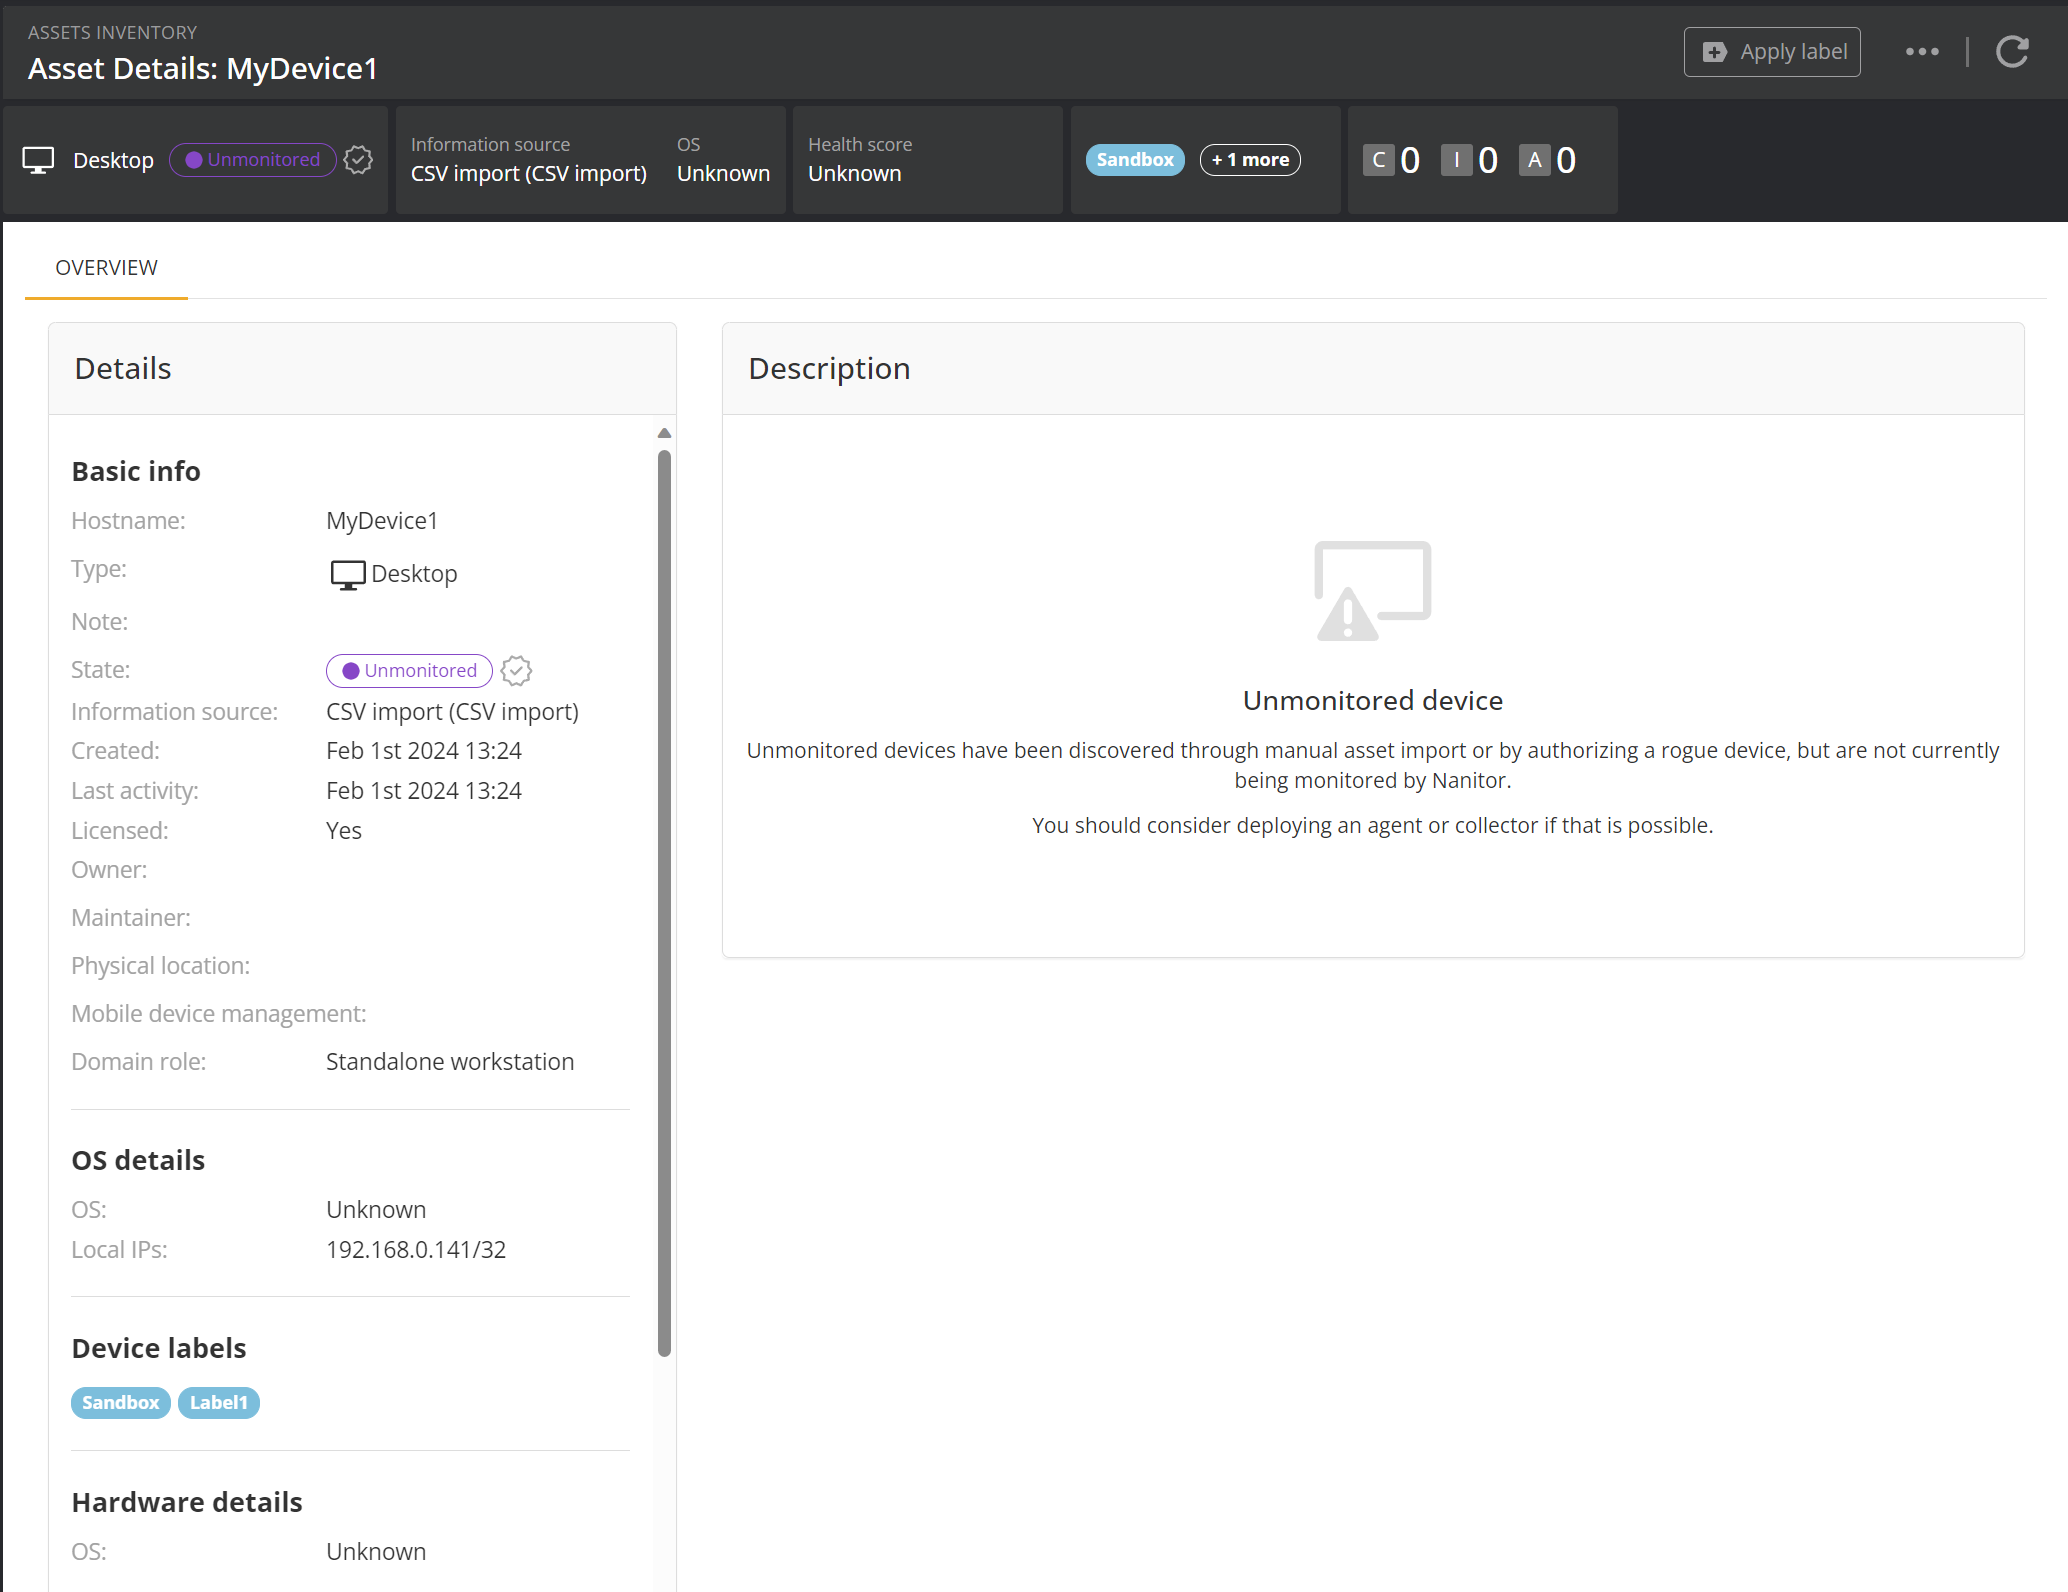
An asset added to the system in this way will have Authorized state (not monitored). When Authorized devices exist, you can filter by Authorized in the assets inventory to see these devices:
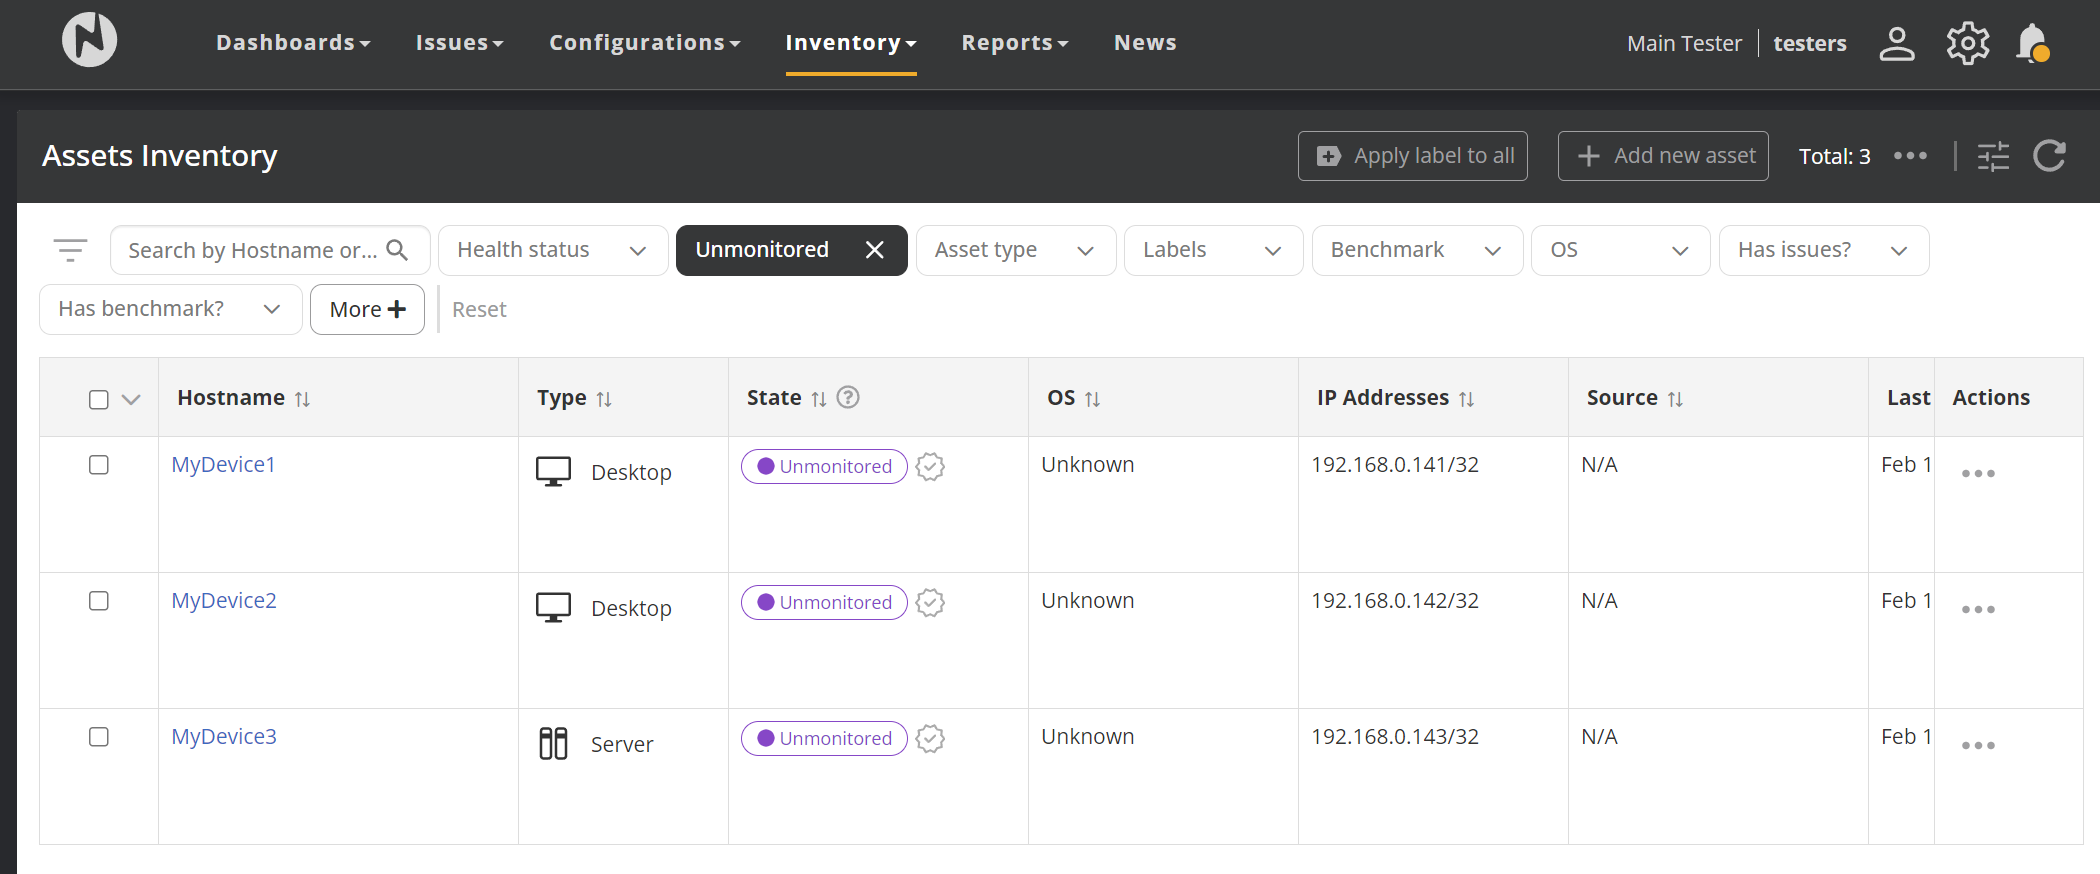
Since the Nanitor system has no way of collecting information about this asset, it will have no information beyond that included in the CSV file. You can however edit the basic info for the device the same as any other device.
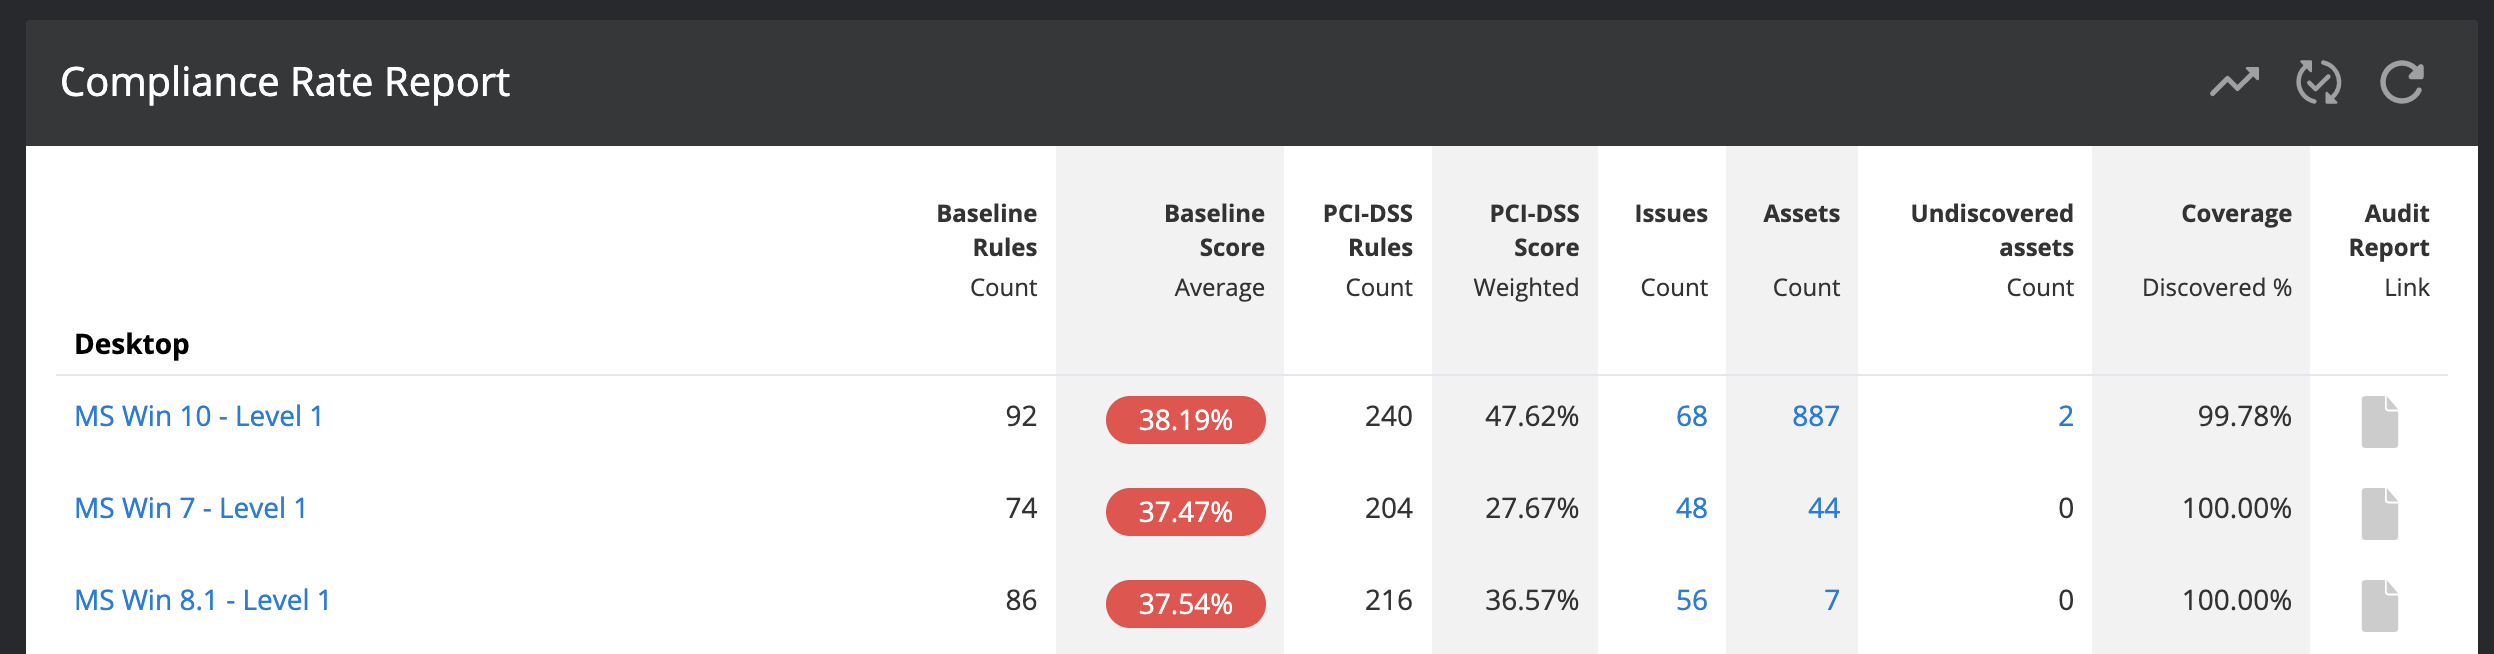
On the compliance report page, if assets with Authorized state (not monitored) exist in the system there will be two added columns, Undiscovered assets and Coverage. The former shows the number of authorized (unmonitored) assets listed under that benchmark, while the latter shows the percentage of the total assets under that benchmark that have been discovered by Nanitor.
Assets with Authorized state (created via CSV import) will be automatically archived after seven days by default (the auto_archive_days setting). This can be overridden by setting the auto_archive_undiscovered_days setting in nanitor_manager.ini. Uploading a CSV file with these assets again will unarchive them. Authorized assets will also be archived if a new CSV file is uploaded that no longer includes those assets (as determined by the hostname/IP combination).
What if I add an agent to the device later?
So long as the hostname and IP match when the agent first contacts the server, Nanitor will match the device to the existing asset entry in the database and convert it from Authorized state to Active state, beginning active monitoring.
Uploading a CSV containing information on a device that has already signed up to Nanitor is safe. If the hostname and IP address match an existing asset, the asset will be updated with the information from the CSV file, including: - Standard fields (Type, Labels, Benchmark) - Custom fields (if included in the CSV)
This allows you to export assets with custom fields, edit them offline, and re-import to update the values. Empty custom field cells in the CSV will leave existing values unchanged, while cells with values will overwrite the existing values.
Benchmark profiles
The benchmark profile names that should be entered in the CSV match the names given on the Nanitor compliance report page. Note that the name must match exactly for the benchmark to be properly assigned. The most common are as follows:
| Benchmark profile name |
|---|
| Amazon Linux 2 - Level 1 - Server |
| Amazon Web Services Foundations - Level 1 |
| Apple OSX Big Sur - Level 1 |
| Apple OSX El Capitan - Level 1 |
| Apple OSX High Sierra - Level 1 |
| Apple OSX Mojave - Level 1 |
| Apple OSX Sierra - Level 1 |
| Apple OSX Yosemite - Level 1 |
| CentOS 6 - Level 1 - Server |
| CentOS 7 - Level 1 - Server |
| CentOS 8 - Level 1 - Server |
| Check Point Gaia - Level 1 |
| Cisco Firepower - Level 1 |
| Cisco Firewall - Level 1 - Cisco ASA 8.x |
| Cisco IOS 12 - Level 1 |
| Cisco IOS 15 - Level 1 |
| Cisco IOS 16 - Level 1 |
| Cisco Nexus - Level 1 |
| Debian 10 - Level 1 |
| Debian 7 - Level 1 |
| Debian 8 - Level 1 |
| Debian 9 - Level 1 |
| Fortigate FortiOS - Level 1 |
| FreeBSD 11 - Level 1 |
| HP Comware - Level 1 |
| IBM AIX - Level 1 |
| Juniper JunOS - Level 1 |
| MS Win 10 - Level 1 |
| MS Win 7 - Level 1 |
| MS Win 8 - Level 1 |
| MS Win 8.1 - Level 1 |
| MS Win Server 2003 - Level 1 - Member Server |
| MS Win Server 2003 - Level 1 - Domain Controller |
| MS Win Server 2008 - Level 1 - Member Server |
| MS Win Server 2008 - Level 1 - Domain Controller |
| MS Win Server 2008 R2 - Level 1 - Member Server |
| MS Win Server 2008 R2 - Level 1 - Domain Controller |
| MS Win Server 2012 - Level 1 - Member Server |
| MS Win Server 2012 - Level 1 - Domain Controller |
| MS Win Server 2012 R2 - Level 1 - Member Server |
| MS Win Server 2012 R2 - Level 1 - Domain Controller |
| MS Win Server 2016 - Level 1 - Member Server |
| MS Win Server 2016 - Level 1 - Domain Controller |
| MS Win Server 2019 - Level 1 - Member Server |
| MS Win Server 2019 - Level 1 - Domain Controller |
| MS Win XP - Level 1 |
| Nginx - Level 1 - Webserver |
| OpenBSD 6 - Level 1 |
| Oracle Database 11 - Level 1 - RDBMS |
| Oracle Database 12 - Level 1 - RDBMS using Traditional Auditing |
| Oracle Linux 6 - Level 1 - Server |
| Oracle Linux 7 - Level 1 - Server |
| Oracle Linux 8 - Level 1 - Server |
| Oracle MySQL - Level 1 - MySQL RDBMS Community |
| Oracle Solaris 10 - Level 1 |
| Oracle Solaris 11 - Level 1 |
| PostgreSQL - Level 1 - PostgreSQL |
| RHEL 5 - Level 1 |
| RHEL 6 - Level 1 - Server |
| RHEL 7 - Level 1 - Server |
| RHEL 8 - Level 1 - Server |
| SUSE 11 - Level 1 - Server |
| SUSE 12 - Level 1 - Server |
| SUSE 15 - Level 1 - Server |
| Ubiquity EdgeOS - Level 1 |
| Ubuntu 14.04 - Level 1 - Server |
| Ubuntu 16.04 - Level 1 - Server |
| Ubuntu 18.04 - Level 1 - Server |
| Ubuntu 20.04 - Level 1 - Server |