Setting up SAML to EntraID (previously Azure AD)
Introduction
Setting up Nanitor to support login with Microsoft EntraID (previously Azure AD) is fairly straightforward. You will need to be a system administrator in Nanitor and a domain admin in Microsoft EntraID to set up the integration.
Downloading Service Provider Metadata
You need to start by downloading an XML file from Nanitor that you then need to upload to EntraID containing various settings. Here is how you do that:
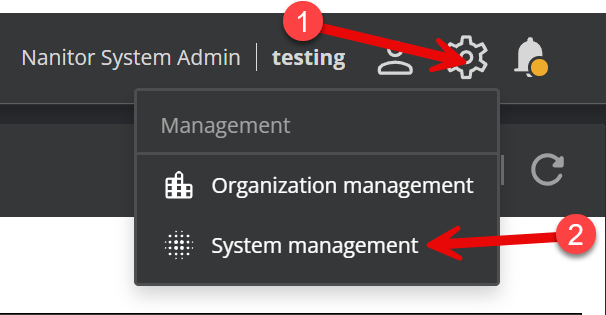
Start by logging in to Nanitor with your system admin credentials, then click on the wheel in the upper right and select System Management. If System management isn't available, then your user probably does not have system admin permissions (note that having organization admin permissions is not enough). You can contact another Nanitor system admin or submit a support ticket to Nanitor to gain system admin access.
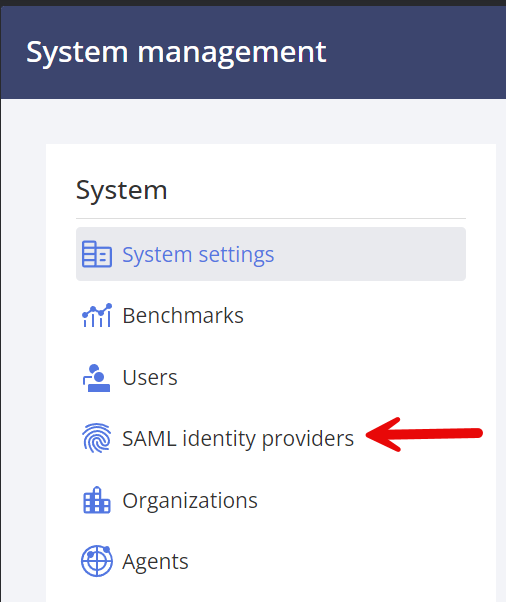
Next, select SAML identity providers in the left bar:
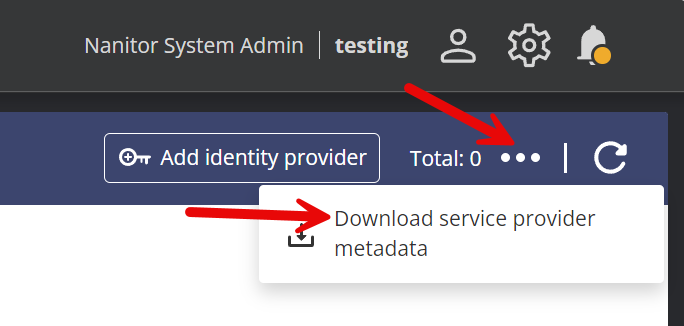
Then click the three dots and "Download service provider metadata":
Create an enterprise app in EntraID
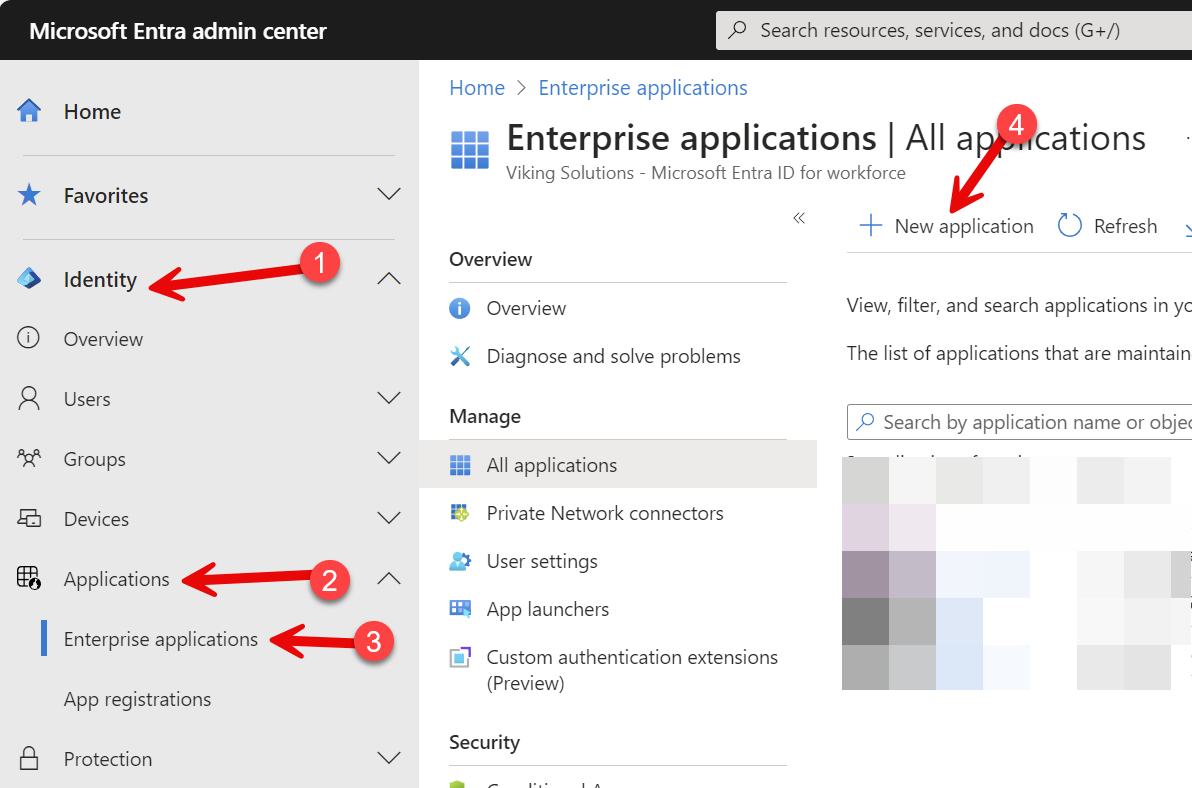
Log into Microsoft EntraID with the appropriate administrative credentials. Expand Identity and Applications, then click on Enterprise Applications and New Application.
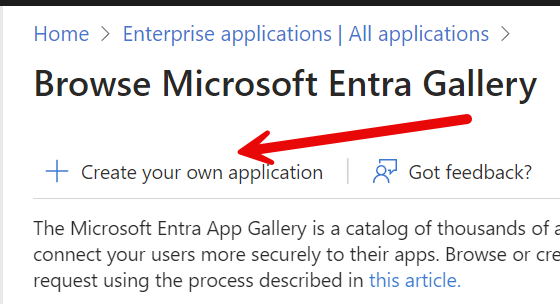
This takes you into the Microsoft Entra Gallery. There, you need to click "Create your own application".
Provide a name that makes sense to you and leave the default setting alone. Ignore any recommendations that come up and click create at the bottom of the modal.

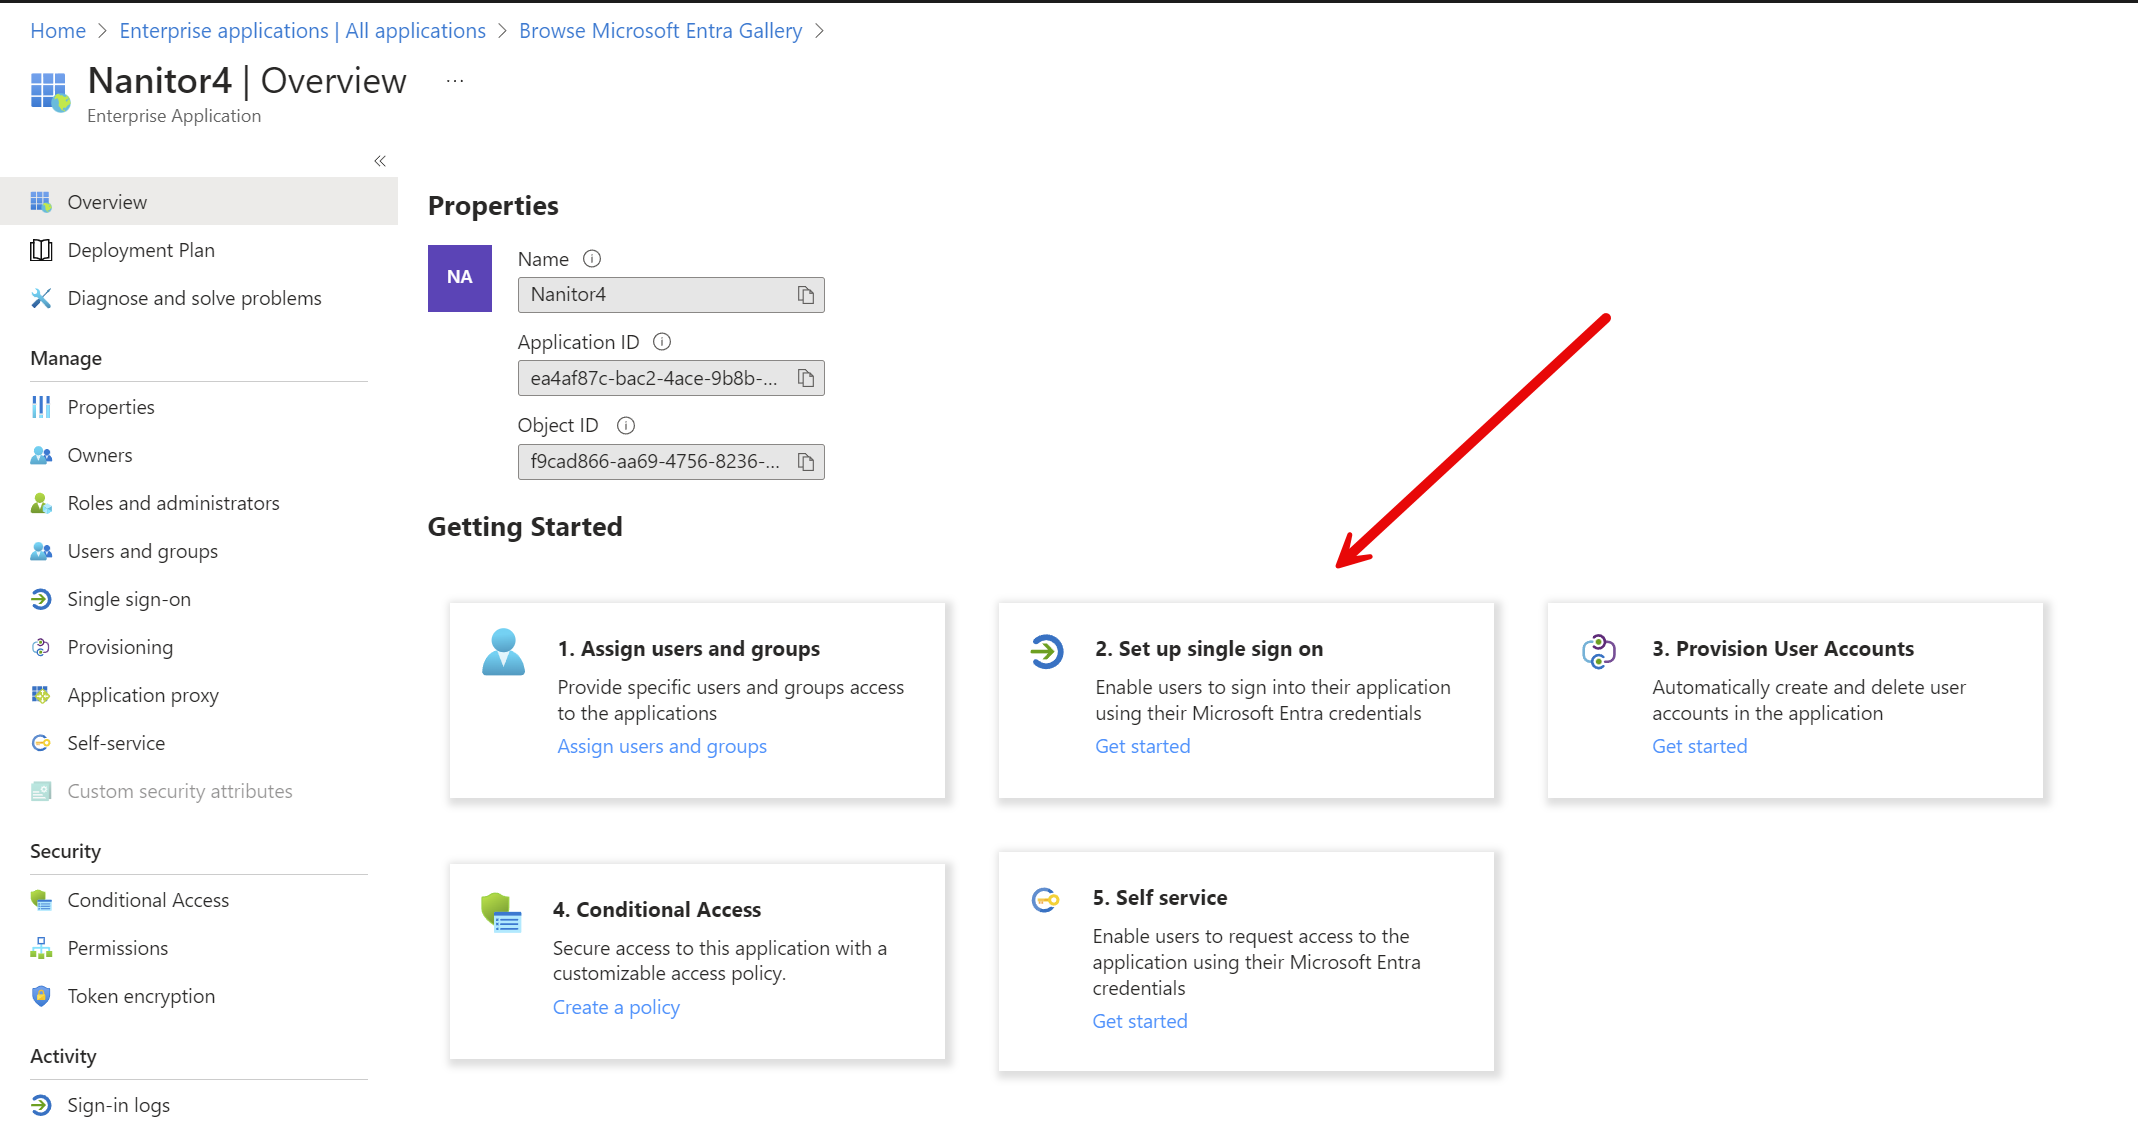
There will be a momentary pause as the application is being created. Once it is ready you will pop into the overview for this new application. Click on #2, "Set up single sign on".
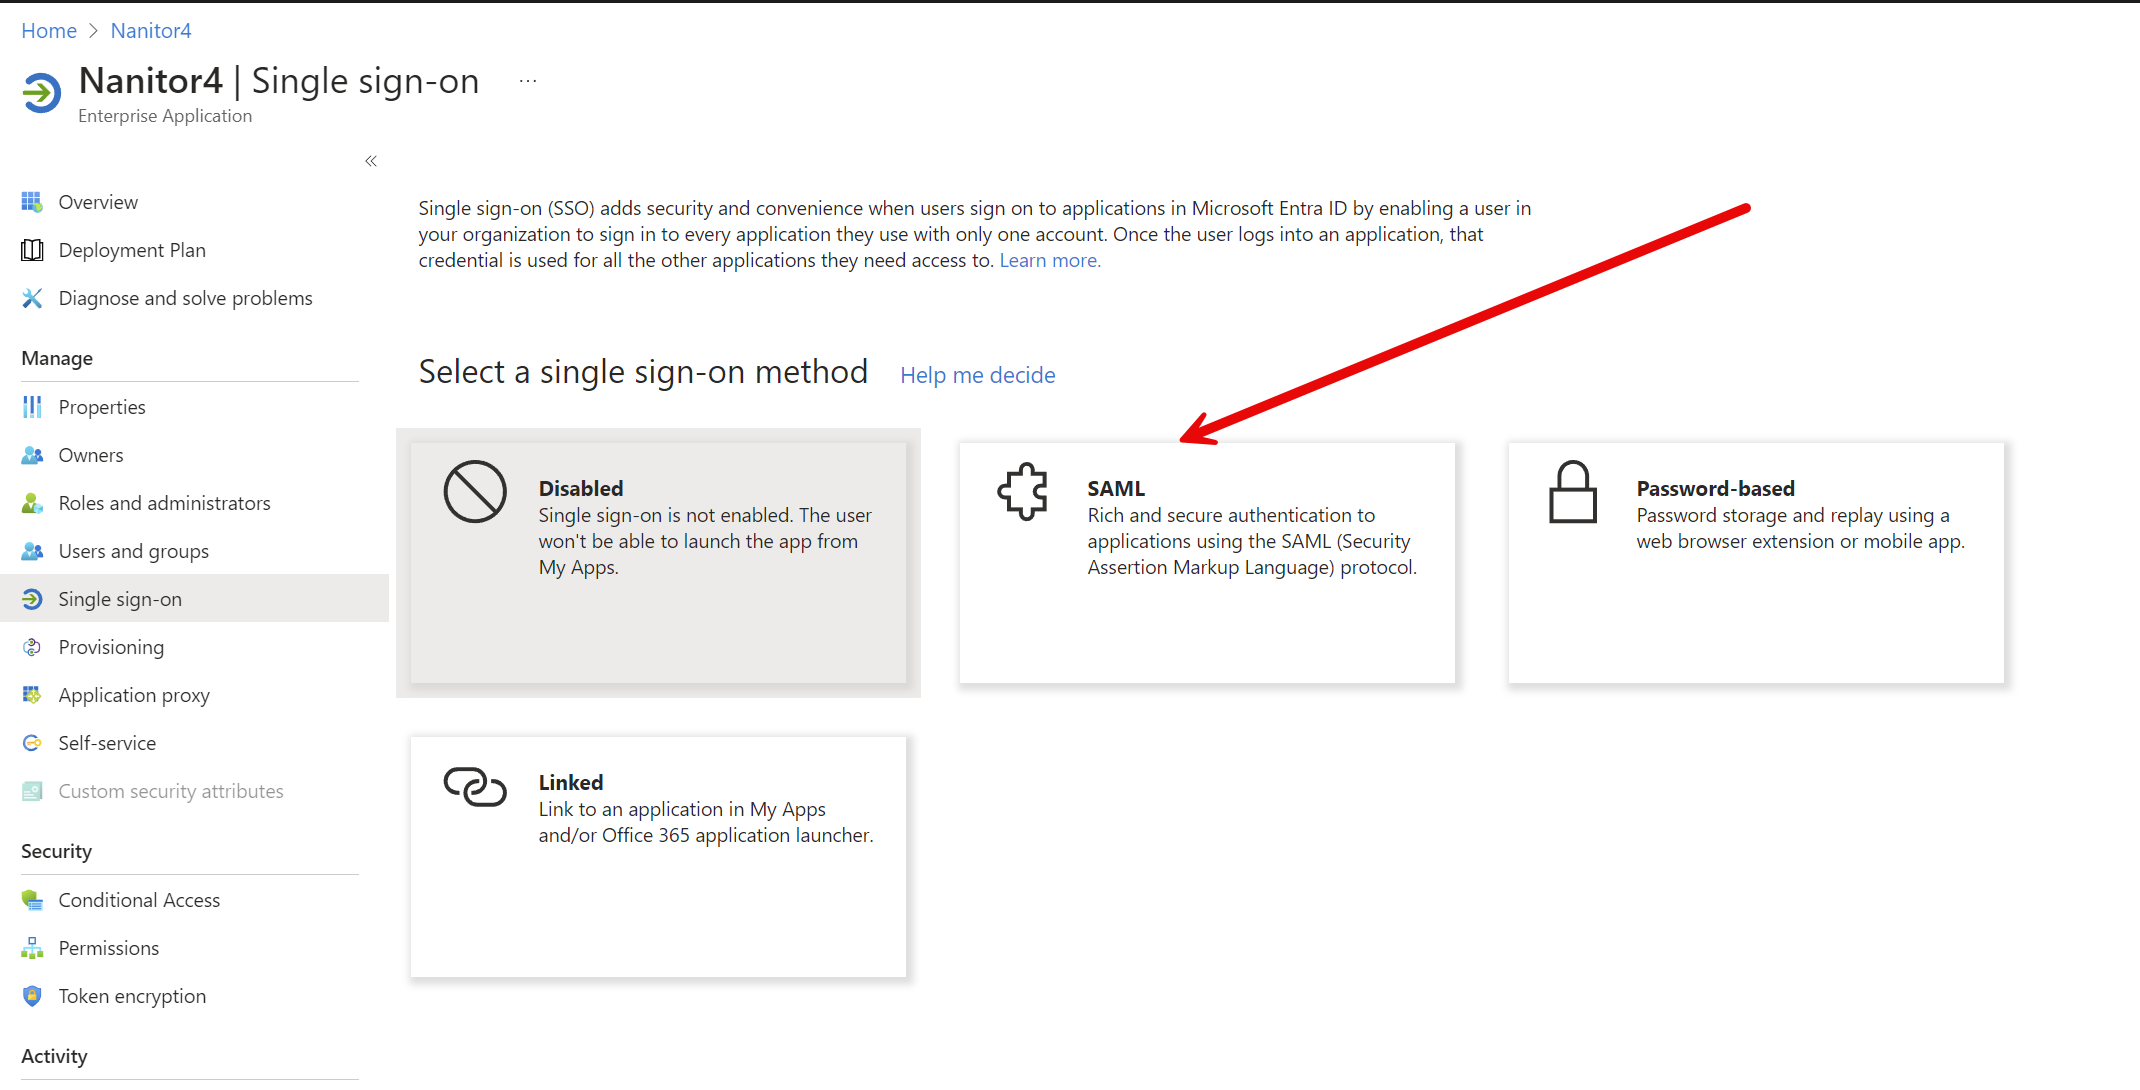
From the next screen, select SAML.
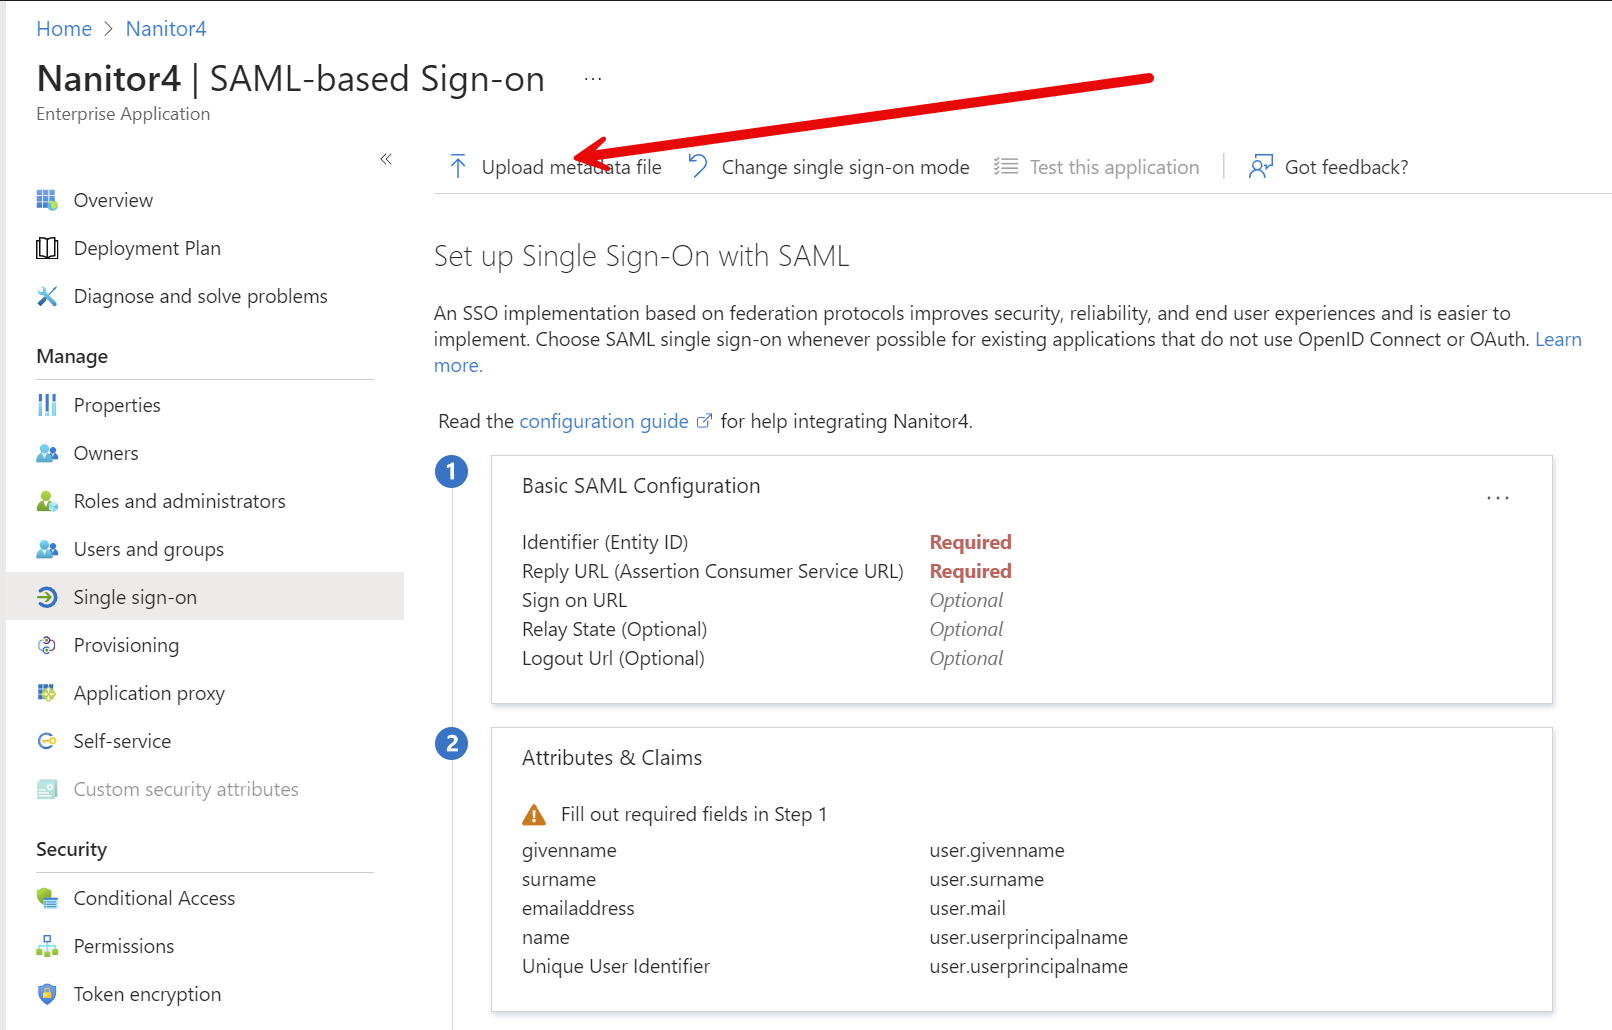
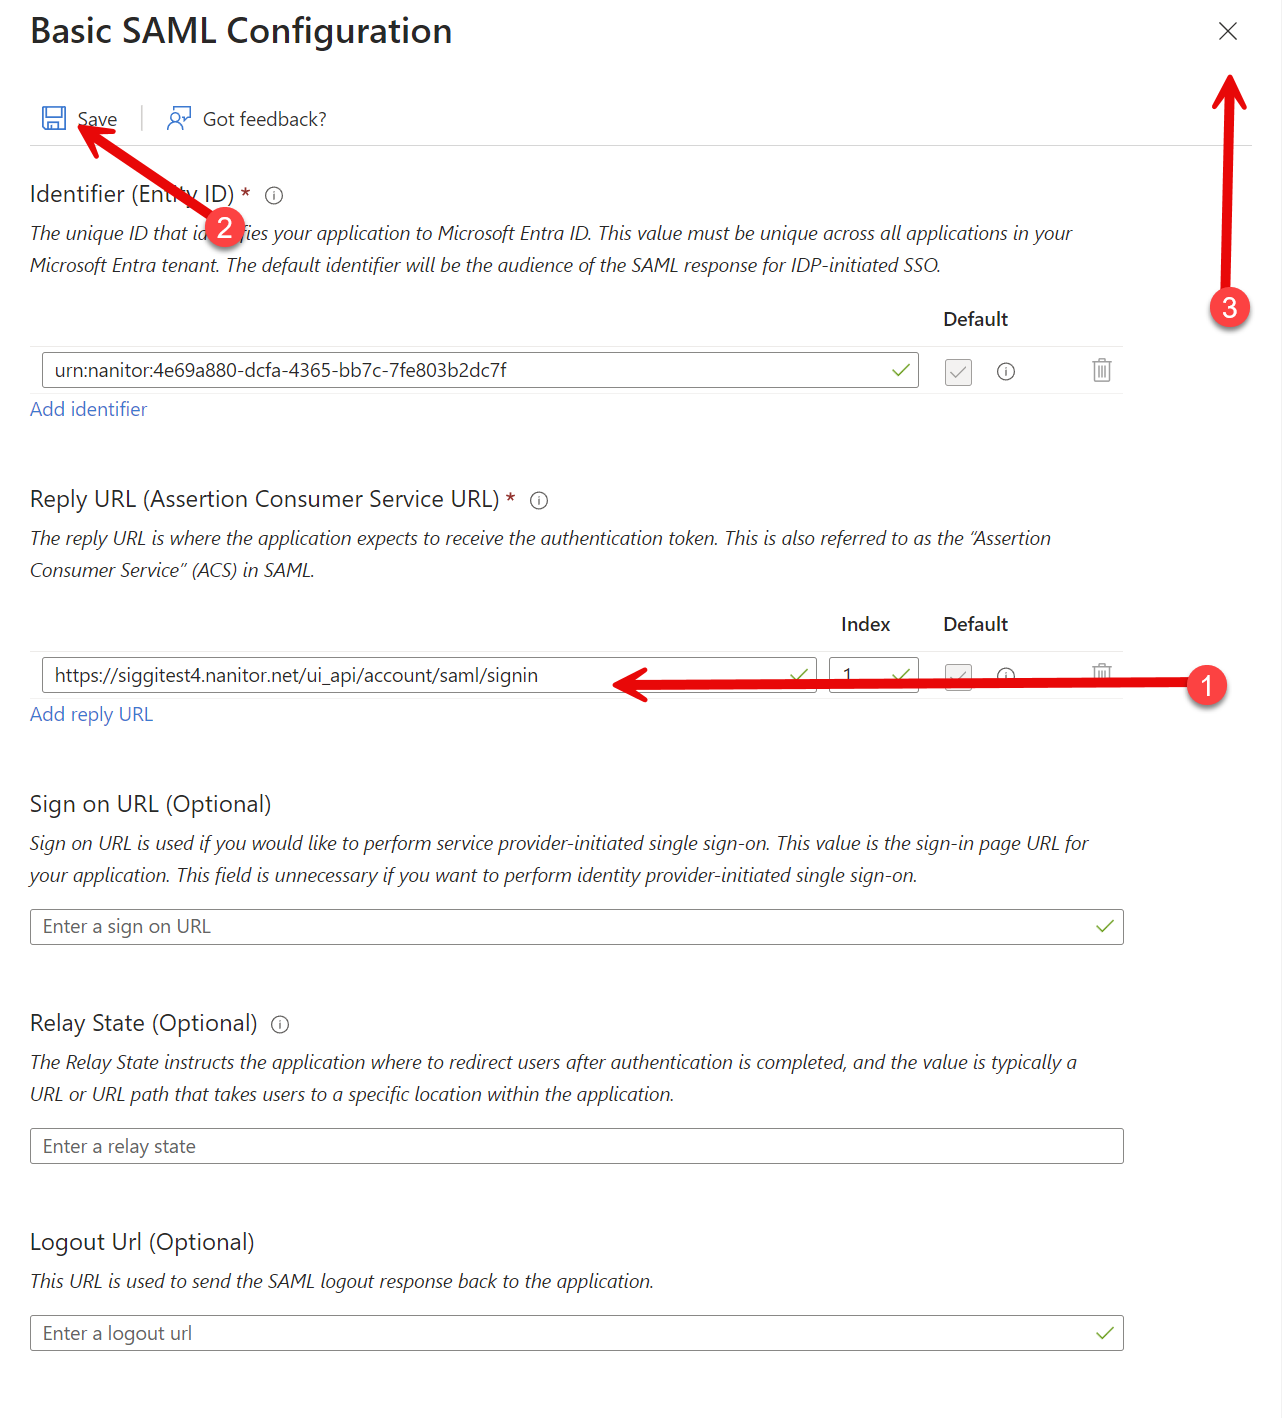
Now we can start configuring the application. Click on "Upload metadata file" near the top and upload the XML file you downloaded from the Nanitor system at the start of this journey.
On the next screen, confirm that there are no errors and that the Reply URL starts out the same as the URL you use to log into your system. If it doesn't, you may have uploaded the wrong XML file. If everything is good, all you have to do is click on Save near the top, then close the modal.
I recommend you skip testing the connection at this point and click on "No, I'll test later".
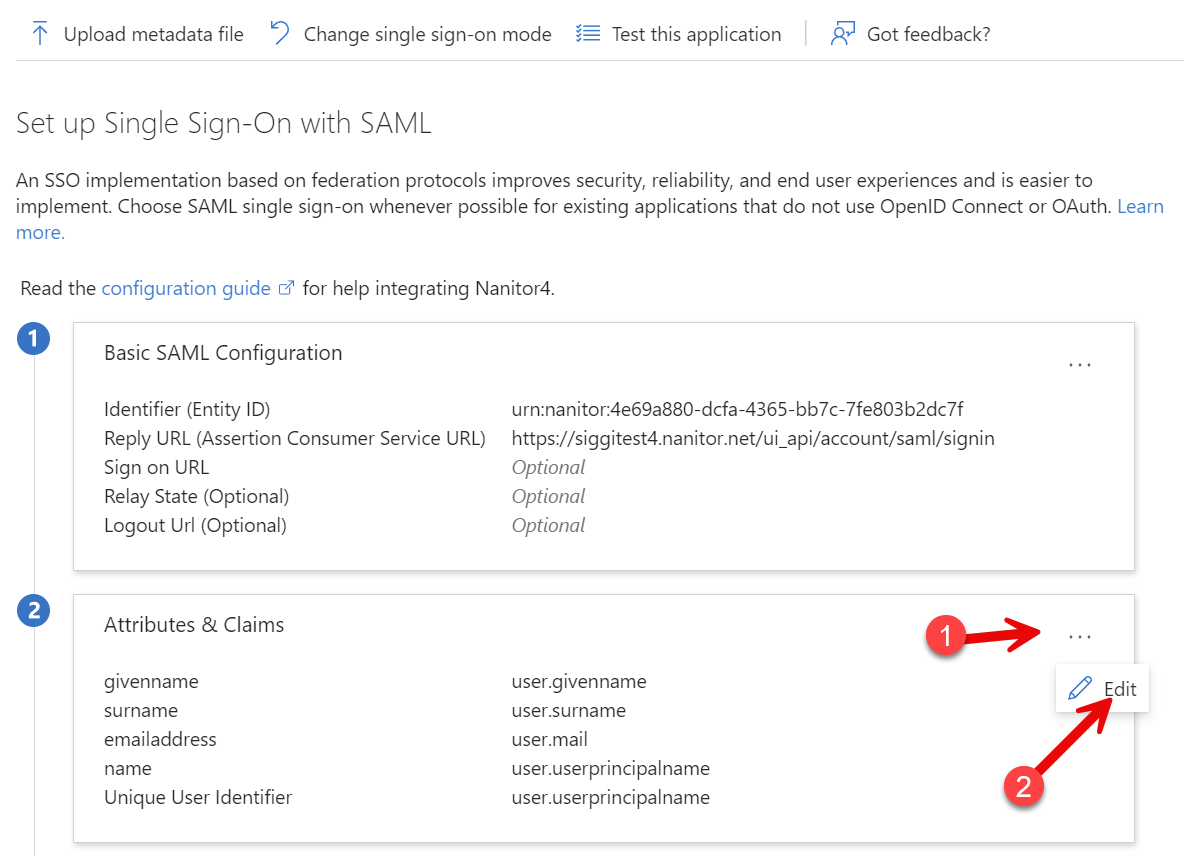
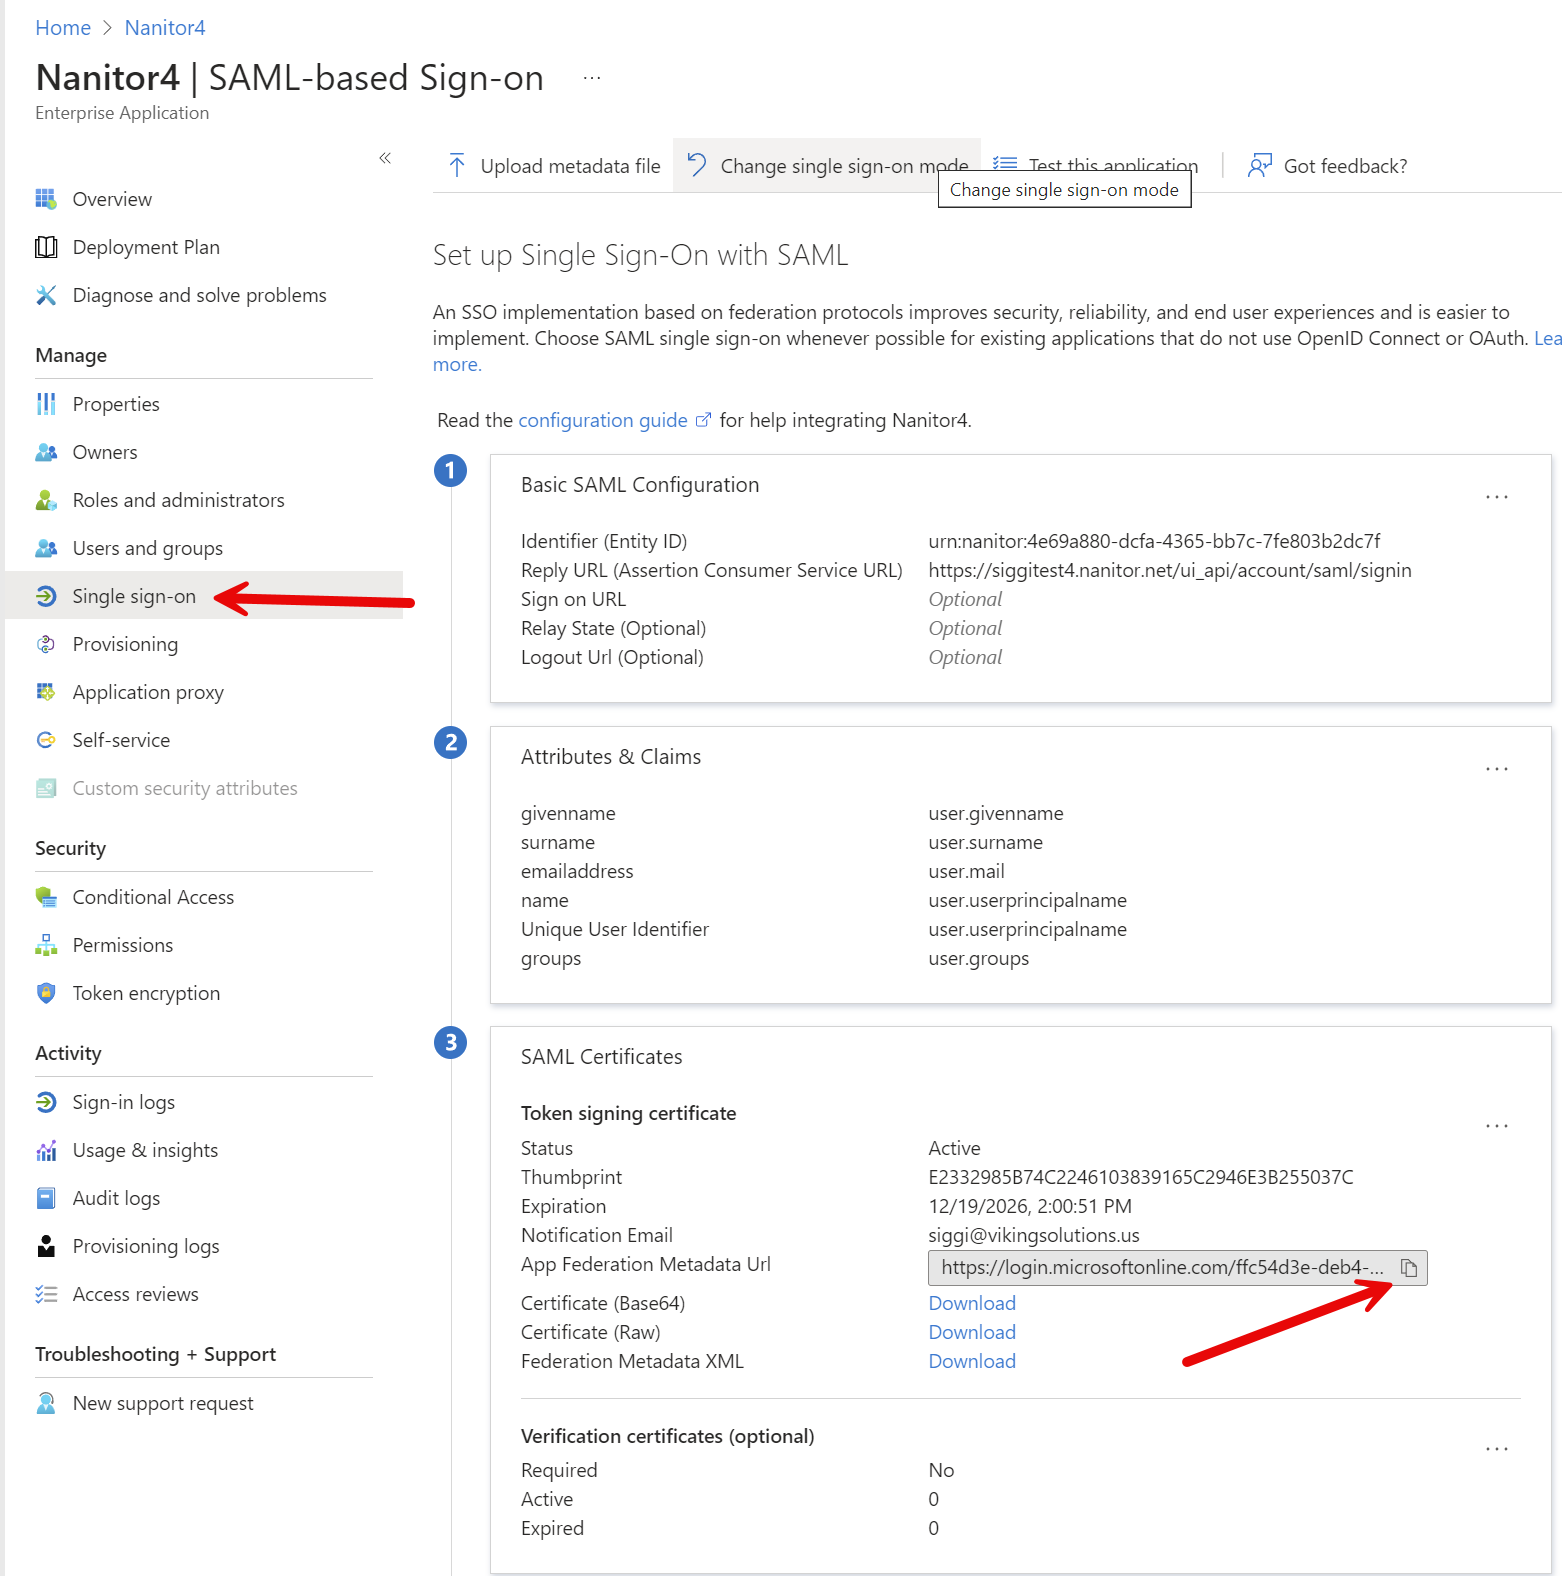
Next, we need to update the Attributes & Claims, so click the three dots and edit:
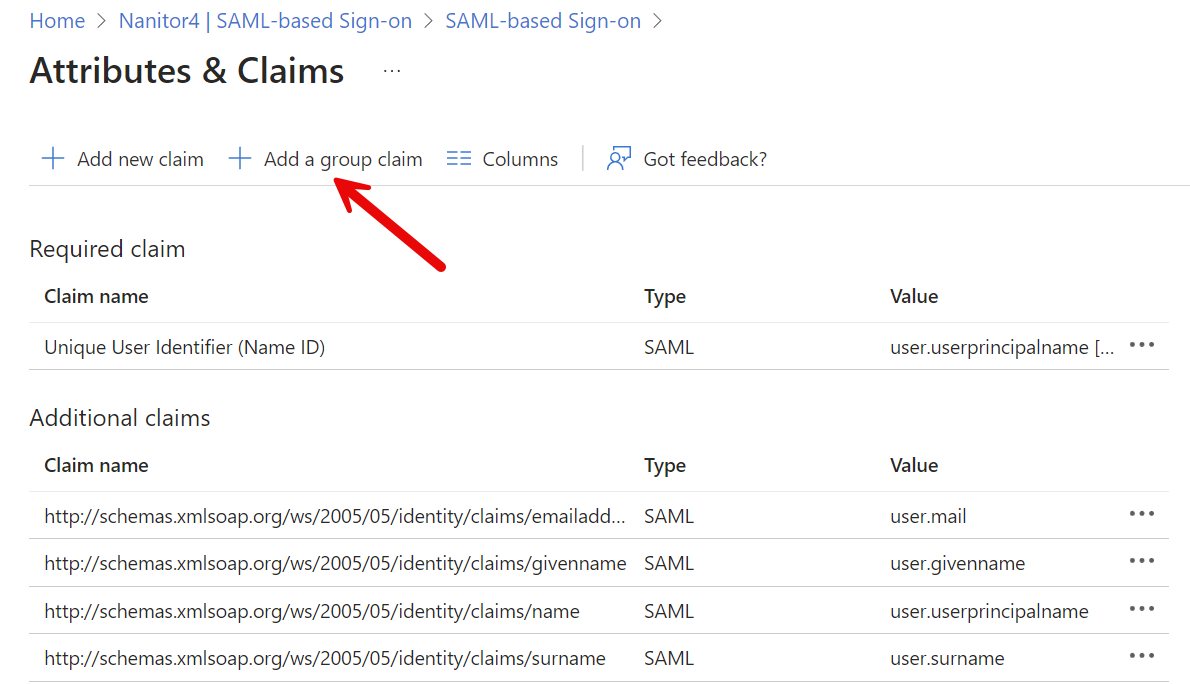
Click on "Add group claim".
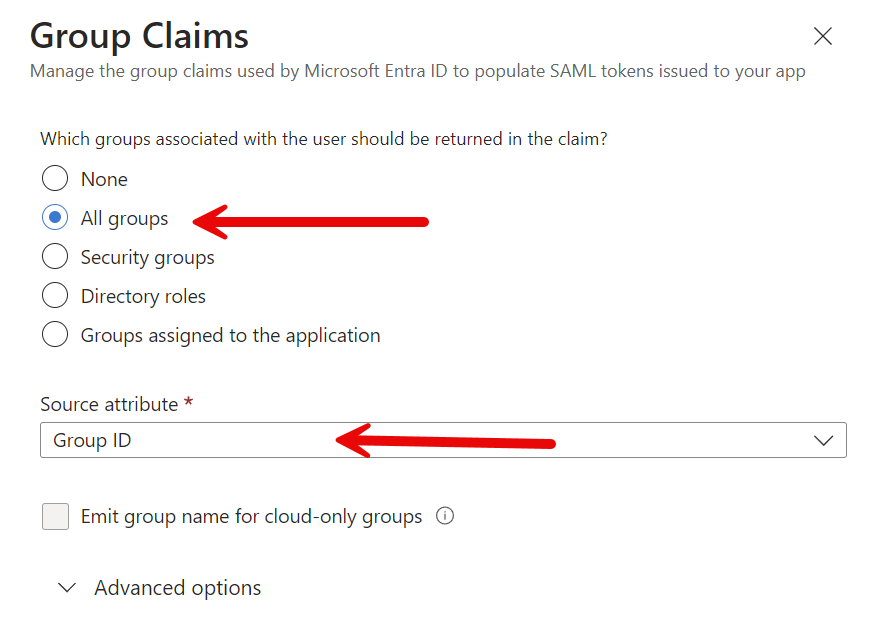
Select "Groups assigned to the application" and click Save. Leave the Source Attribute at the default Group ID.
Avoid Using 'All groups'
Do not select "All groups" here. When a user is a member of a large number of groups (around 150+), Azure replaces the group list in the SAML assertion with a Graph API link instead of sending the actual group IDs. Nanitor can't process this link, so group matching fails and the user gets a "does not have permission" error. Using "Groups assigned to the application" avoids this problem entirely and is the recommended setting.
Since we selected "Groups assigned to the application", we now need to assign the relevant groups to this enterprise app. This is also where you control which users can access Nanitor.
Click on "Users and Groups" in the left bar, then "Add user/group" near the top.
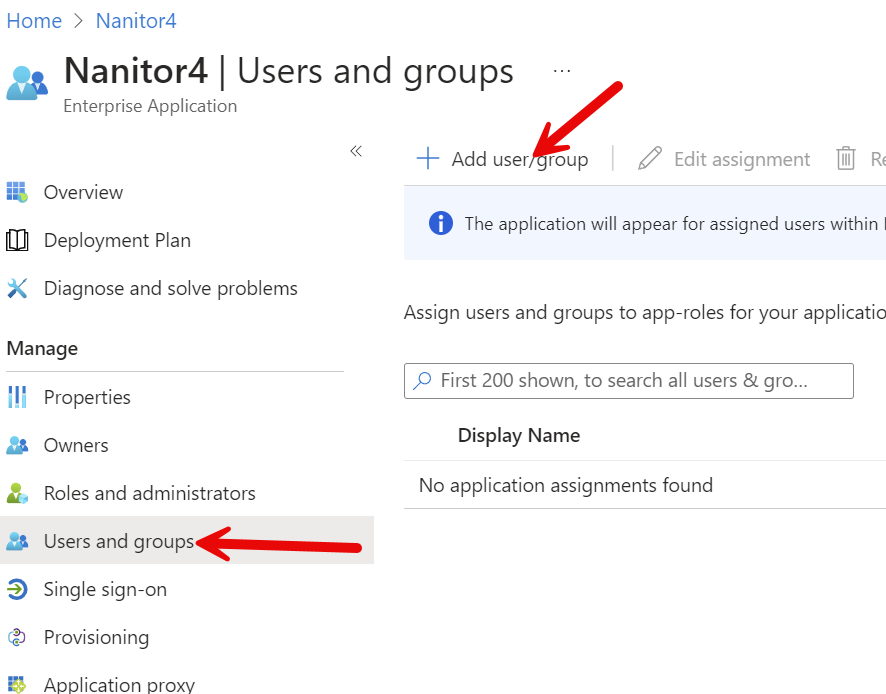
Add the group(s) you'll use for Nanitor organization mapping. Users need to be members of these groups to log in successfully — the group ties the user to a Nanitor role. Once you've assigned the groups, click on assign.
Then go back to "Single sign-on" on the left and find the App Federation Metadata URL, then copy that to your clipboard. You will need to paste this into Nanitor.
Configuring Nanitor System
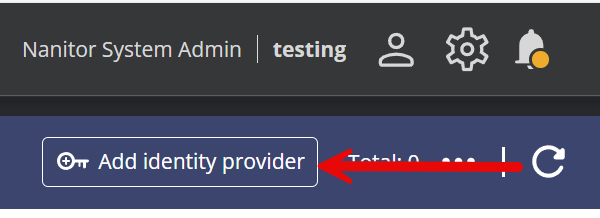
Now go back to your Nanitor instance, to the SAML identity provider screen you were on at the start of this journey, and click on "Add identity provider".
Provide a name that makes sense and paste in the URL you just copied and click ADD.
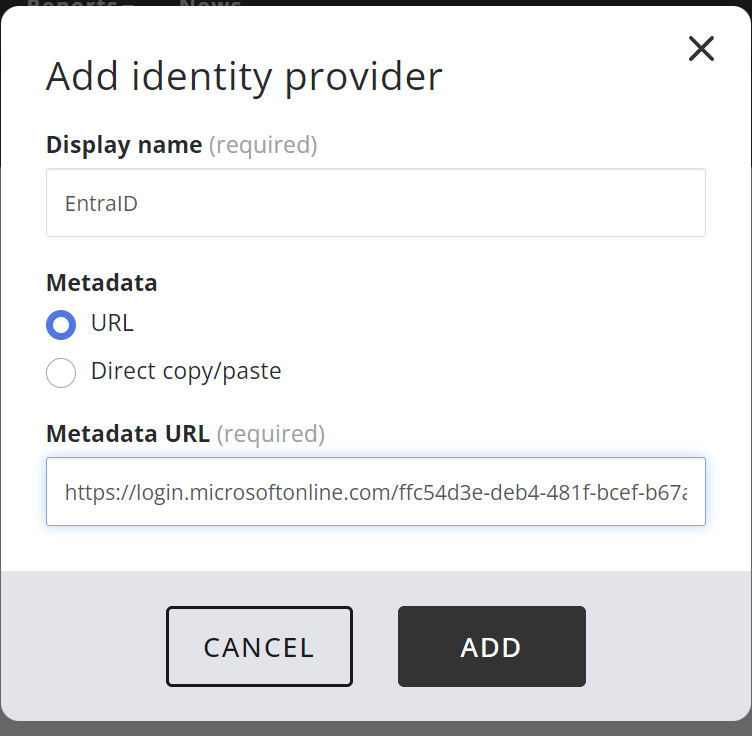
Note that the login screen will prefix the name you provide here with "Sign in with ". So if you use the string "EntraID" as I did in this example then the login screen will add a button with the text "Sign in with EntraID".
Mapping User Groups with Nanitor Privileges
The only thing left now is to map an EntraID user group to a Nanitor privilege. For this you need to start by grabbing the ObjectID from EntraID.
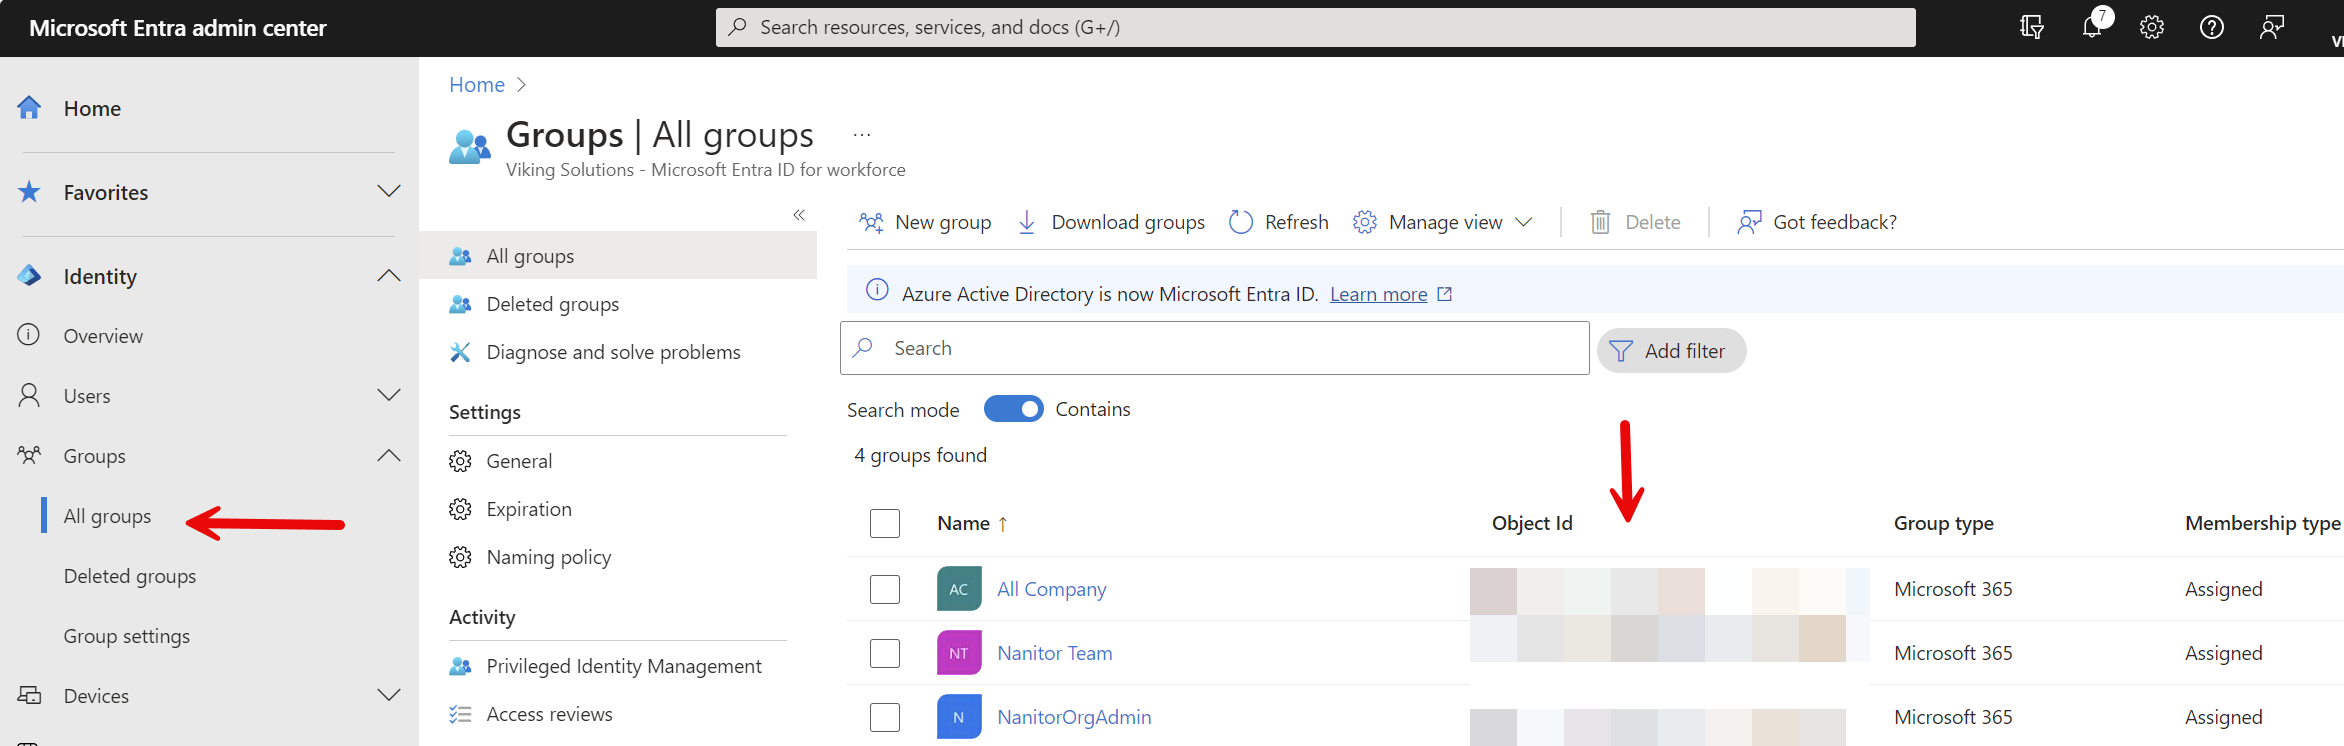
Then you come back to Nanitor and go into Organization management
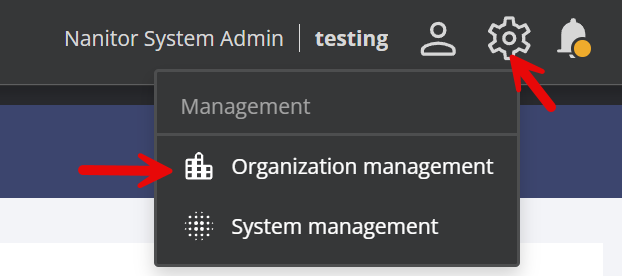
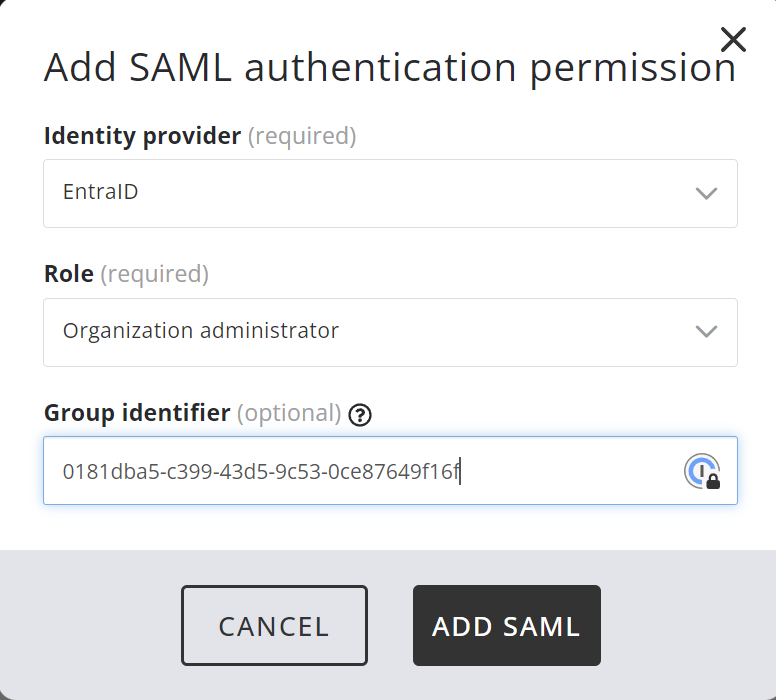
Select Users on the left and SAML Permissions, then click on "Add SAML permission"

Select the name you selected above ("EntraID" in this example), the role you want to assign, and the Object ID you copied from EntraID. Then click Add SAML. Repeat for all other permissions you want to assign.
That's all, folks; you're all done. As always, if you have any issues or questions reach out to our support team. The link to the ticketing system is in the footer of this site.