Working on rogue asset issues
Rogue asset issues arrive when you have network discovery turned on and it is finding devices that aren't already authorized in your instance. Authorized devices are devices with an agent installed that is successfully checking into your instance, or being successfully collected on by a collector, or previous rogue devices that have been marked as authorized devices.
For instructions on how to configure network discovery, please check out our Network discovery help article. For instructions on how to mark a rogue device as an authorized device, please read our Authorizing/unauthorizing rogue assets help article
Here we will focus on proposing a strategy on how to determine whether a device flagged as a rogue device is indeed rogue or an authorized device that has not yet been added to the system.
In essence, you have to do a lot of detective work to figure out what this device is. Start with what you know.
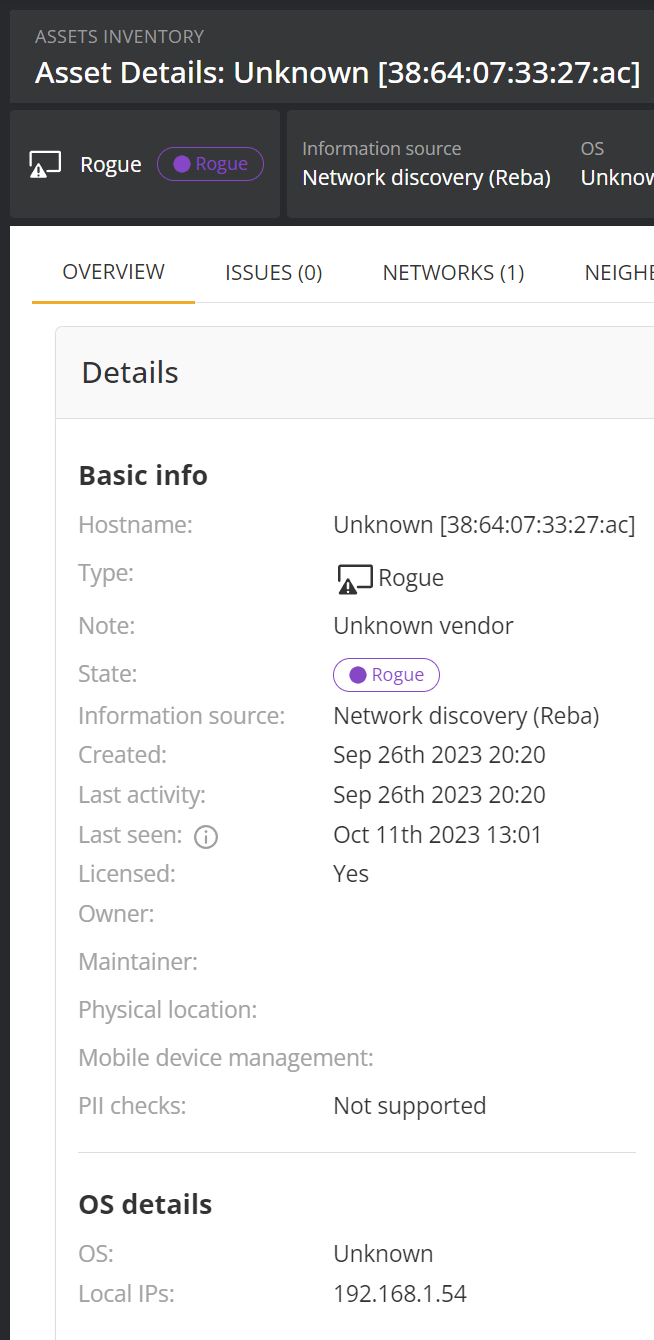
There is typically not a whole lot of information to go on, to begin with. Here we can see that a device named Reba found a device with the IP of 192.168.1.54 on the network and flagged it as rogue. You should also take note of the MAC address. The created date is the date it was first noticed on the network and last seen tells you when this device was last seen on the network. This screenshot was taken just a few minutes past the last seen date, telling us that this device is currently active on the network. The last activity date is meaningless for rogue and unmonitored devices as it will always be the created date.
Next, you should try to probe this device to see what ports it has open. This is often an excellent clue as to what sort of device this is.
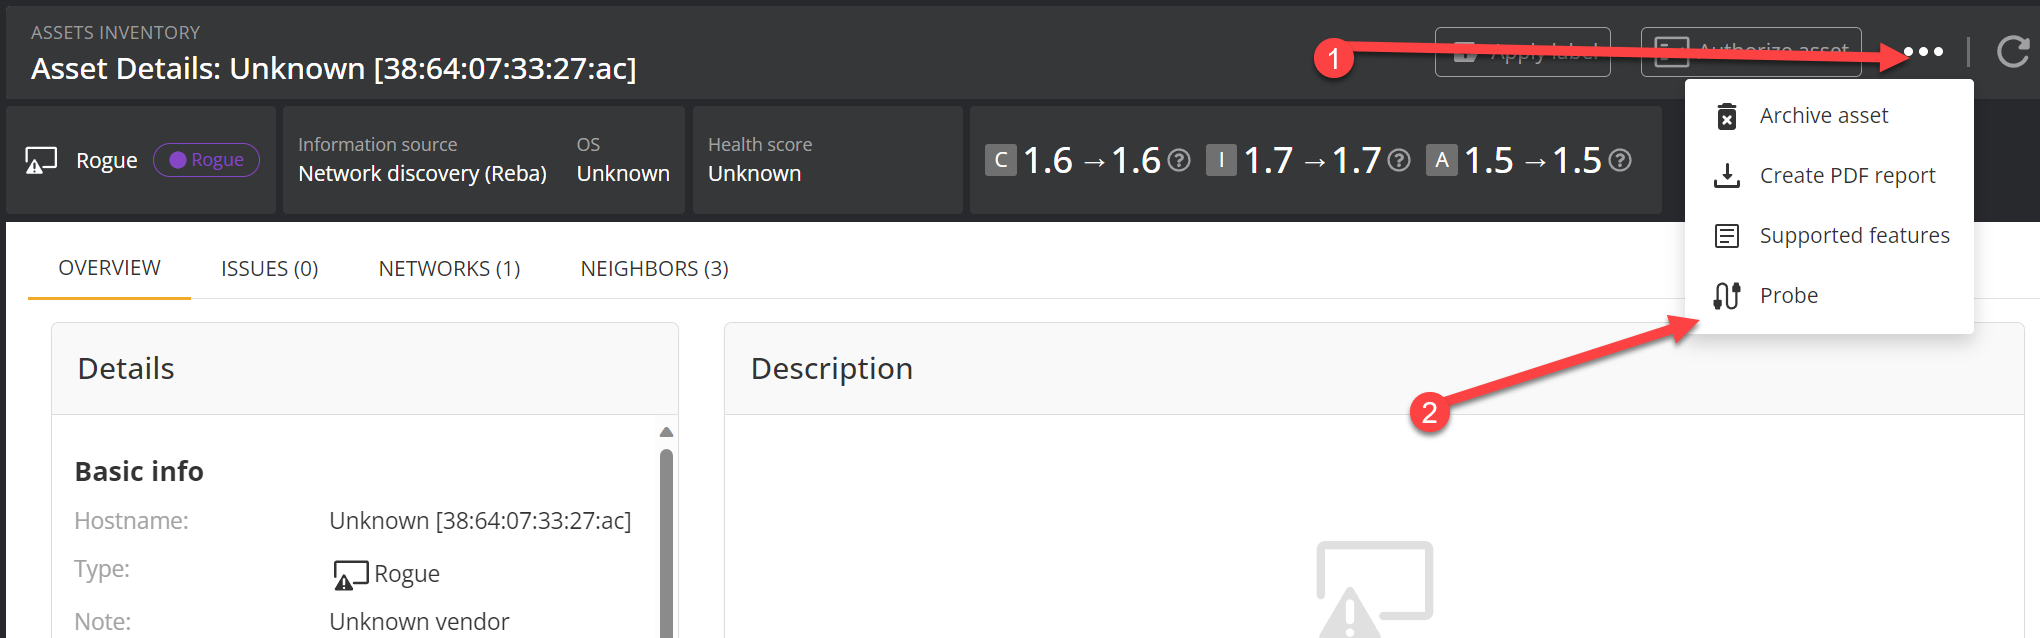
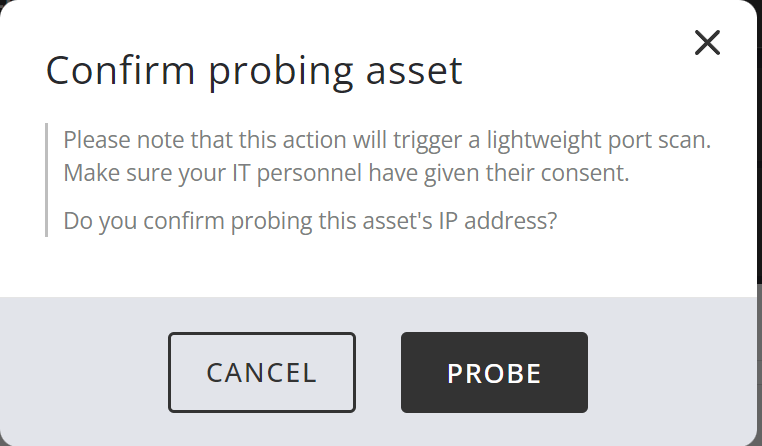
Confirm that you know what you are doing:
Now, when you look back at the detail screen, you'll see confirmation that the probe has been requested and which device was assigned to do the probing. The probing device isn't necessarily the device listed as the device that discovered it if has been discovered by muliple devices.
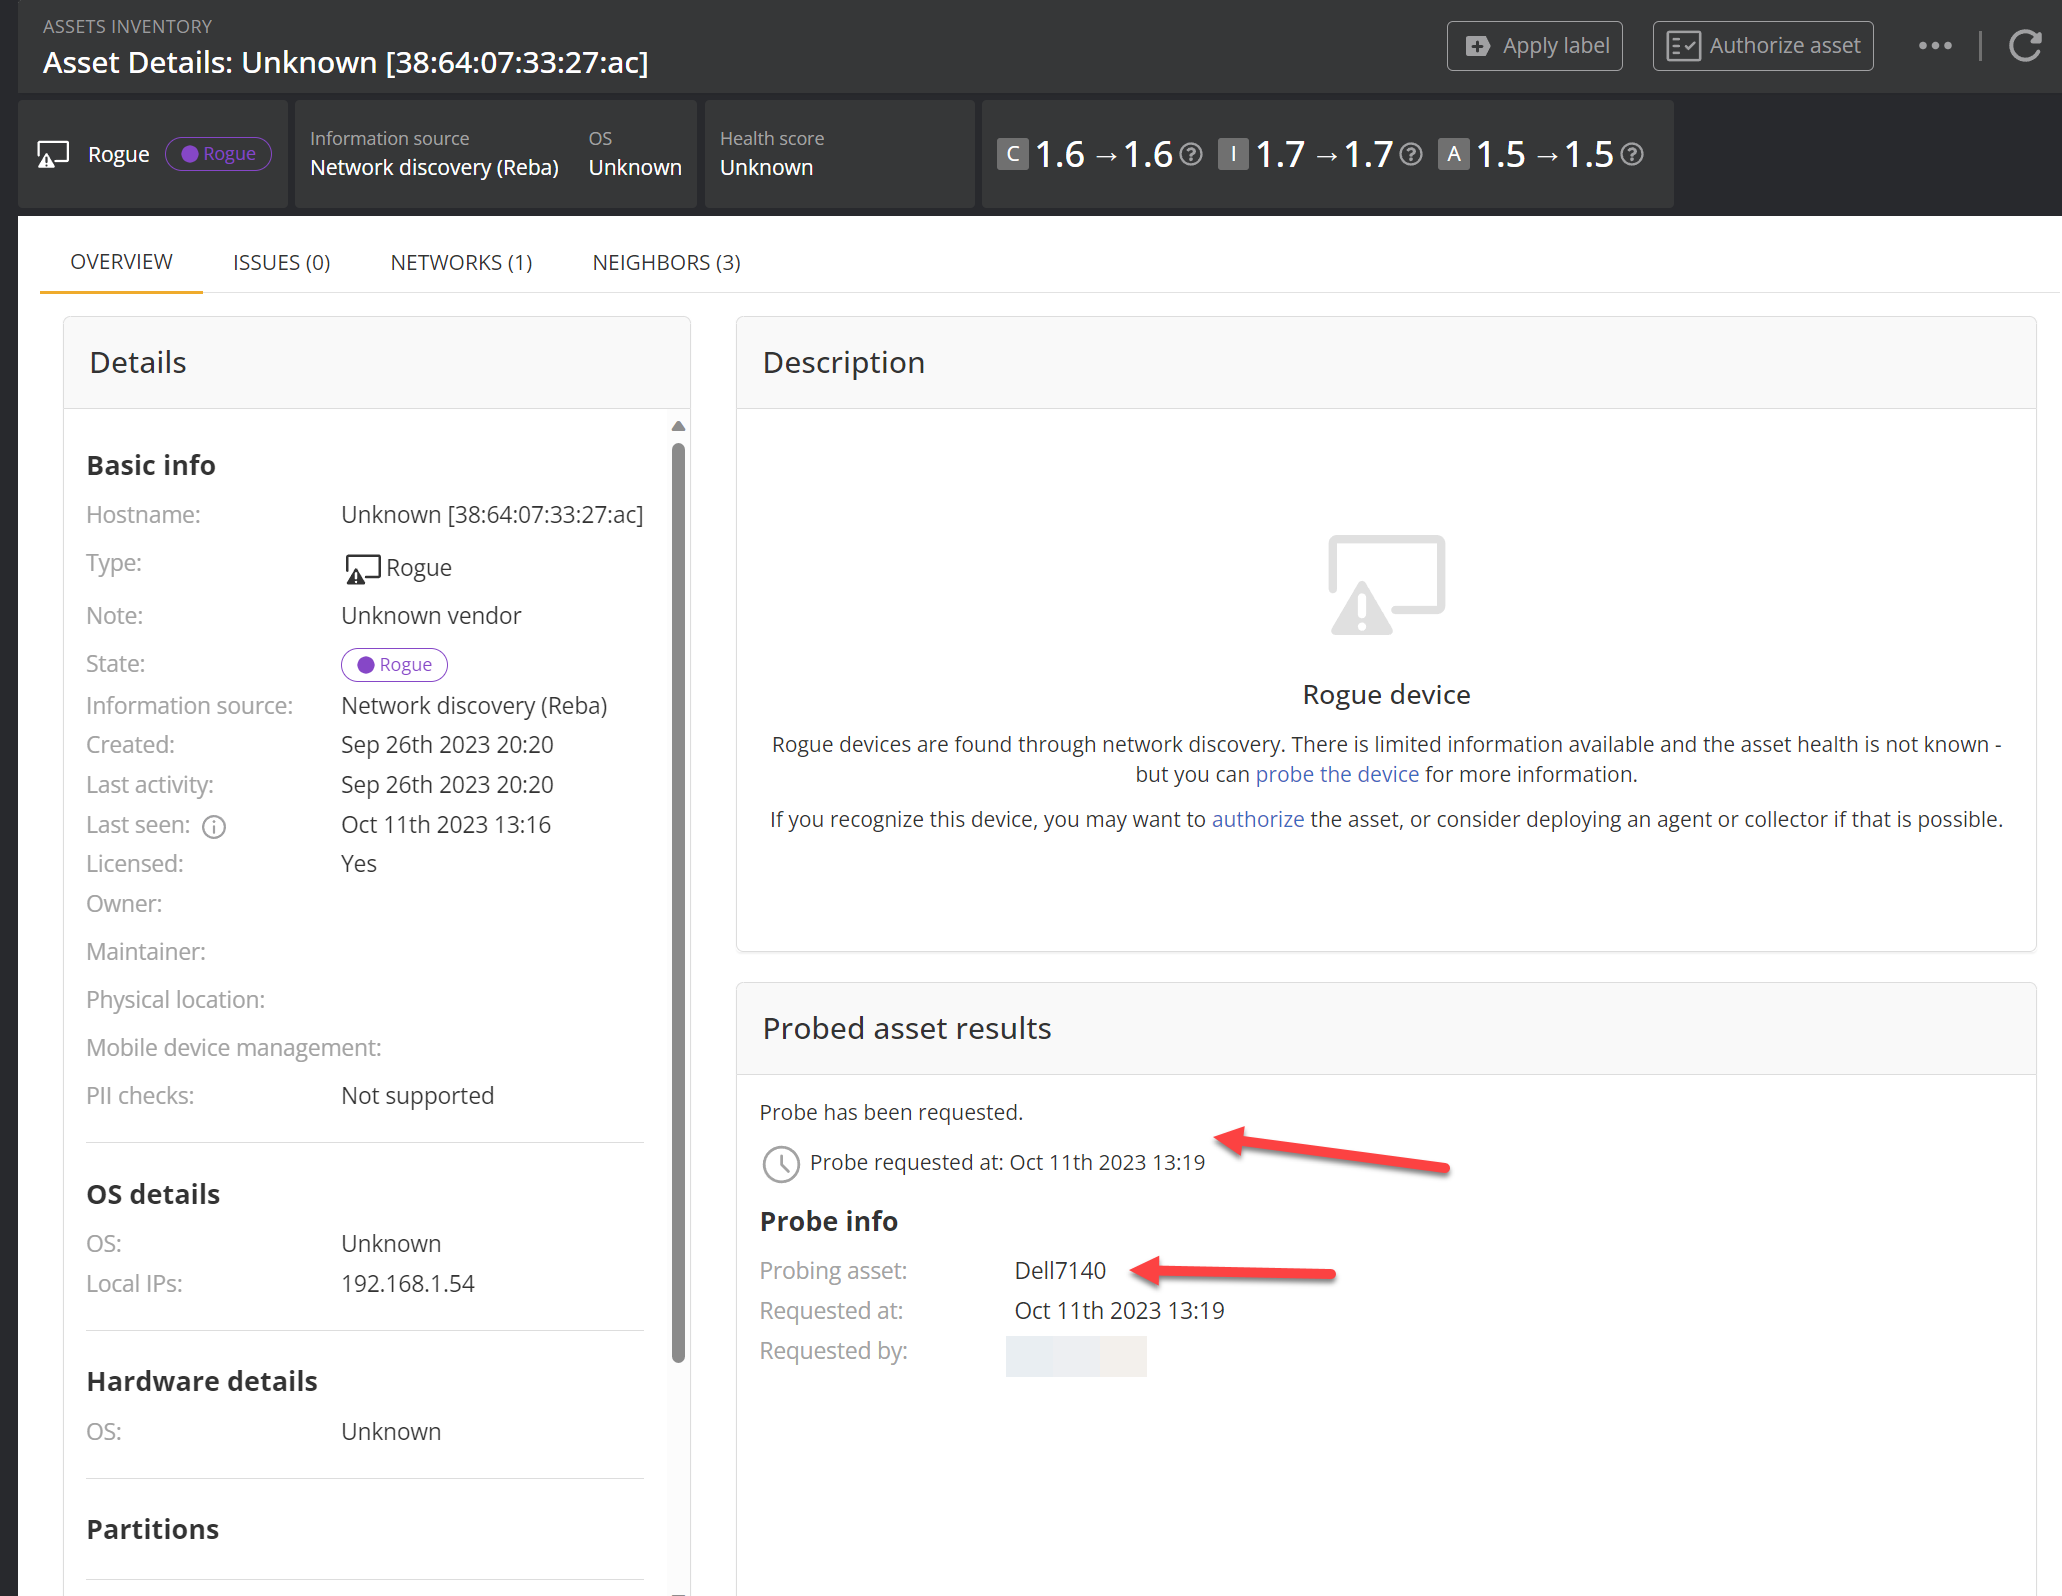
Probing will take a few minutes, so at this stage, it is best to turn your attention to a different device and get probing requested for a few more devices.
After a few minutes, come back to this device and refresh, and the results should be there for you.
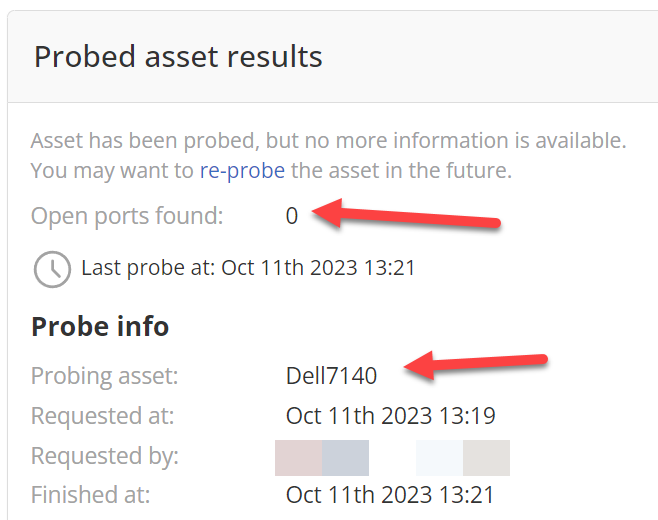
If you are unlucky, the probe won't find anything as in this example above. This tells you that whatever device this is, it is a well-hardened and secured device with no management interface. While not very helpful information, it is still good information to take note of.
Next you are going to want to check out who is seeing this device active on the network, which you can see from the network tab.
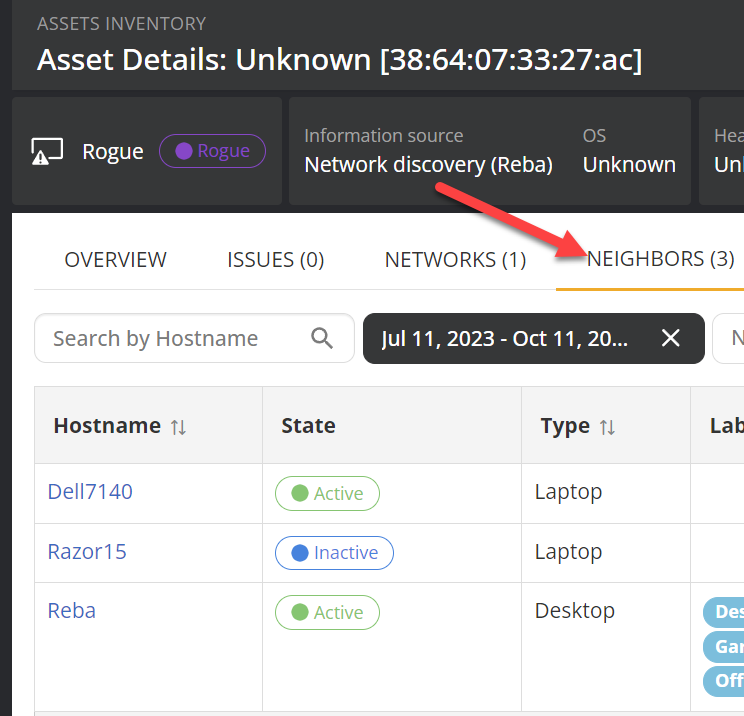
This should tell you which part of the network to look at, as a device has to be on the same subnet to discover a rogue device. This should cut down your haystack significantly, especially if your network is well-designed with micro-segmentation. Just look up what network segment the neighbors are all in, and the rogue device is going to be in that segment.
The last step here is to see if you have any documentation on what this IP/MAC address is. If not, then go to your networking device and trace out where this device is located. The details on how to perform that trace are outside the scope of this article; however, you do this by following the router routing table to see where that IP address is routed to, then at the last hop use ARP to confirm the IP to MAC mapping. From there, use the switch's CAM table to find out what physical port that MAC address is found on. Once you know the physical port, you can trace the cable to the actual device.