Setting up SAML (generic)
Introduction
Setting up Nanitor to support login with SAML is fairly straightforward. You will need to be a system administrator in Nanitor and an admin in your identity provider to set up the integration.
This article will give you instructions on how to add your favorite identity provider, focusing on Nanitor side of things. You'll have to know your identity provider. For specific instructions related to identity providers we formally support please see SAML topic
Downloading Service Provider Metadata
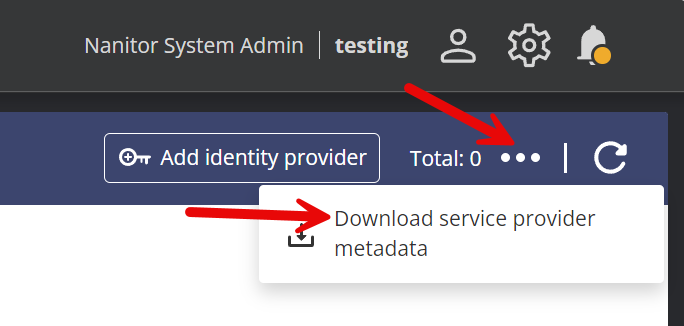
You need to start by downloading an XML file from Nanitor that you then need to upload to your identity provider containing various settings. Here is how you do that:
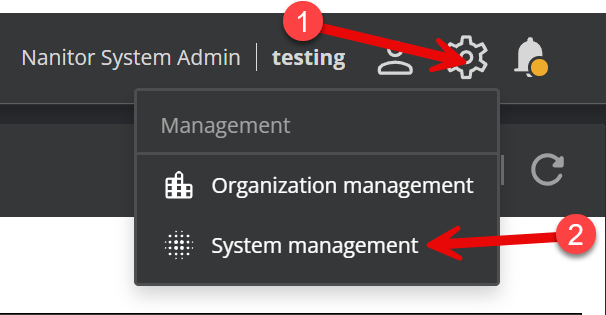
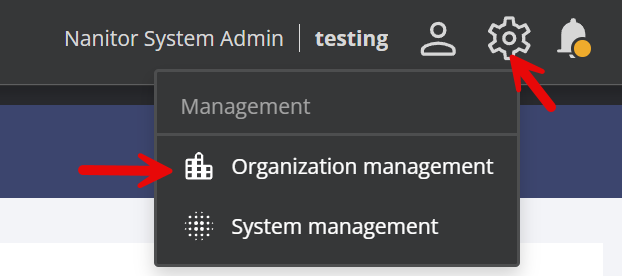
Start by logging in to Nanitor with your system admin credentials, then click on the wheel in the upper right and select System Management. If System management isn't available, then your user probably does not have system admin permissions (note that having organization admin permissions is not enough). You can contact another Nanitor system admin or submit a support ticket to Nanitor to gain system admin access. If you are self hosted with access to the server running Nanitor check out this article.
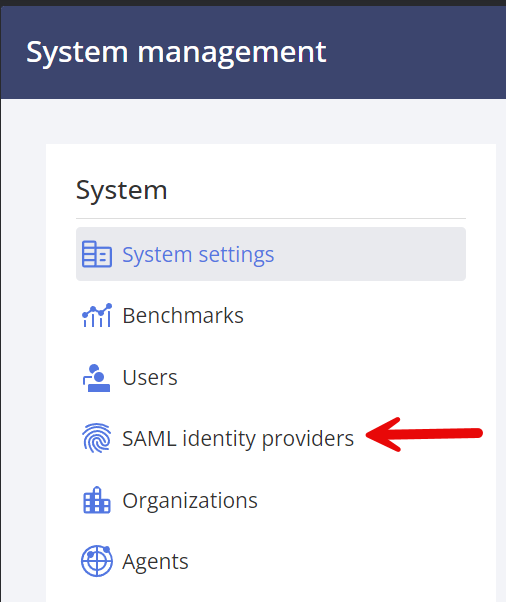
Next, select SAML identity providers in the left bar:
Then click the three dots and "Download service provider metadata":
SAML user attributes
Nanitor picks up specific attributes from the SAML assertion to populate user profiles. You'll need to set these up in your identity provider so that Nanitor gets the right information.
Required
| Attribute | Purpose |
|---|---|
NameID (email format) |
Identifies the user. This must be the user's email address. |
Recommended
| Attribute Name | Claim URI | Purpose |
|---|---|---|
displayname |
http://schemas.microsoft.com/identity/claims/displayname |
Full display name |
givenname |
http://schemas.xmlsoap.org/ws/2005/05/identity/claims/givenname |
First name |
surname |
http://schemas.xmlsoap.org/ws/2005/05/identity/claims/surname |
Last name |
groups |
http://schemas.microsoft.com/ws/2008/06/identity/claims/groups |
Group membership for permissions mapping |
Nanitor matches attributes using either the short name (e.g. givenname) or the full claim URI. The match is case-insensitive.
How Nanitor resolves the display name
- If
displaynameis present, that's used as the user's full name. - If
displaynameis missing butgivennameand/orsurnameare present, Nanitor concatenates them into the full name. - If no name attributes are sent at all, the user's full name will be blank — this causes issues like empty entries in user dropdowns.
Make sure you configure at least givenname and surname in your identity provider, even if displayname isn't available. Some identity providers (e.g. FortiAuthenticator) don't send a display name by default — check the FortiAuthenticator SAML guide for specific steps.
Verifying SAML Attributes
If users show up with blank names after SAML login, use a browser extension like SAML-tracer (available for Chrome and Firefox) to inspect the SAML response and check which attributes your identity provider is actually sending.
Steps in your identity provider
- Create a new application.
- Enable SAML authentication for the application.
- Upload the XML file, or apply the values from it manually. Refer to your identity provider specialist for details.
- Set up the SAML assertion attributes listed above. At a minimum, make sure
givennameandsurnameare included so that user names show up correctly in Nanitor. - Enable the group claim attribute if possible so that the user's group ID is included in the response from your identity provider. If you don't do this, Nanitor won't be able to assign permissions based on user groups, giving all users who log in with this identity provider the same level of access by default. If your identity provider supports it, send only groups assigned to the application rather than all groups — this avoids issues with group limits (e.g. Azure replaces the group list with a link when a user is in 150+ groups, which Nanitor can't process).
- Associate the appropriate user groups with this new application.
- Find the App Federation Metadata URL, then copy that to your clipboard. You will need to paste this into Nanitor.
Configuring Nanitor System
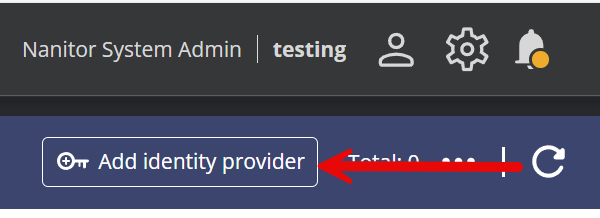
Now go back to your Nanitor instance, to the SAML identity provider screen you were on at the start of this journey, and click on "Add identity provider".
Provide a name that makes sense and paste in the URL you just copied and click ADD.
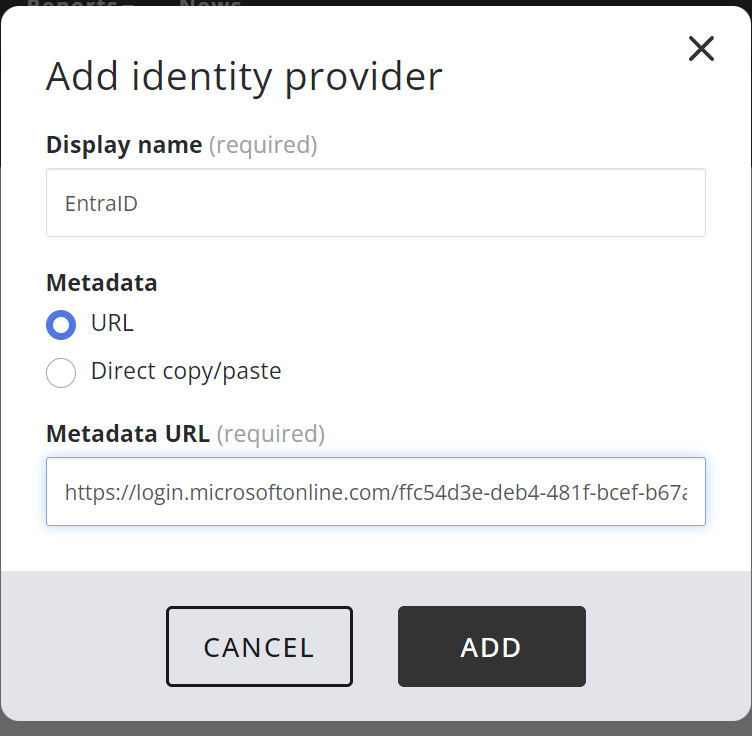
Note that the login screen will prefix the name you provide here with "Sign in with ". So if you use the string "EntraID" as I did in this example then the login screen will add a button with the text "Sign in with EntraID".
Mapping User Groups with Nanitor Privileges
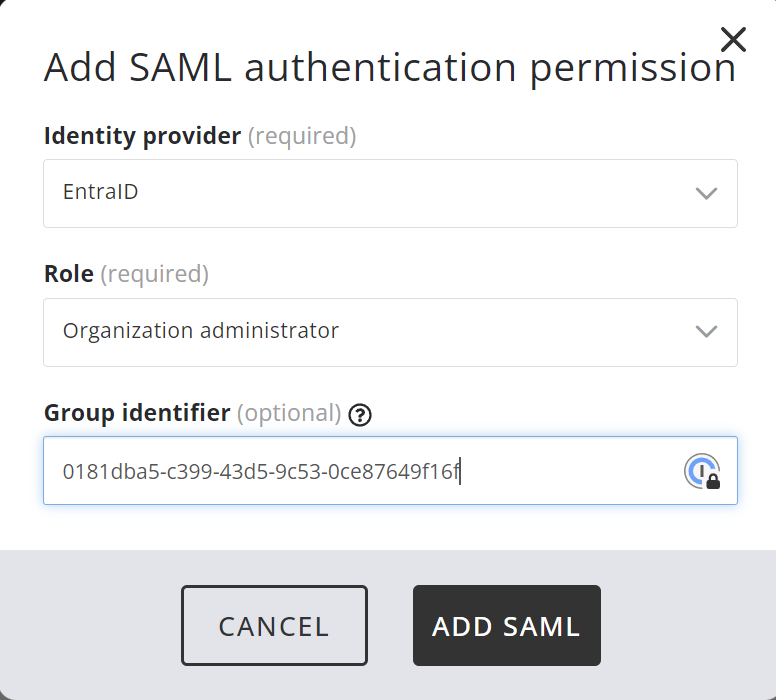
The only thing left now is to map your identity provider's user groups to Nanitor roles. For this, you need to start by grabbing the ObjectID for the group from the identity provider.
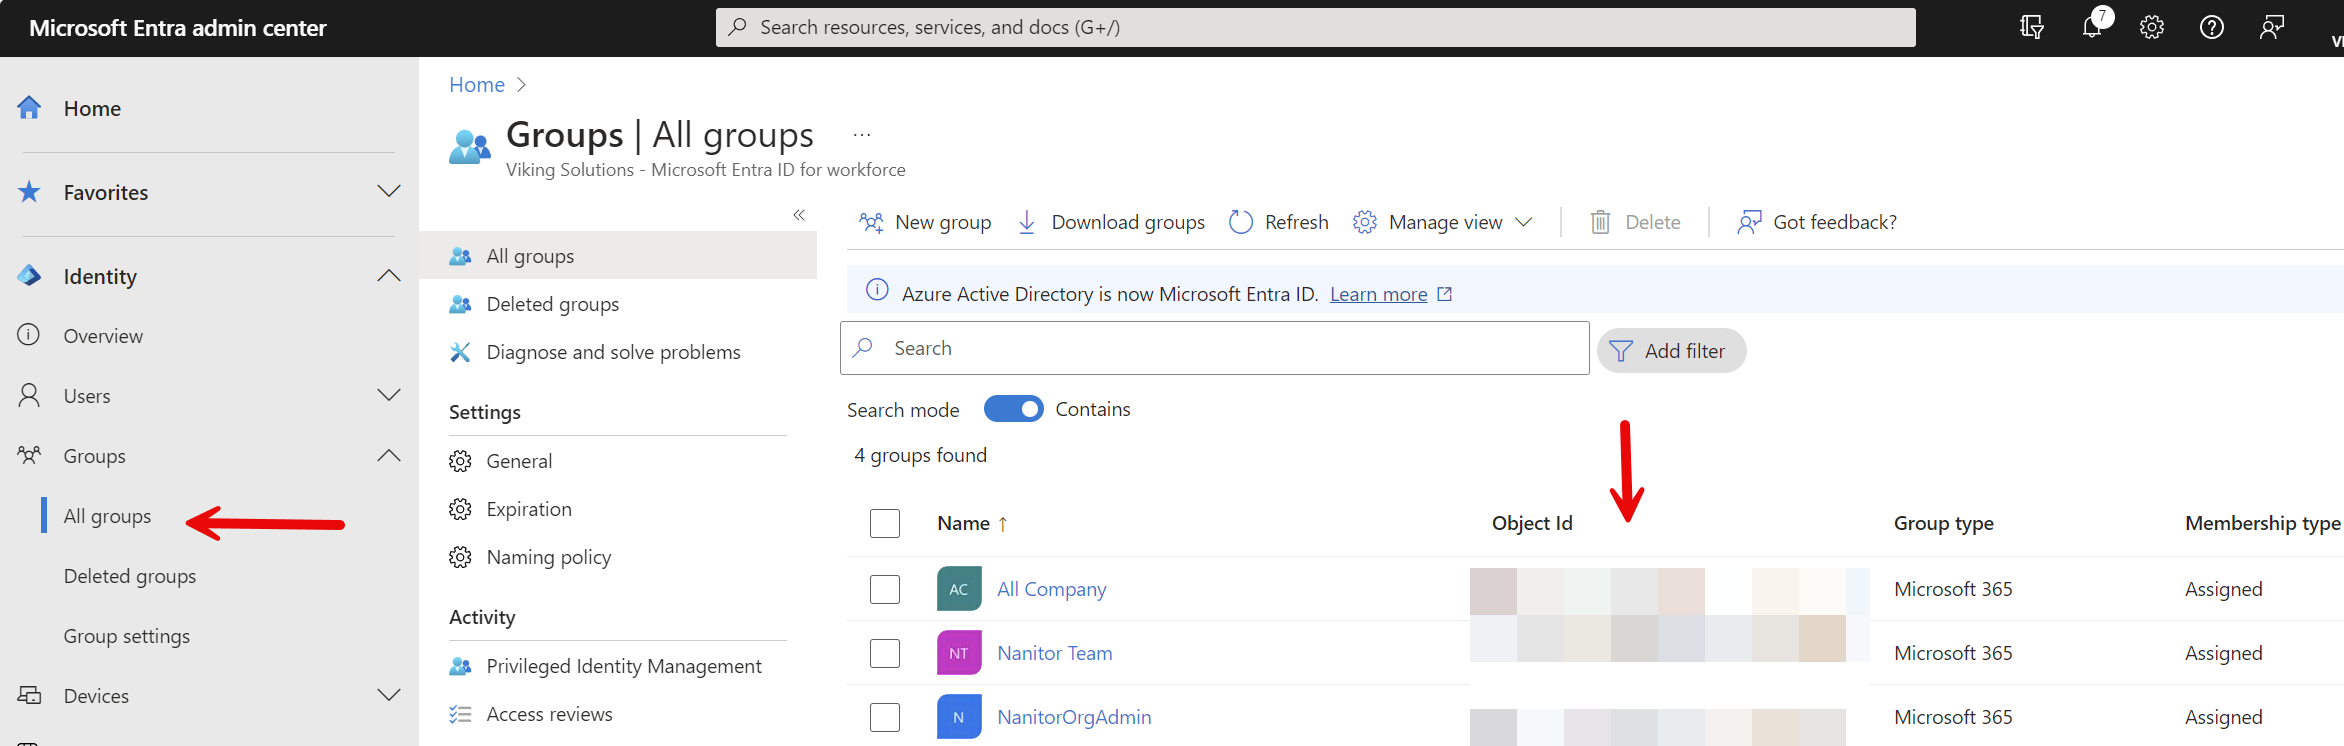
Then return to Nanitor and go into Organization management.
Select Users on the left and click the SAML Permissions tab, then click on "Add SAML permission".

Select the name you selected above ("EntraID" in this example), the role you want to assign, and the Object ID you copied from the identity provider. Then click Add SAML. Repeat for all other permissions you want to assign. If you leave the group ID blank, then all users who log in with the identity provider will get this role assigned.
That's all, folks; you're all done. As always, if you have any issues or questions reach out to our support team. The link to the ticketing system is in the footer of this site.