How do I create my security baseline in configurations?
Your baseline defines what security checks your organization wants to fulfill per benchmark. It is a subset of all the checks that Nanitor offers. Upon installation, Nanitor ships with a best practice baseline based on CSI guidelines and Nanitor recommendations. You may want to customize your baseline, i.e., add or remove checks from your baseline.
To view all the benchmarks navigate to Configurations --> Security Configurations

To view a specific benchmark click on the name, for example, Windows 10.
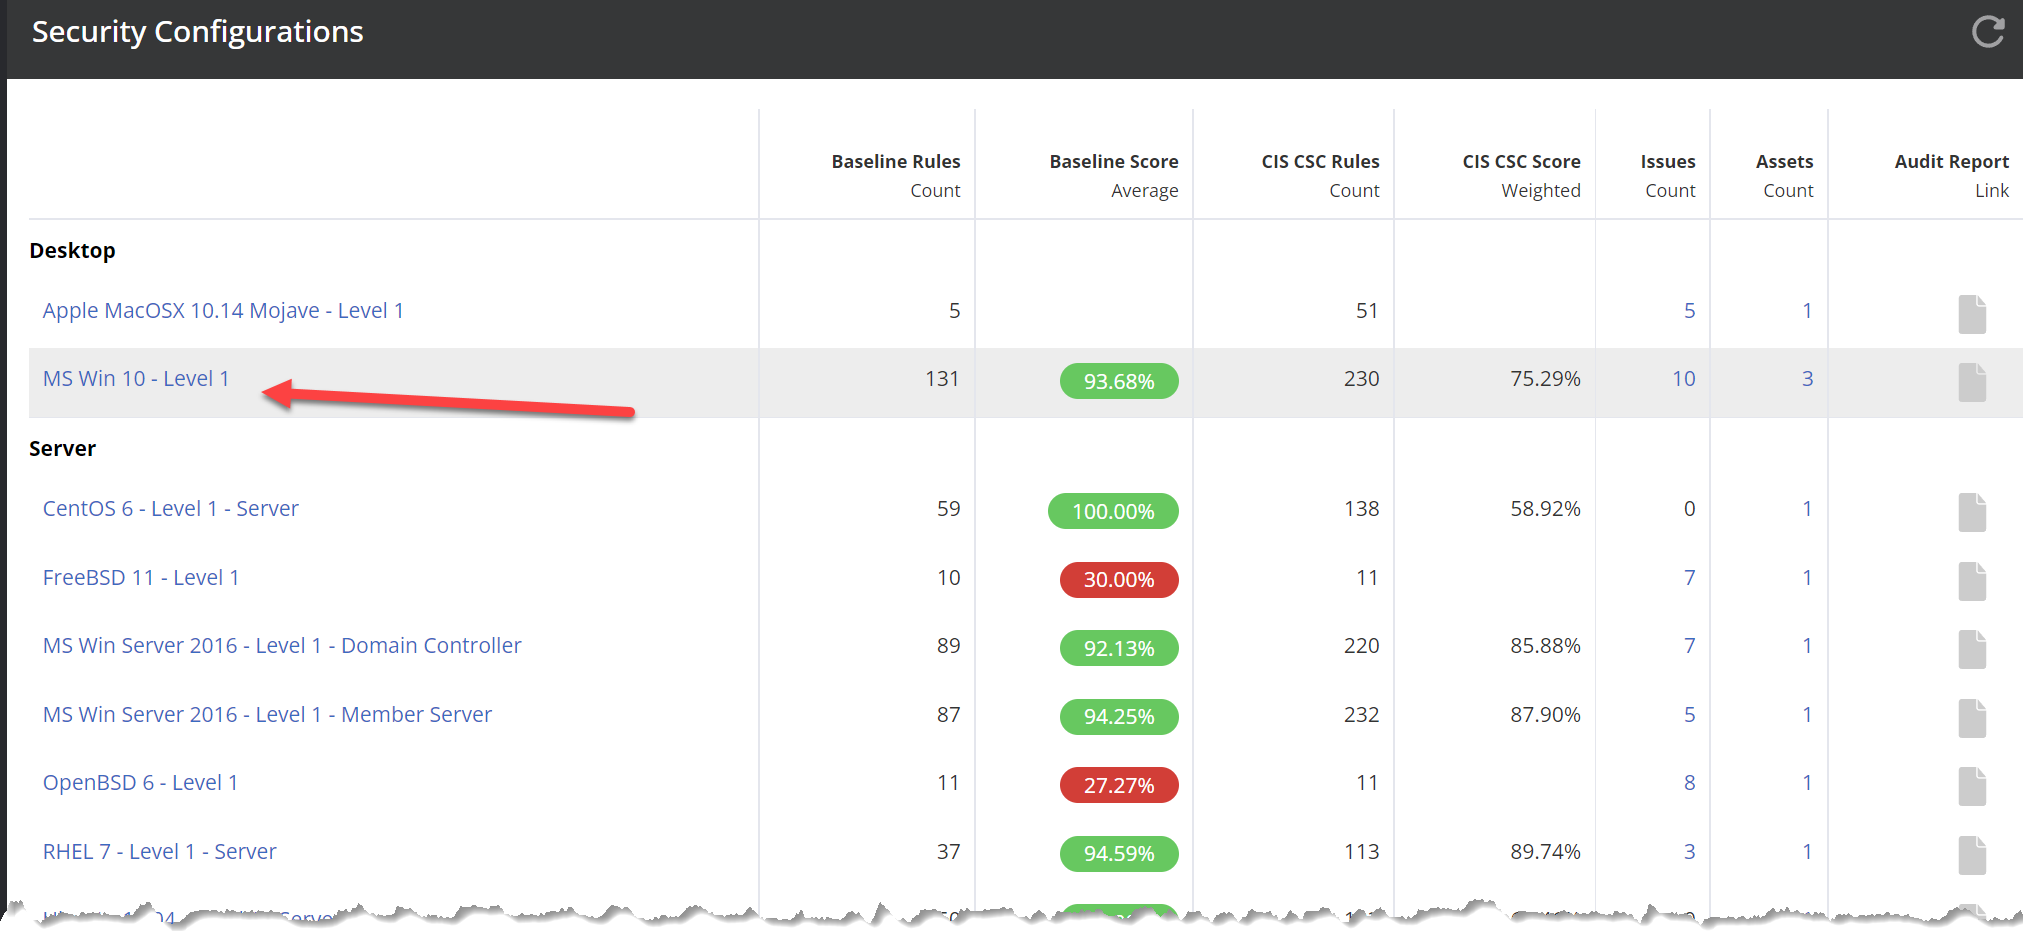
In the screenshot above you can see that 131 rules out of 230 are enabled. When you click into it you'll get a screen like this

The default filter is to show only what is in the baseline. To view all the benchmark rules available or just those that are not in the baseline, make sure to adjust the baseline filter pointed out in the screenshot above.
When you click on one of those policies you can read all about it and decide if it should be part of your baseline or not.
When there is something in the custom value column then you have the option to customize what the policy checks for. For example, policy 1.1.1 about password history default looks for 24 passwords, but this can be modified to say 36.

This is what you see when you click on the name

To change whether a policy is in baseline or not, change the checkbox next to "in baseline". You then need to provide a reason and then click save at the bottom of the screen.
Our recommendation is to use our recommended out-of-the-box policy as a starting point and harden your systems to fulfill those policies, modifying the baseline as needed. Then going forward, we recommend going through the rich set of available checks and continuously review your baseline, then add checks that make sense for your improved security.